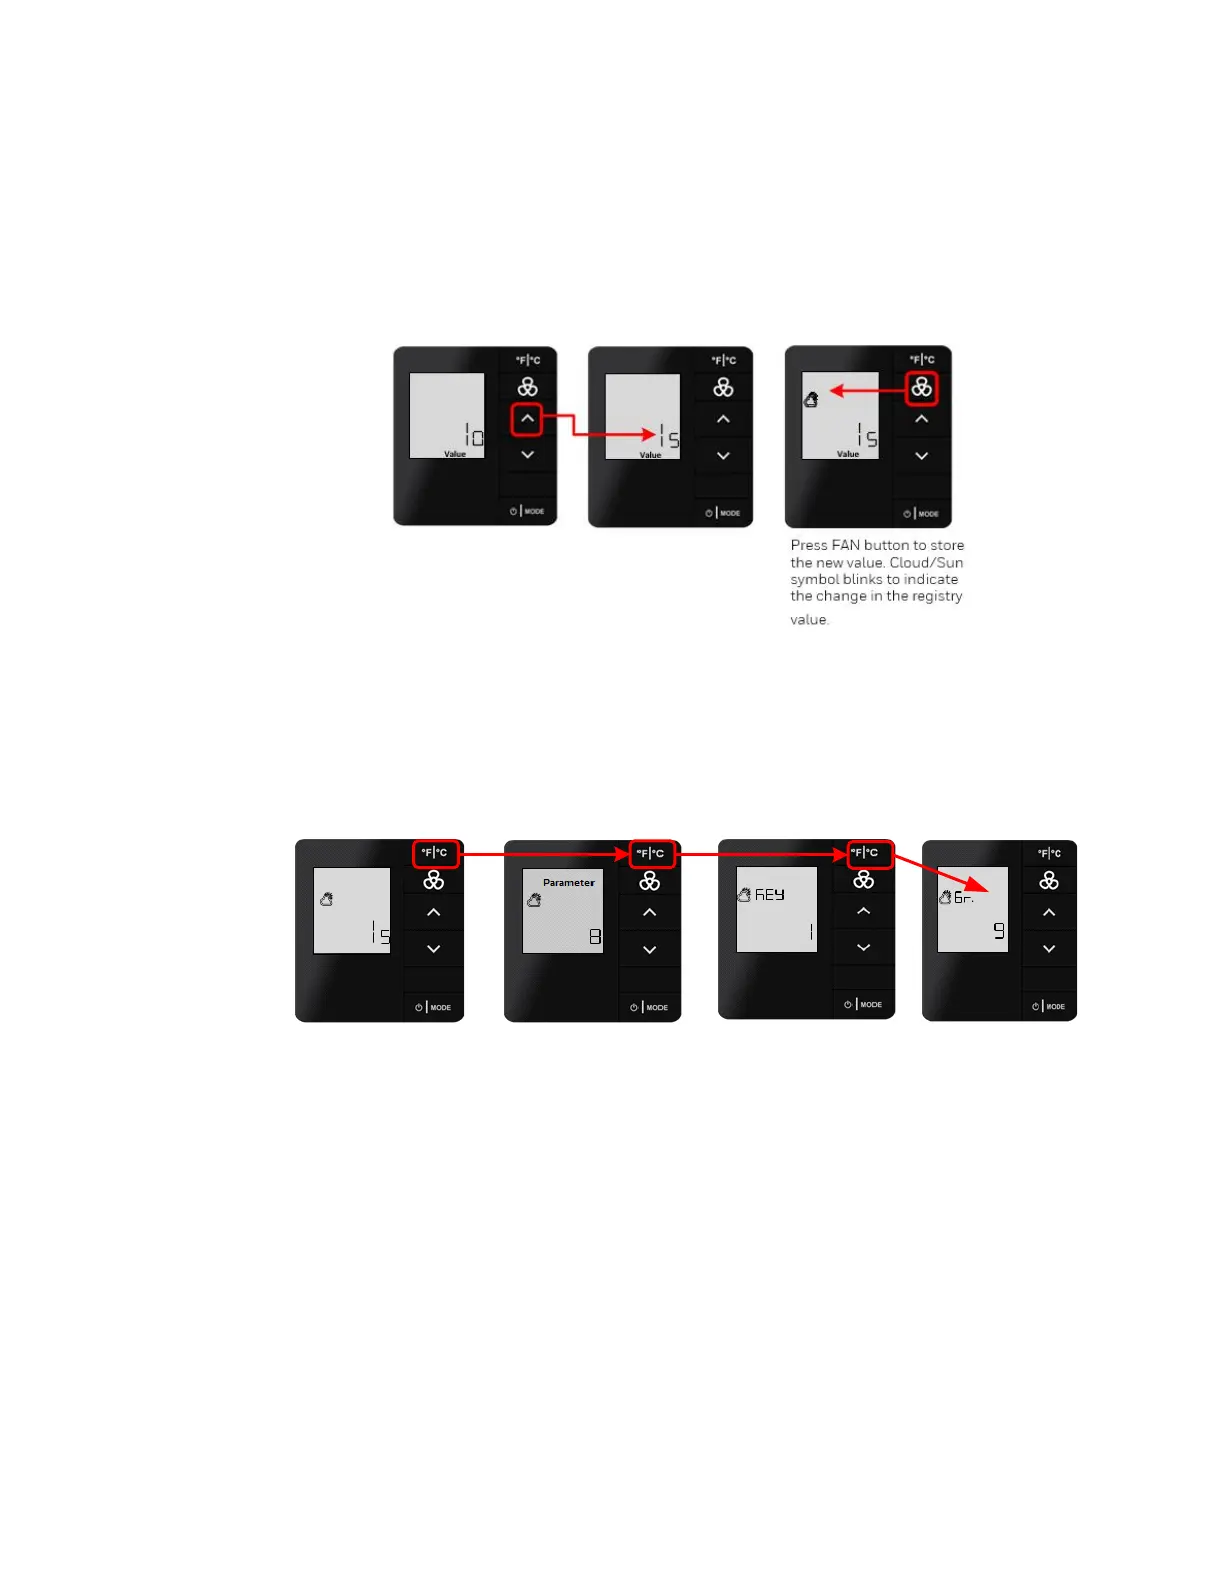
8. With the value of the defined Registry Offset now displayed, use the Up/Down arrow but-
tons to change the value if desired. In order for any change to be permanent, you must
press the FAN button to store the change.
Upon pressing the FAN button to store the change, a Cloud / Sun icon will begin to blink
in the upper left of the display to indicate a change to the Registry of the HVAC partner
device has been made.
9. If you desire to make additional changes to the current selected Registry or other Registry
a) Each press of the FC button returns to the previous Group: Key or Group: Key: Index
level. Press the FC button as many times as required to back out to the desired
Group: Key or Group: Key: Index.
For example, if currently viewing Registry 9:1 (Group 9: Key 1) Parameter 8 value:
b) When the desired level is reached, use the Up / Down arrow buttons to select the de-
sired Group, Key, or Index value, then press the MODE button to view the value of the
selected Group, Key, or Index value.
10. If no further changes are desired, press the FC button as many times as required to
back out through the Gr9 menus until Str (Store) is displayed. Pressing the FAN button
again with Str displayed will Commit the registry and permanently store all changes.
The e7w will RESET in order to store the changes and exit out of Parameter mode.