94
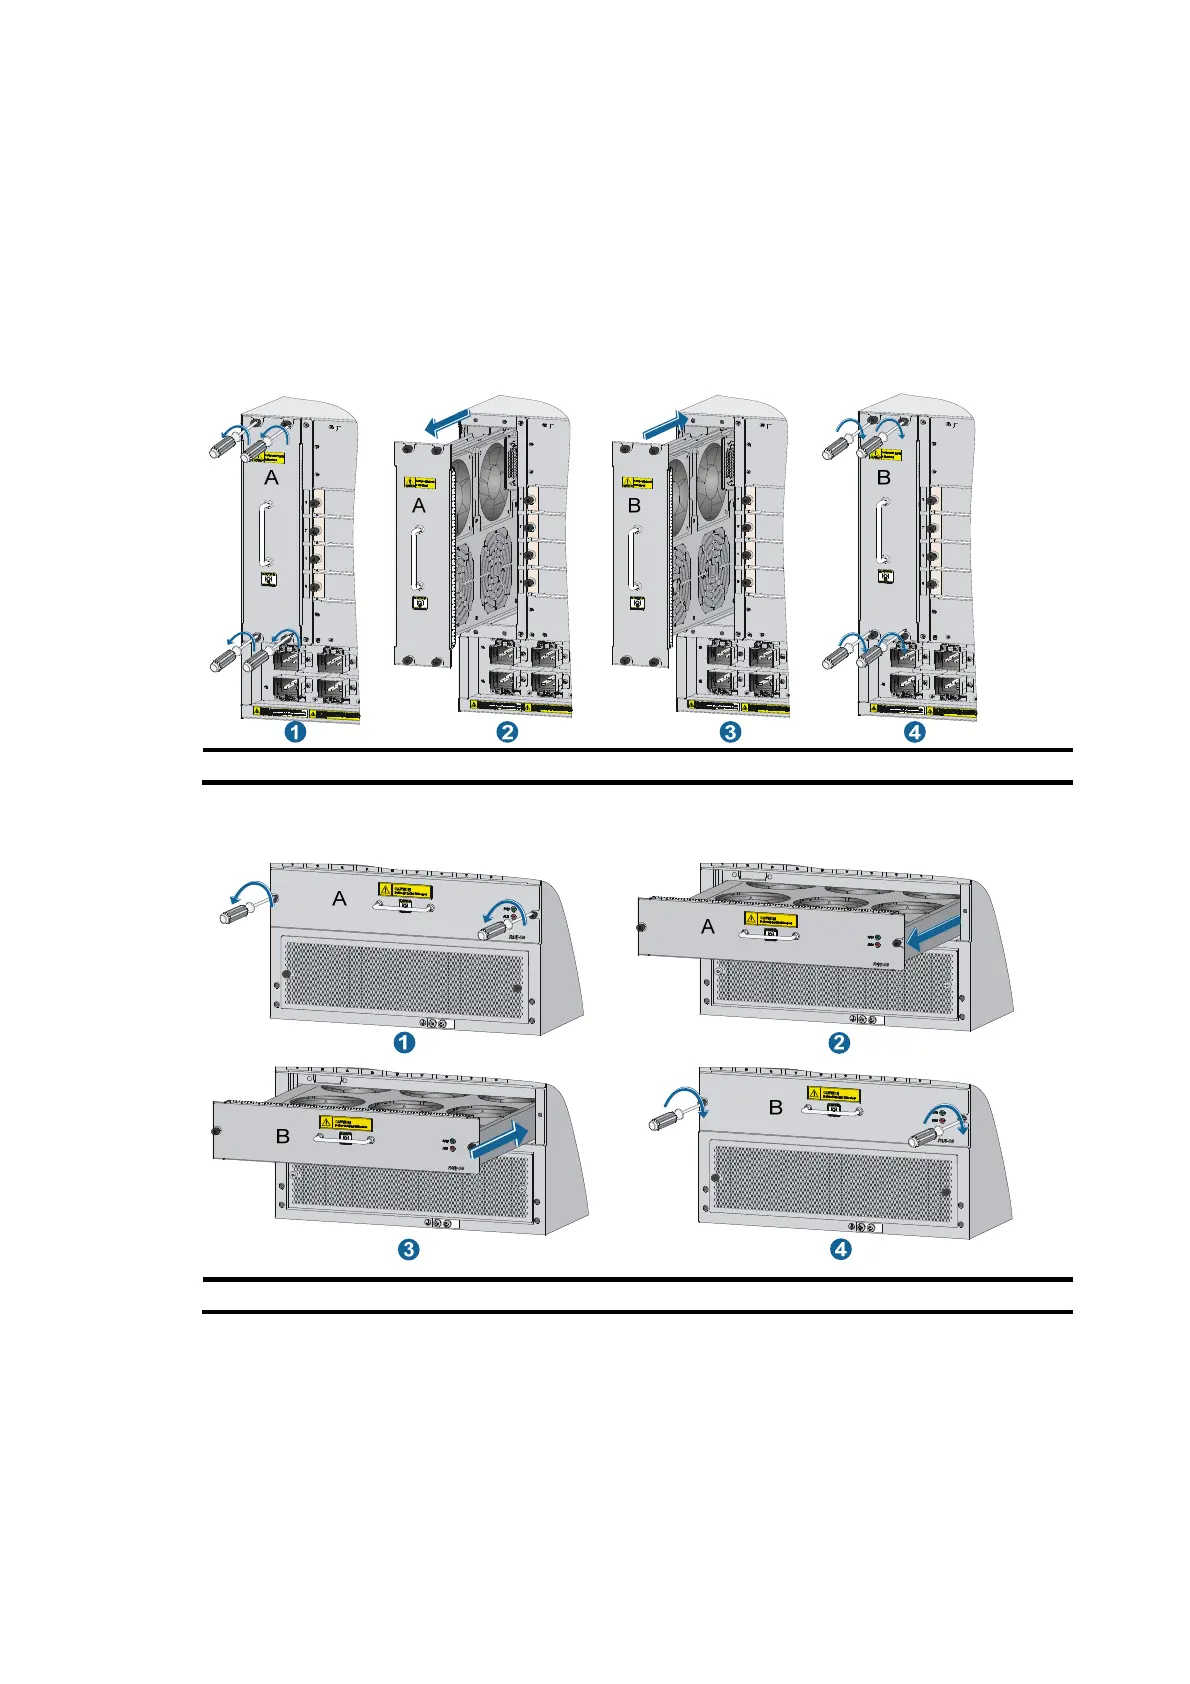
1. Loosen the captive screws on the fan tray.
2. Pull out the fan tray along the slide rails. Put the removed fan tray in an antistatic bag or in its
original shipping materials.
3. Insert the new fan tray into the fan tray slot along the slide rails. Push the fan tray in the slot until
it makes close contact with the backplane of the chassis.
4. Finger-tighten the captive screws and then use a screwdriver to fasten the screws to make sure the
fan tray is firmly fastened.
Figure 72 Replacing a fan tray (for the 12504)
: Fan tray to be removed B: Fan tray to be installed
Figure 73 Replacing a fan tray (for the 12508 and 12518)
A: Fan tray to be removed B: Fan tray to be installed
Replacing a CF card
 Loading...