43
NOTE:
• Keep the removed the blank panel and protective box properly for future use.
• All the cards for the 12500 are hot-swappable.
Installation procedure
IMPORTANT:
• Fasten the screws of each card right after you insert it.
• To avoid damage to a card, do not use excessive force when installing and removing the card.
To install a card:
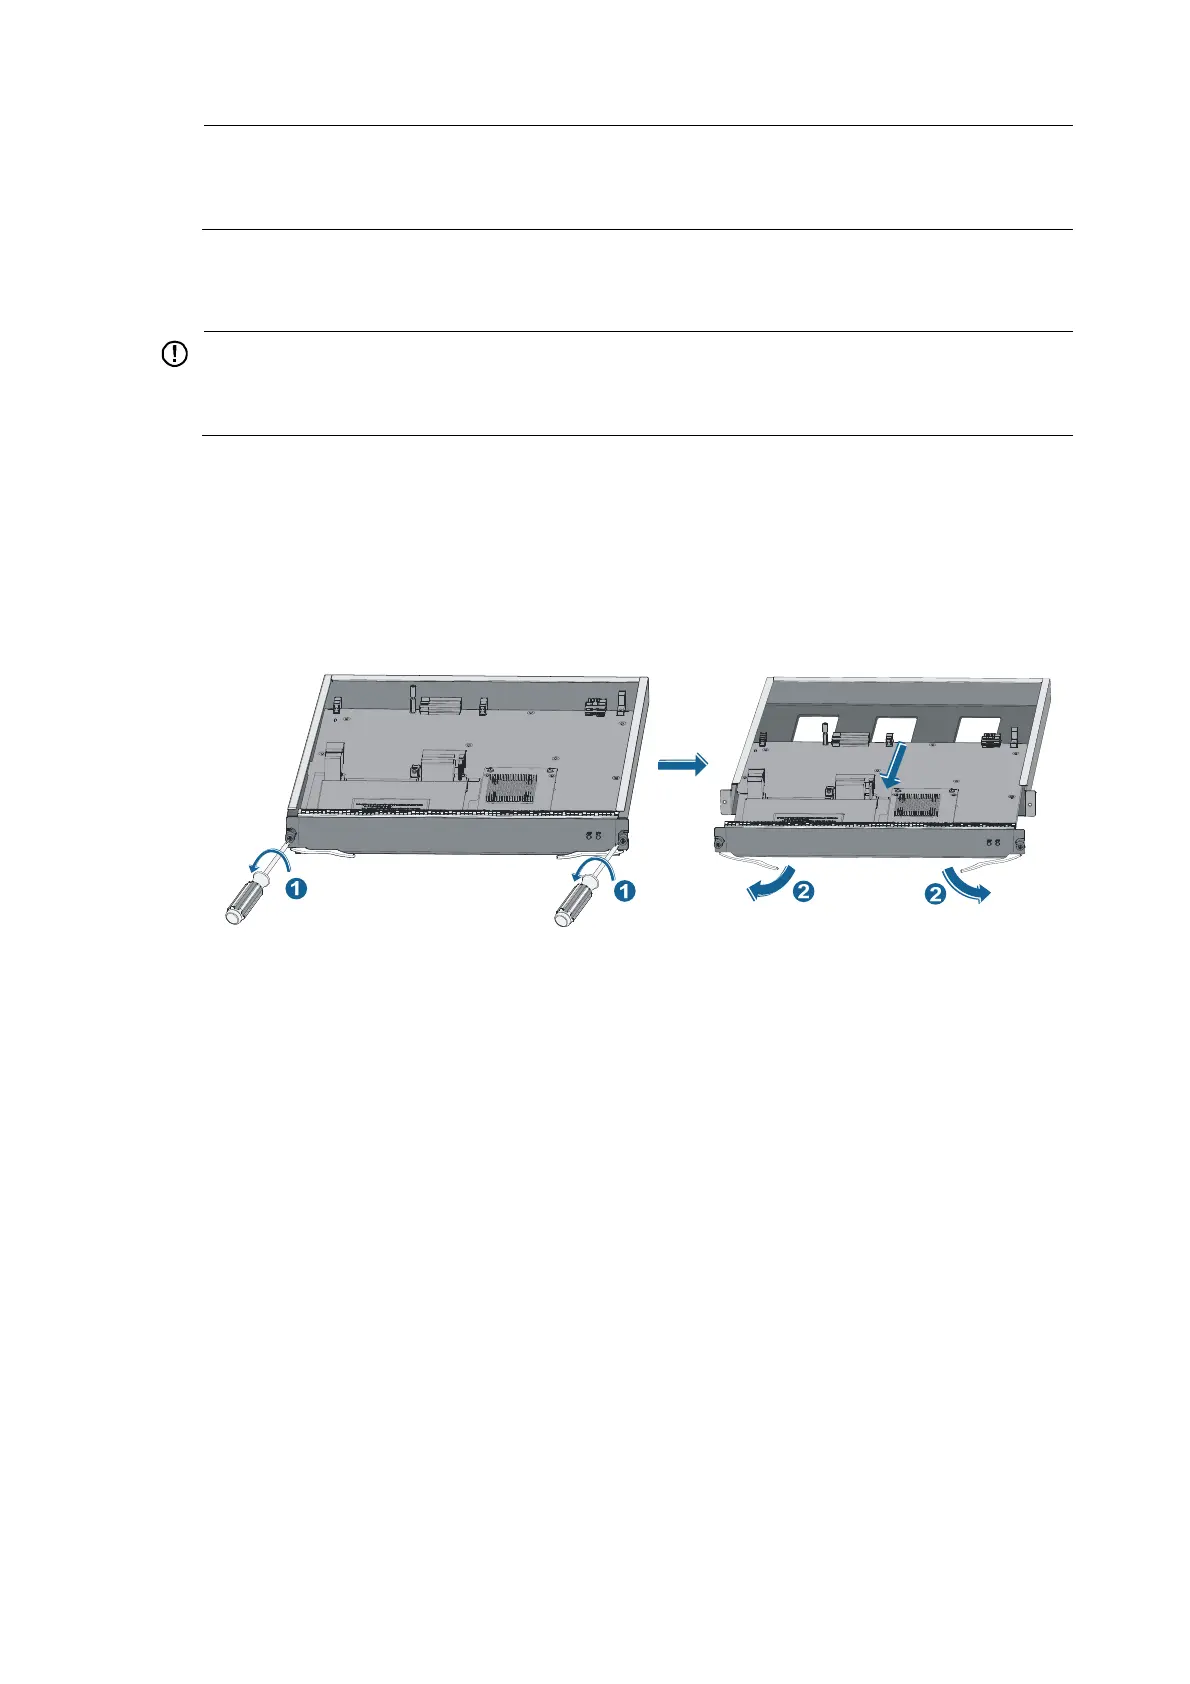
1. Remove the protective box before installing an MPU:
2. Wear an ESD-preventive wrist strap and then loosen the captive screws that attach the MPU to the
protective box with a Philips screwdriver.
3. Pull the MPU out of the protective box gently, as shown in Figure 41.
Figure 41 Removing the protective box
4. Move the ejector levers on the front panel of the MPU outwards, hold up the MPU by one hand
without touching any electronic components on the MPU, and hold the front panel by the other
hand to push the MPU into the slot along the slide rails slowly.
5. Push the ejector levers inward to ensure close contact between the MPU and the backplane.
6. Position the screws into the holes and fasten them with a screwdriver to attach the MPU.
 Loading...