DRAFT - HP Confidential - DRAFT
Removal and replacement procedures 104
— Two-bay SFF hot-plug rear drive cage removal
7. If installed, remove the PCI riser cage (on page 30).
8. Remove all expansion boards from the onboard PCIe expansion slots ("HP Flexible Smart Array P840ar
Controller" on page 93).
9. Remove the FlexibleLOM blank ("FlexibleLOM blank" on page 70).
10. Remove all DIMMs ("DIMM" on page 61).
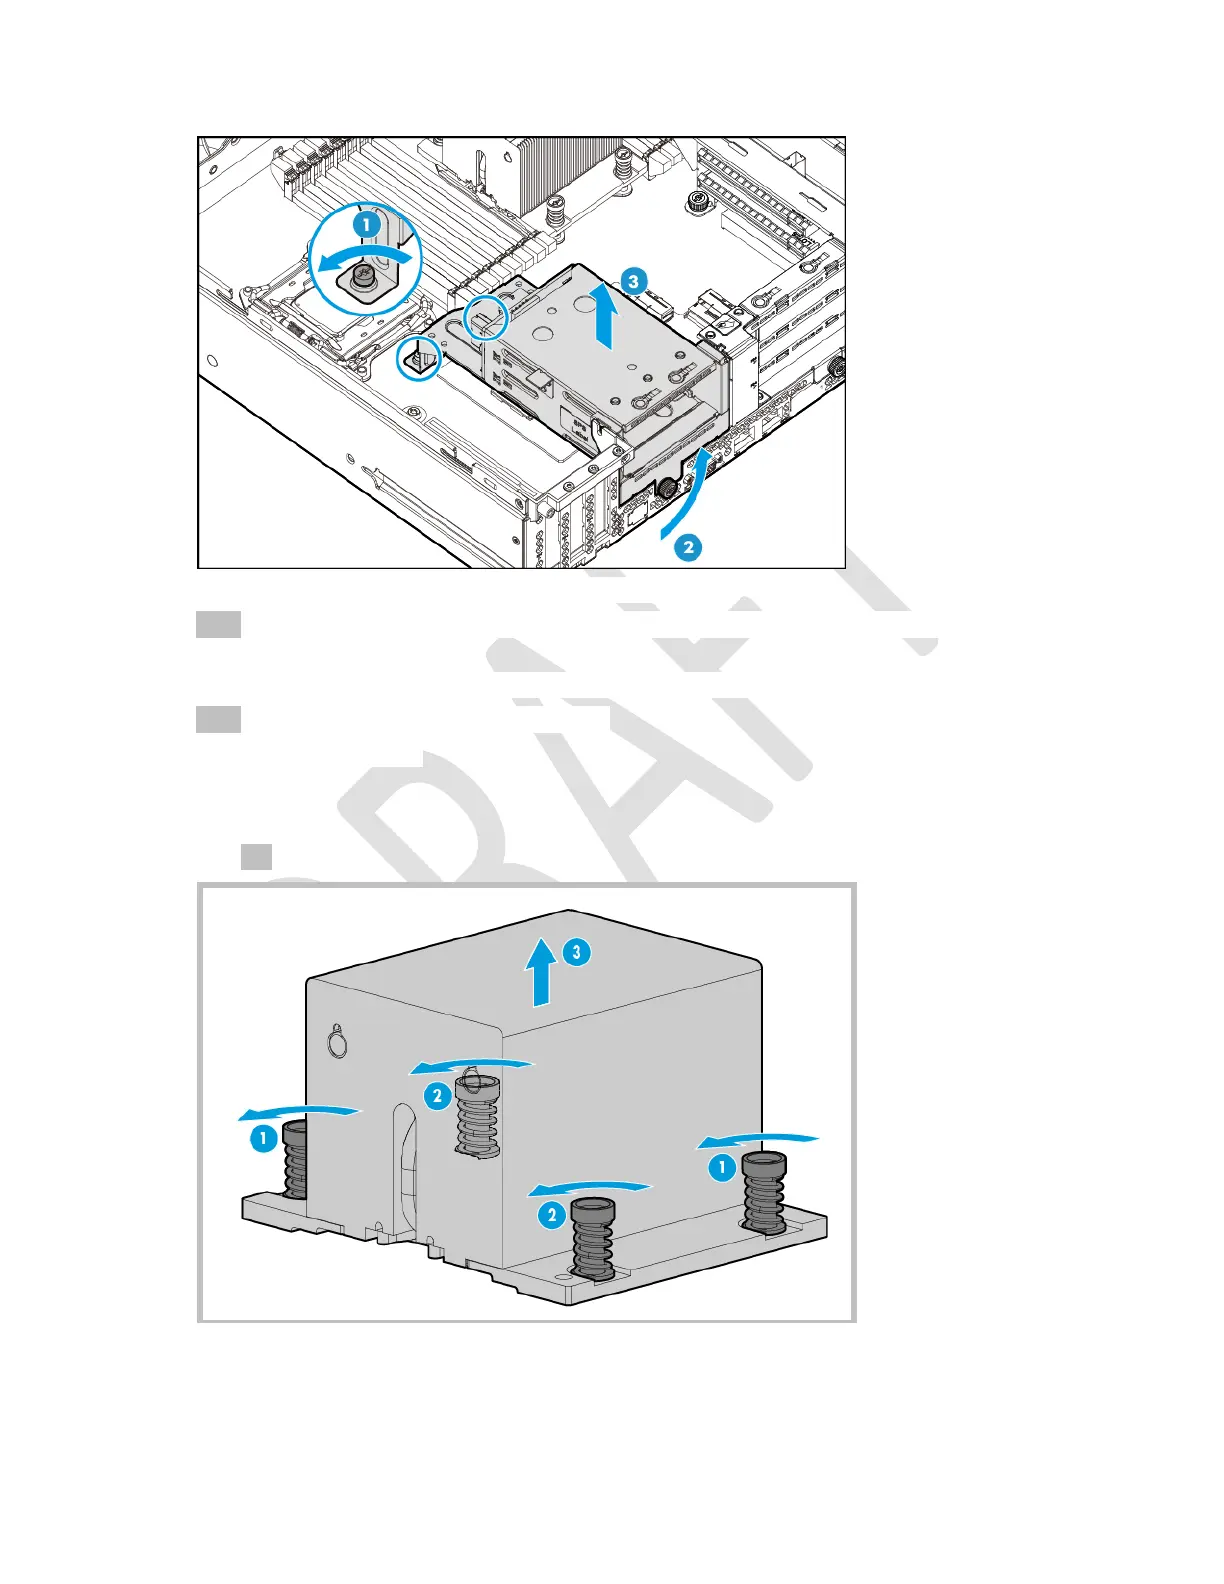
11. Remove the heatsink:
a. Loosen one pair of diagonally opposite screws halfway, and then loosen the other pair of screws.
b. Completely loosen all screws in the same sequence.
c. Remove the heatsink from the processor backplate.

 Loading...


