FULLTEST3
EN - 77
6.13. EXECUTION OF AN AUTOTEST
The instrument allows you to execute Autotest sequences predefined in the main
Menu (see § 5.7).
1. Press the FUNC key and select the AUTO TEST function. The screen of is shown
on the display
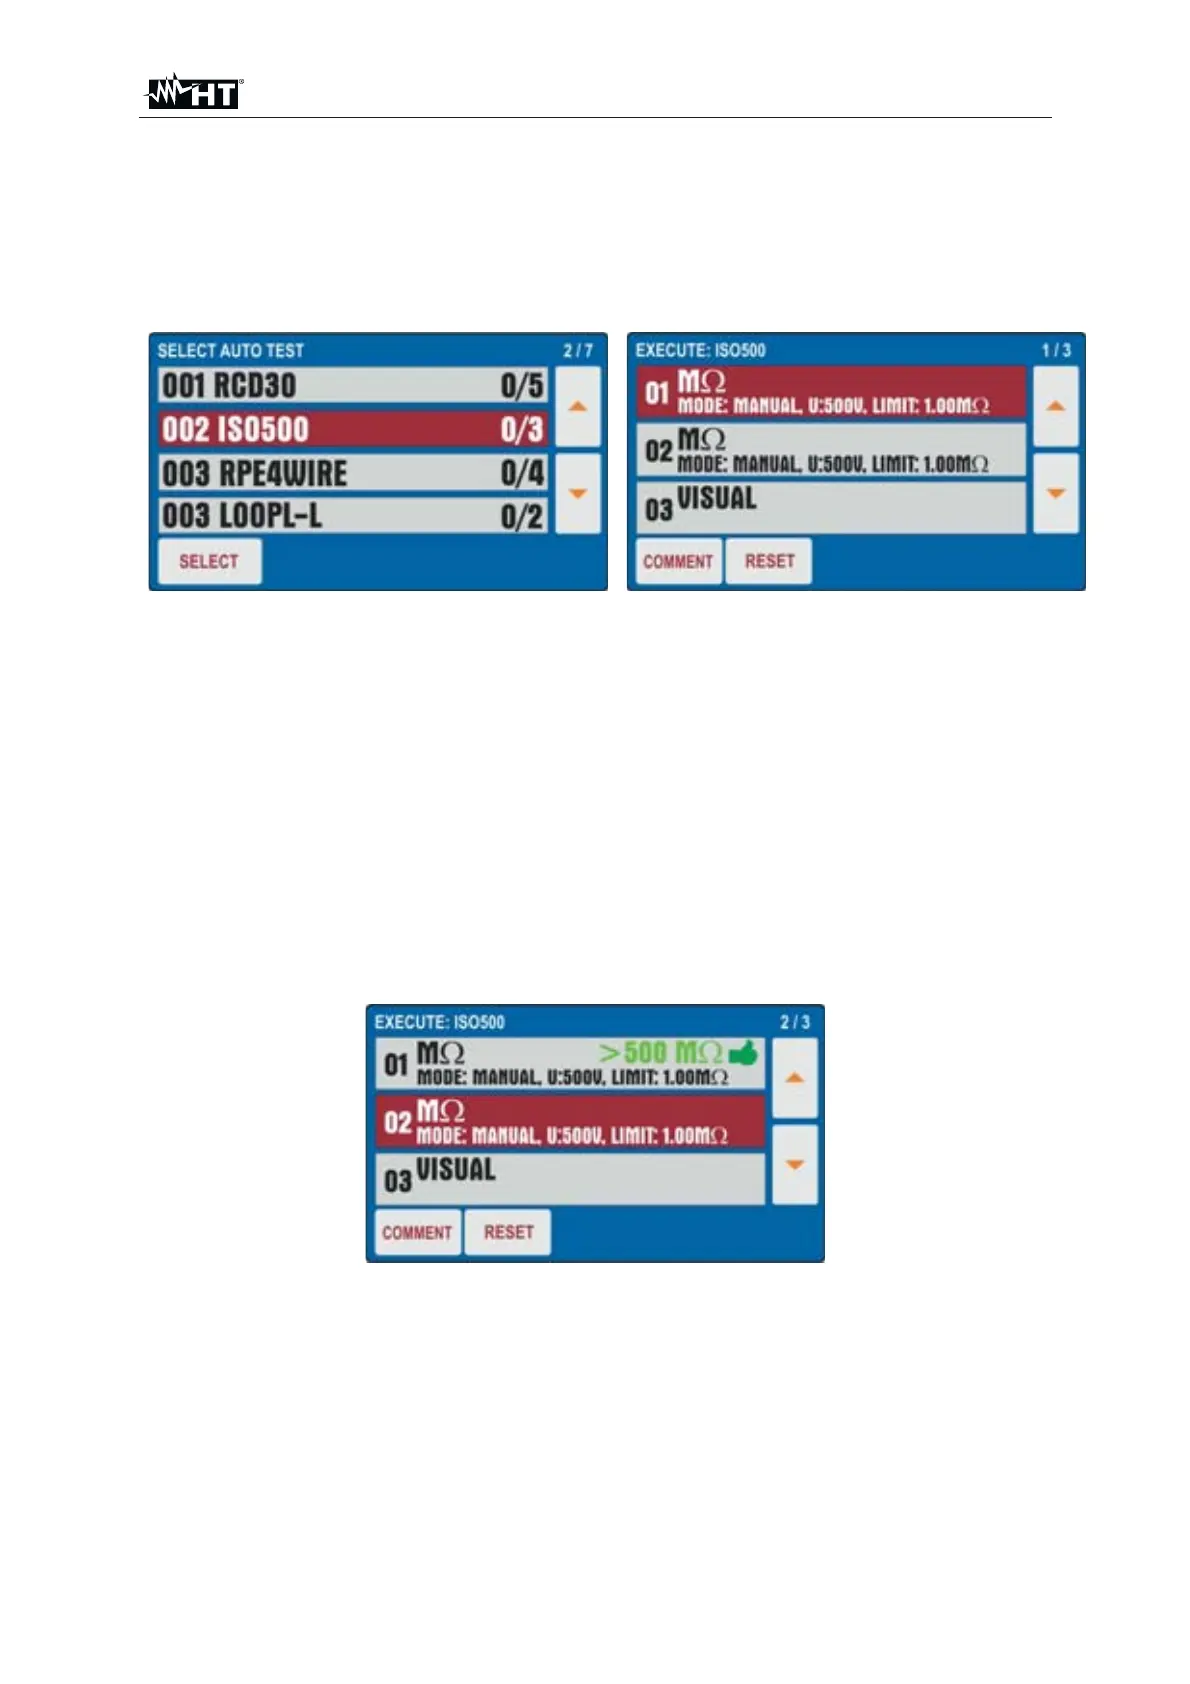
Fig. 76 : AUTO TEST Function - Initial screen
2. Use the S or T arrow keys to select the desired Autotest (ex: Insulation
measurement with 500VDC test voltage and 3 tests included) and touch the
SELECT key or directly the corresponding line. The "0 / X" message in which X =
number of tests included in the Autotest indicates that no internal test has been
performed. The screen of Fig. 76 - right side is shown on the display
3. Connect the instrument to the first circuit under test (ex: consider the Insulation
measurement of § 6.3)
4. Press the START/STOP key twice to activate the "01" test of the Autotest
5. Press the START/STOP key again to end the "01" test. The instrument will save
the first partial result of the Autotest and automatically prepares itself for the
execution of the next "02" test (see Fig. 77)
6. Press the COMMENT key to include a possible comment to the 01 test
Fig. 77 : AUTO TEST Function - Partial result test 01
7. Connect the test leads to the second circuit under test
8. Press the START/STOP key twice to activate the "02" test of the Autotest
9. Press the START/STOP key again to end the "02" test. The instrument will save
the first partial result of the Autotest and automatically prepares itself for the
execution of the next "03" test (see Fig. 78)
10. Press the COMMENT key to include a possible comment to the 02 test