8. If you are instructed to return the dual-motor hot-swap fan, follow all packaging
instructions, and use any packaging materials for shipping that are supplied to
you.
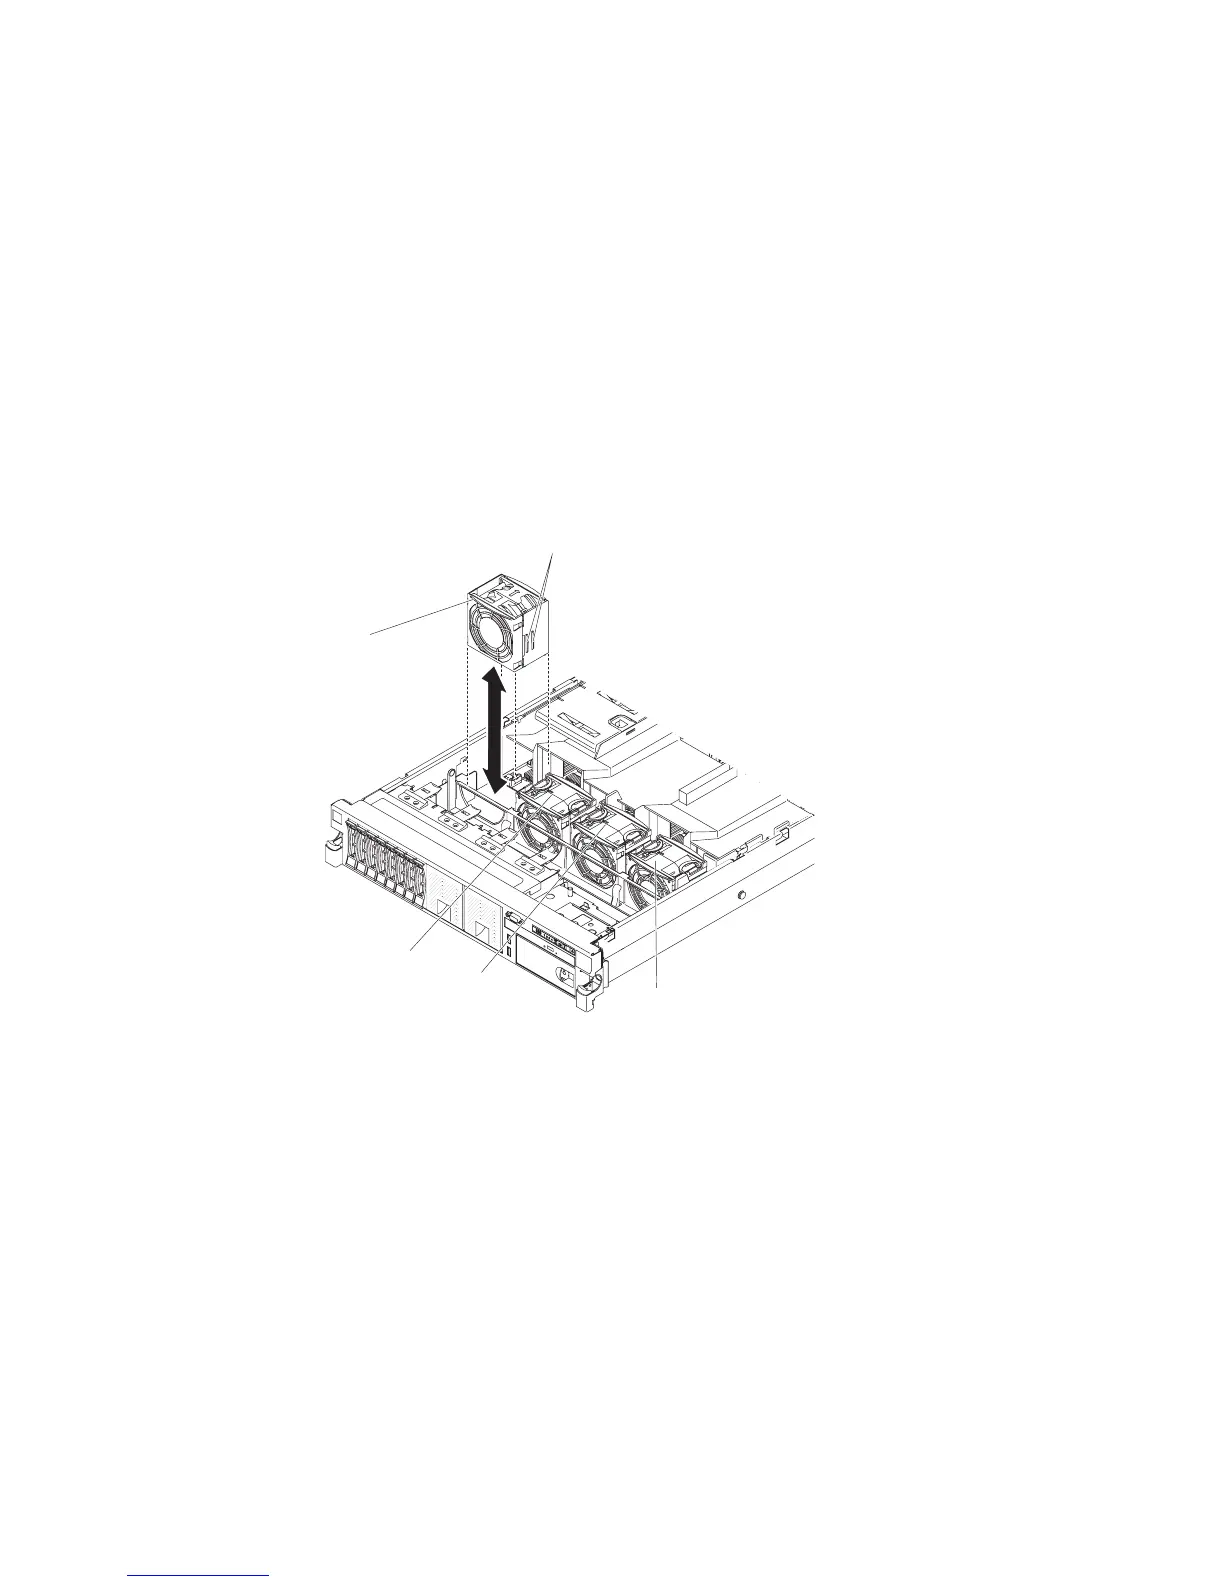
Installing a hot-swap dual-motor hot-swap fan
For proper cooling, the server requires that all four dual-motor hot-swap fans be
installed at all times.
Attention: To ensure proper server operation, if a dual-motor hot-swap fan fails,
replace it immediately. Have a replacement dual-motor hot-swap fan ready to install
as soon as you remove the failed dual-motor hot-swap fan.
See “System-board internal connectors” on page 17 for the locations of the
dual-motor hot-swap fan connectors.
To install any of the four replaceable fans, complete the following steps.
Fan 1
Fan 2
Fan 3
Fan 4
Vertical tabs
1. Rotate the air baffle up.
2. Orient the new dual-motor hot-swap fan over its position in the dual-motor
hot-swap fan bracket so that the connector on the bottom aligns with the
dual-motor hot-swap fan connector on the system board.
3. Align the vertical tabs on the dual-motor hot-swap fan with the slots on the
dual-motor hot-swap fan cage bracket.
4. Push the new dual-motor hot-swap fan into the dual-motor hot-swap fan
connector on the system board. Press down on the top surface of the
dual-motor hot-swap fan to seat the dual-motor hot-swap fan fully. (Make sure
that the LED has turned off.)
5. Repeat steps 1 through 3 until all the new or replacement dual-motor hot-swap
fans are installed.
6. Install the cover (see “Installing the cover” on page 206).
7. Slide the server into the rack.
258 IBM System x3650 M4 Type 7915: Problem Determination and Service Guide

 Loading...


