Section 5 - Commissioning
COMMISSIONING
52 Installation and Maintenance
5.3 FILLING THE SYSTEM
1. Once the circuit has been charged with water.
2. Make sure that all air vents have been purged around
the system.
3. Charge the circuit and raise the pressure to between
1 to 1.5 bar. Refer to Table 5, Table 6, Table 7 and
Table 8.
ᘐ WARNING: The product contains the hydrocarbon
refrigerant R290 which is very ammable. The refrigerant
may mix with air to form a ammable atmosphere
increasing the risk of re and/or explosion. Work that
requires the removal of the exterior casing of the Heat
Pump must only be carried out by competent persons
who are familiar with the risks of R290 refrigerant. Work
on the refrigeration circuit must only be carried out by
a Cat I or Cat II F-gas certied engineer with a City and
Guilds 6187-21 certicate or equivalent. Work done
on the heat pump should be done in accordance with
industry standard safety procedures and practices for
working with hydrocarbons.
ᘐ WARNING: During charging operations, it must
be made sure that the electrical components of the
circuit and surrounding area have their electrical
supply switched o or protected from potential water
leaks/sprays. Failure to comply with this requirement
increases the risk of electric shock, damage to the
products.
5.4 SYSTEM AIR VENTING
Make sure that all circuits connections have been made and
drainage valves are closed before charging the system. A
system circulator is not to be operated when initially charging
the system.
Refer to 5.2.2 for dosing requirements.
Filling the System
The primary heating circuit is charged using the following
method:
1.
completed.
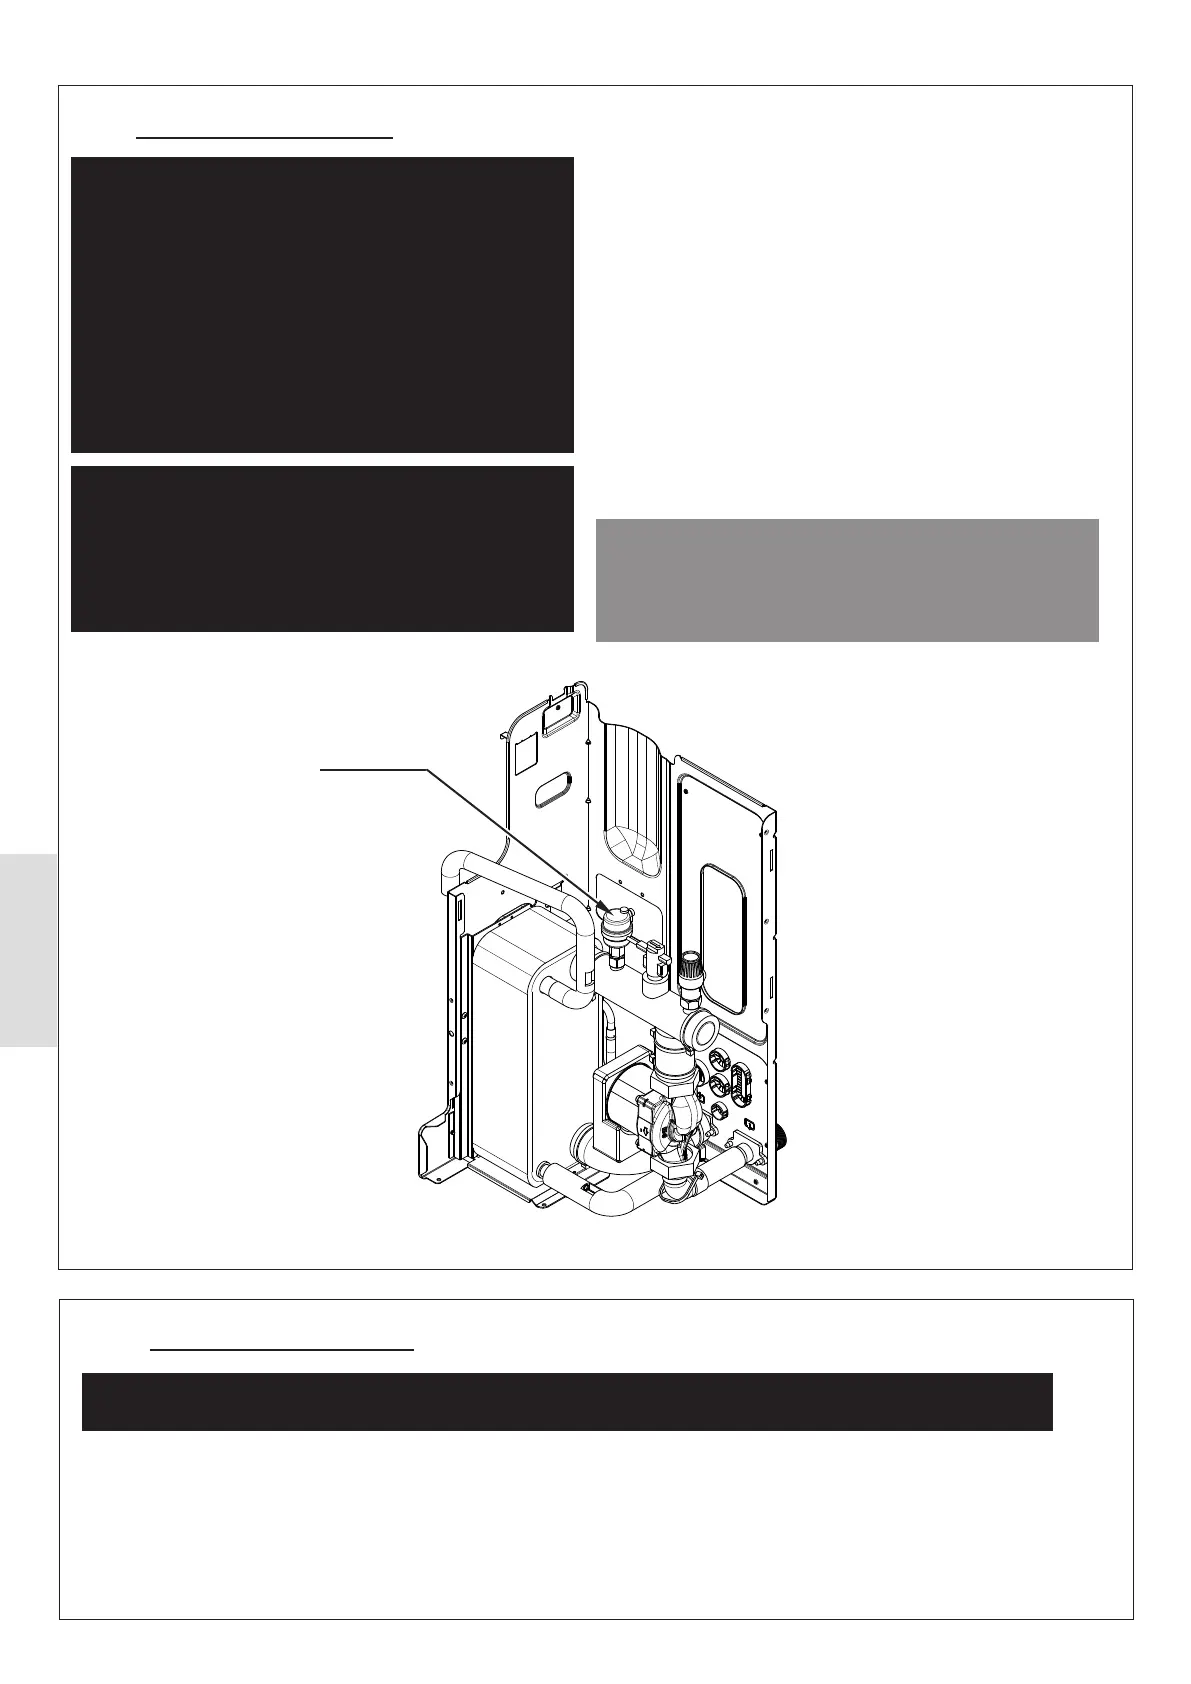
2. Open automatic air vent dust cap. Refer to Figure 51.
3.
the pressure gauge.
4. Fill the system to between 1 – 1.5 Bar.
ᘐ CAUTION: Care should be taken when lling the
system. If pressure is dicult to achieve, or if a pressure
drop is observed after the pressure is settled, circuit
components and routes should be reviewed and checked
for water leaks.
Figure 51. Auto Air Vent Dust Cap
Auto Air Vent
4. Operate the system circulator.
5. Repeat steps 2 – 4 until all the air is removed from
the system.
6. The auto air vent must be left open on completion.
ᘐ WARNING: The outdoor unit is supplied with the automatic air vent closed. To allow for proper air venting
the dust cap must be opened as shown in Figure 51.