63
RDX A8 User and Service Guide — Version 1.0
b. Cooling fan
The cooling fan is a CRU (Customer Replaceable Unit)). The fan is located on the rear side of the
unit and is fixed with 2 thumb screws. The fan is speed controlled. The speed varies in 4 steps
(low, medium, high and max) and is controlled by a micro controller and thermal sensors.
For technical specification, see section Product specification, Page 60.
i. Removing a cooling fan
1. Power down the unit by pressing the power button on the front panel.
2. Locate the cooling fan on the middle of the rear panel of the unit,
shown in section Rear panel layout, Page 10.
3. Remove the power cord on the rear panel of the unit.
4. Loosen the two thumbscrews located on the rear of the cooling fan using a #3 Phillips
screwdriver or your fingers.
5. Pull the cooling fan straight out from the rear of the unit.
6. To store or ship the removed cooling fan, repackage it in the original or replacement
device packaging materials.
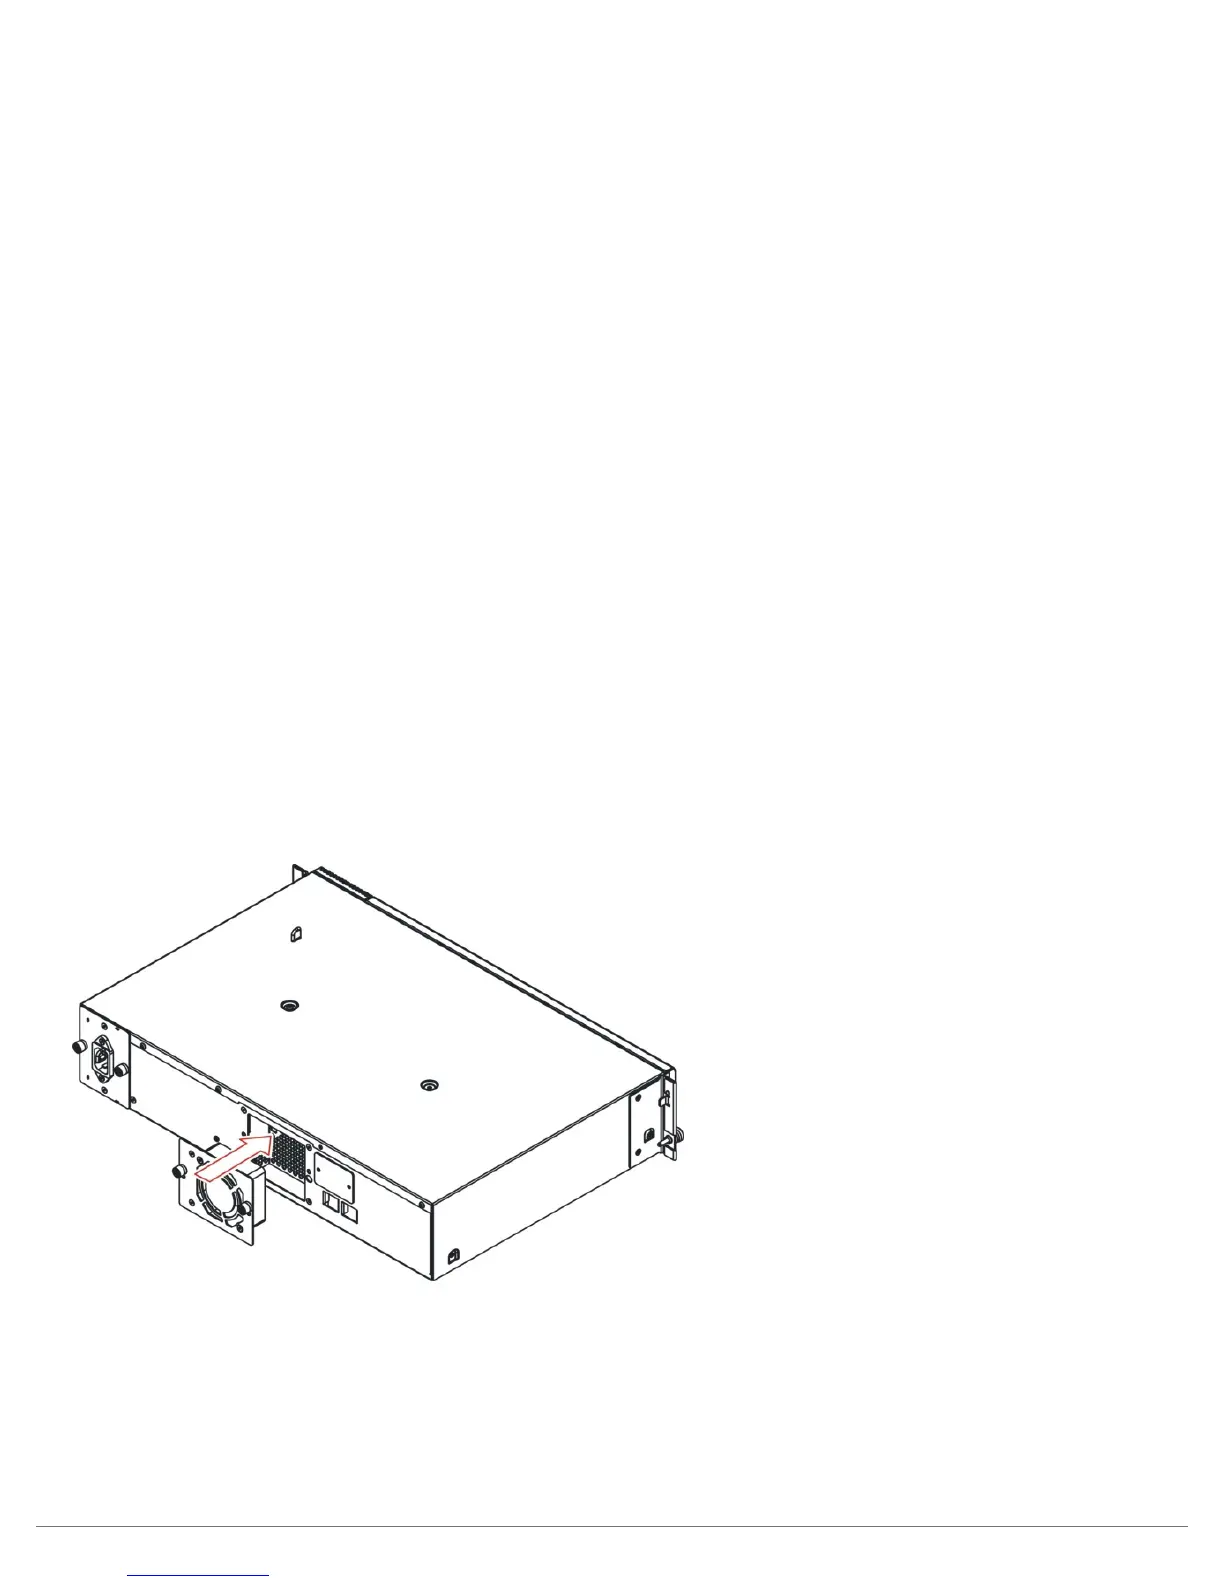
ii. Installing a cooling fan
1. Locate the cooling fan bay on the middle of the rear panel of the RDX A8 unit,
shown in section Rear panel layout, Page 10.
2. Before installing the cooling fan, inspect the connectors on the cooling fan CRU and the
mating connector in the RDX A8 unit. Ensure that the connectors are intact, free of any
foreign objects, and have no cracks or deformed or bent contacts.
3. Push the cooling fan straight into the cooling fan bay until it seats itself against the back
of the unit, see Figure 42.
Figure 42—Installing a cooling fan
4. Tighten the two thumbscrews using a #3 Phillips screwdriver or your fingers to secure
the cooling fan to the unit.