Thermography System VarioCAM
®
HD
6. Introduction
16 © InfraTec GmbH 2016 User Manual
6.2 Start
■ Provide for power supply by inserting the charged rechargeable lithium-ion battery or by connecting
the wall plug transformer* to the VarioCAM
®
HD (plug the 14-pin connector into the right LEMO
socket with the red dot pointing to the top).
■ Remove the cover of the SD-card slot, insert the SD-card into the card slot, and re-attach the cover.
■ Remove the protective cap from the lens.
■ Push the Power button . The camera is switched on and the Jenoptik logo is displayed during the
process of booting. Upon system initialisation, the power-on LED initially flashing green and then
illuminated permanently in green indicates that the VarioCAM
®
HD is ready-to-operate in Live mode.
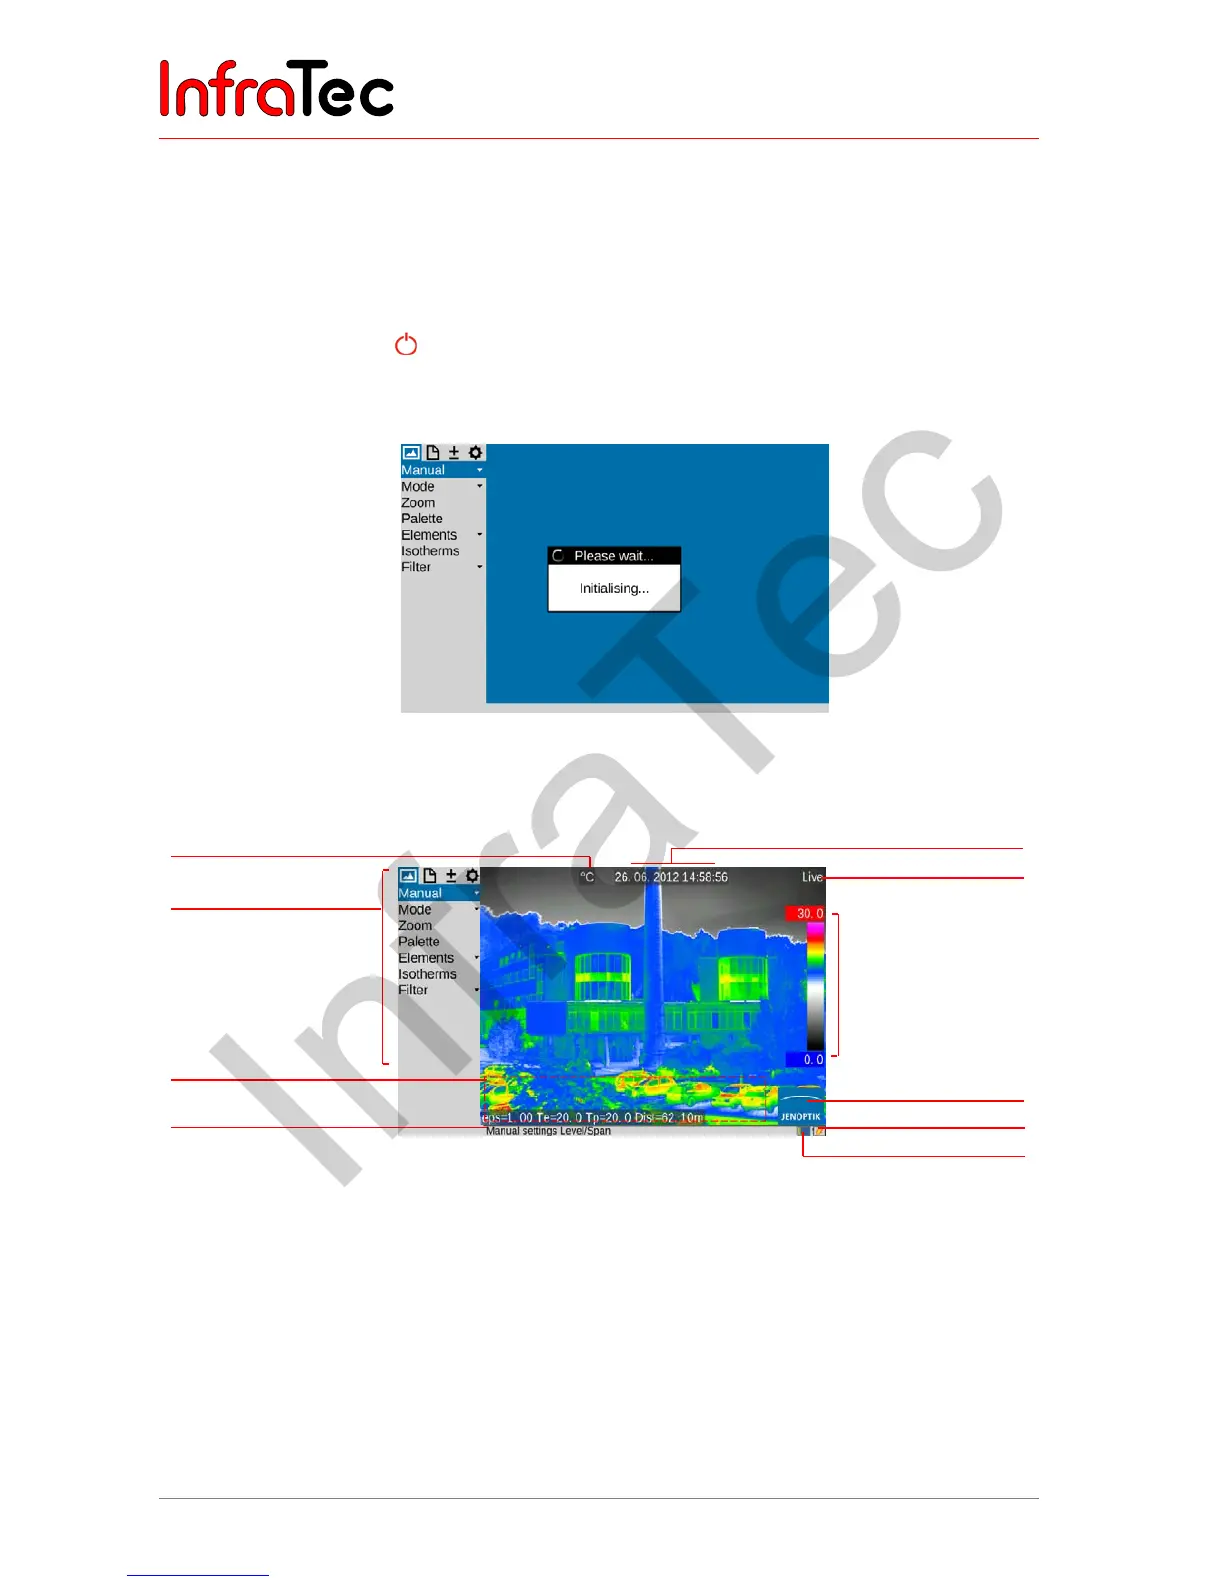
Fig. 3 Camera start: system initialisation indication
6.3 Display
Fig. 4 Arrangement of the image elements
■ Initially, you must select a motif with a contrasty scene (e.g. an active electrical device) and point the
VarioCAM
®
HD towards this scene.
■ When using the viewfinder*, fold the display to the side of the camera. The viewfinder is switched on
by doing so. You must initially adapt the viewfinder to your eye using the diopter compensation. For
this, the eyecup on the viewfinder is rotated. In order to find the ideal setting, you can use the
sharpness of the letters initially.
Temperature unit
Camera menu
Information field for
system information
Help line
Date/time
Camera status (mode)
Color range with
upper and lower limit
of the shown
temperature range
Logo
Status rechargeable battery
Status SDHC-card