Thermography System VarioCAM
®
HD
6. Introduction
18 © InfraTec GmbH 2016 User Manual
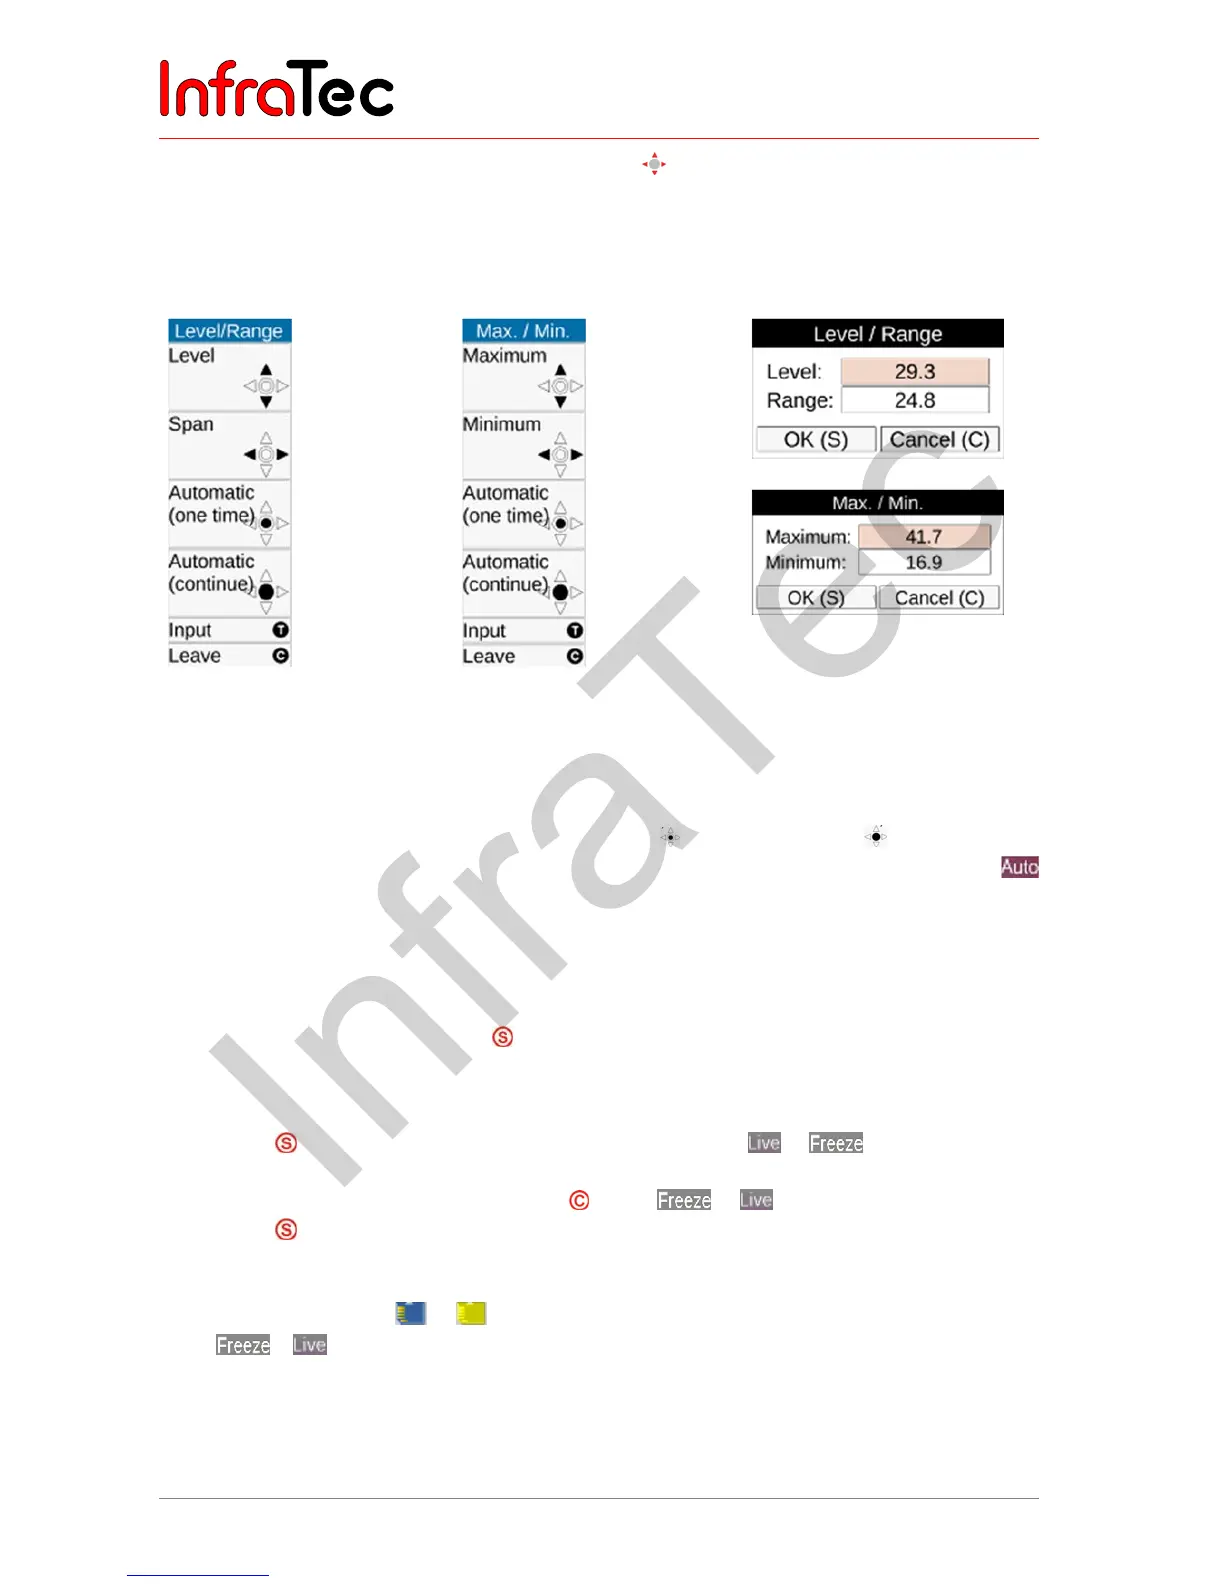
■ Depending on the selected input variant, the joystick can be used in order to set the temperature
level and the temperature range (Level/Range) or the upper and lower limits (Max/Min) and the
values can be input numerically as well. In this, the respective joystick and button functions are
displayed to the left of the thermal image. The respective input dialog for numerical input is displayed
in the center of the field of view:
Fig. 12 Menu for manually
setting level/range
Fig. 13 Menu for manually
setting maximum/
minimum
Fig. 14 Dialog fields for
numerical temperature
input
If the options Level/Range and Maximum/Minimum are set manually, the temperature scale can be
adapted automatically once by shortly pushing the Enter button. If the Enter button is pushed
longer, the scale is permanently adapted automatically. The AUTO mode will then be displayed by
on the right side of the image above the color palette. The AUTO mode is terminated by any manual
setting of Level/Range/Max/Min.
6.6 Saving images
In order to save the thermal image, the
button is required. The following variants are possible:
6.6.1 Saving with "check"
■ Push the button halfway down the live image will be frozen:
.
■ The frozen image can initially be “checked” on the display or viewfinder.
■ If the image is not to be saved, push the button: .
■ Push the button completely the image is saved.
The process of writing the data is indicated by the changing color of the map symbol (in the line below
the image, right-hand side): . Upon saving, the camera control automatically activates the Live
mode: .