3 Installation and Wiring
-
30
-
3
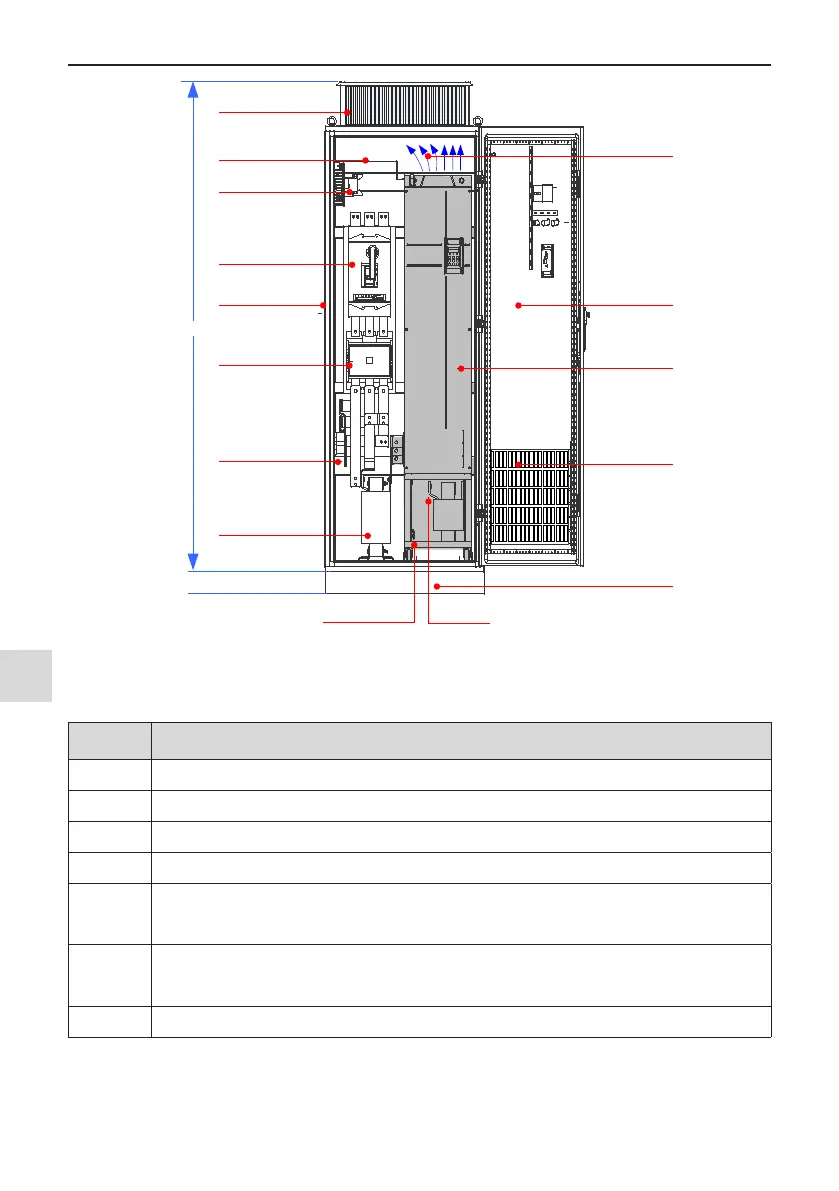
Output terminal
Cabinet ventilation
top cover
Cabinet
Breaker
Contactor
AC input reactor
MD500 (450 kW)
Air inlet of front
door
Insulation barrier
Cabinet input
terminal
Grounding terminal
Ventilation airflow
Front door
Transformer (from
380 V to 220 V)
H100 cabinet base
100mm
2200mm
Figure 3-14 Recommended cabinet layout
3. Steps of installing the AC drive in cabinet
Step Description
1 Install the xing beam in the nine-folding AL cabinet, as shown in Figure 3-15.
2 Secure the bottom mounting bracket, as shown in Figure 3-17.
3 Assemble the guide rail (optional) and connect the guide rail to cabinet.
4 Remove the cover from the drive (refer to Section 3.1.5). Then the handle is exposed.
5
Arrange two persons to align castors of the drive to the guide rail and push the drive into the cabinet
slowly, as shown in Figure 3-20 and Figure 3-21. Use soft strap in the process of push-in and push-out to
prevent turnover.
6
Remove the soft strap. There are two mounting holes at the back of the drive. Secure the mounting holes
at the top and bottom parts at the back of the drive to secure the drive to the xing team, as shown in
Figure 3-22.
7 Check installation of the drive is secure and remove the guide rail.
 Loading...