Page 28 DM55 DynaDrum PP V6, Manual No.21-18, Rev.2.19
4.2 Installation
CAUTION
• All work on or with this unit is only permitted for skilled personnel!
• Pay attention to the electrical schematics!
• Only with an air pressure of 80 psi (5.5 bar) minimum a perfect performance is
secured!
• All motors have to be attached according to the data sheet of the manufacturer.
• All heating elements have to be mounted and operated secured and according to the
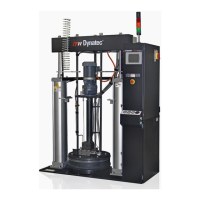
1. Position the Bulk Melter so that it is convenient for drum loading and with easy access
to the work area. Provide adequate access to the control panel. Be certain there is a
minimum of 9 feet (2.95m) of overhead clearance.
2. Bolt Melter and panel box securely to the floor with 1/2” dia. x 3” anchor bolts and flat
washers.
WARNING
To prevent injury to personnel, the Bulk Melter and control panel box must be
firmly secured to the floor.
3. Connect air supply line (minimum size 1/2”) to the pneumatic control panel located on
the right rear of the unit. Incoming supply must be clean, dry air. Any separators or
additional filters are the responsibility of the customer.
4. The piston pump shaft seal is designed to perform without throat seal liquid. Most
applications tend to be detrimental in the use of these liquids, as they are prone to
collect debris from the plant environment and can contaminate the seal. However, a
wet cup is provided in the Bulk Melter for applications where it is advantageous to use
such liquids.
Prior to operation, fill the piston pump recess (cavity) half full with throat seal liquid
(see Ch. 11 Recommended Spare Parts List for part nos.), mineral oil or a compatible
solvent for your application. Consult ITW Dynatec for compatibility with the piston
pump shaft seal and bearing. No disassembly is required to access the cavity.
5. Locate the main disconnect switch on the upper right corner of the controller’s panel
box. Refer to electrical schematic in Chapter 13 for proper wiring connections.
To prevent serious or fatal injury, unit must be installed in accordance with all
applicable codes and be properly grounded.
All electrical connections should be made by qualified electrical personnel.
Wear appropriate safety equipment when working with high voltage sources.
6. Positively identify the line voltage and be certain that it matches the voltage on the
electrical data plate.
CAUTION
Incorrect voltage will cause severe damage to the equipment.
7. Connect the ground wire (green) to the ground bar in the lower right corner of the
panel box. Connect the other power leads to the circuit breaker line terminals as
shown on the electrical schematics.