1. Preparations for measurement
MKC-710 7
Installation of Solvent Change Unit(Option)
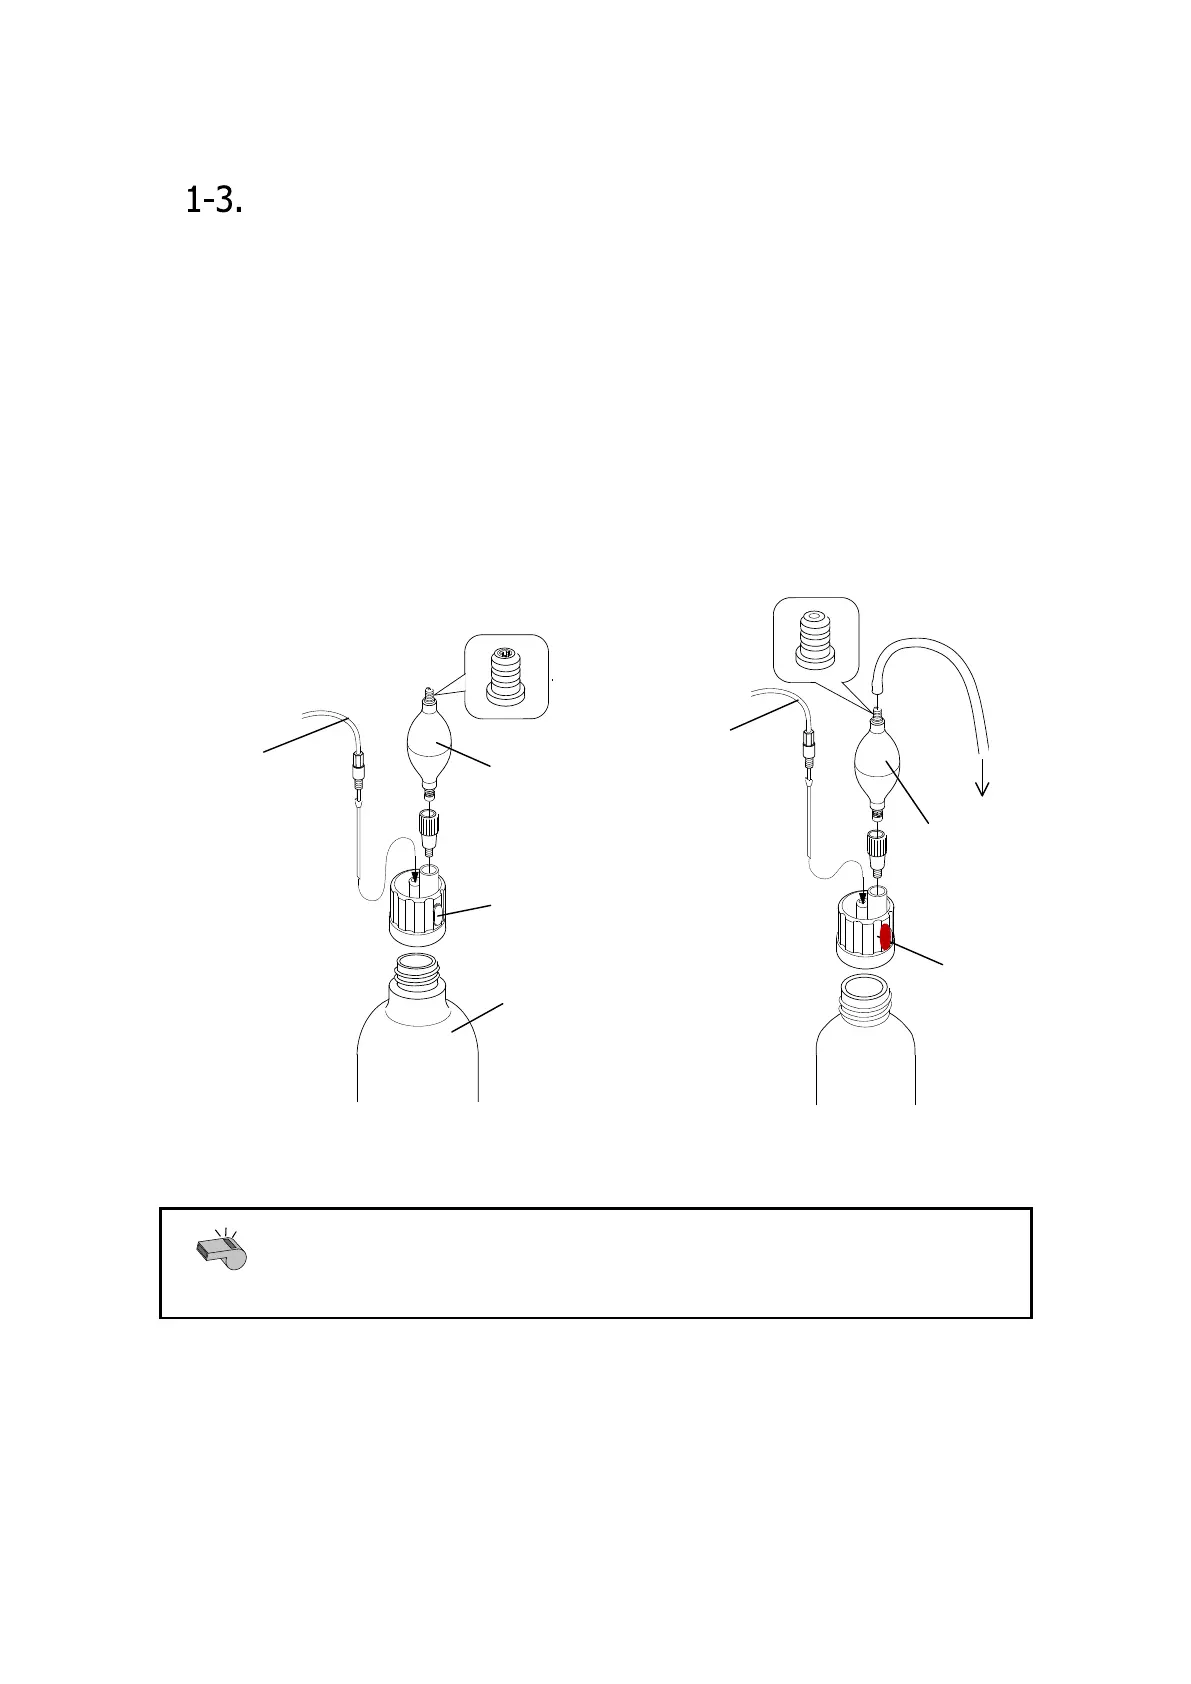
1-3-1.Installation of Manual Solvent Change Unit
1) Insert the rubber globe onto the reagent bottle cap.
2) Connect the drain tube to the reagent bottle cap (with rubber stopper), and the
injection tube to the reagent bottle cap.
3) Fix the cap (with plug) to the polyethylene bottle.
4) Fix the desiccant tube to the rubber globe.
5) Connect the reagent bottle to a commercially sold KF reagent bottle filled with
anolyte.
< Drain side > < Discharge side >
Injection tube
Reagent bottle cap
Squeeze in
Insert
Insert
to desiccant tube
Rubber globe
Rubber globe
for drain
Drain tube
Polyethylene
bottle
Squeeze in
Insert
Reagent bottle
cap (with plug)
Squeeze in
If loosely squeezed it in, pressurized air may leak and it may cause
malfunction of dispensing KF reagent. There are two kinds of rubber
globes, one for drain and the other for discharge of reagent. Both of them
are indicated by the joint on top of each.