P/N 06-236530-001 2-7 August 2013
approximately 2 to 3 feet of wire length in the enclosure for future internal
connections.
2-4.3 Semi-Flush Mounting
To semi-flush mount the control unit:
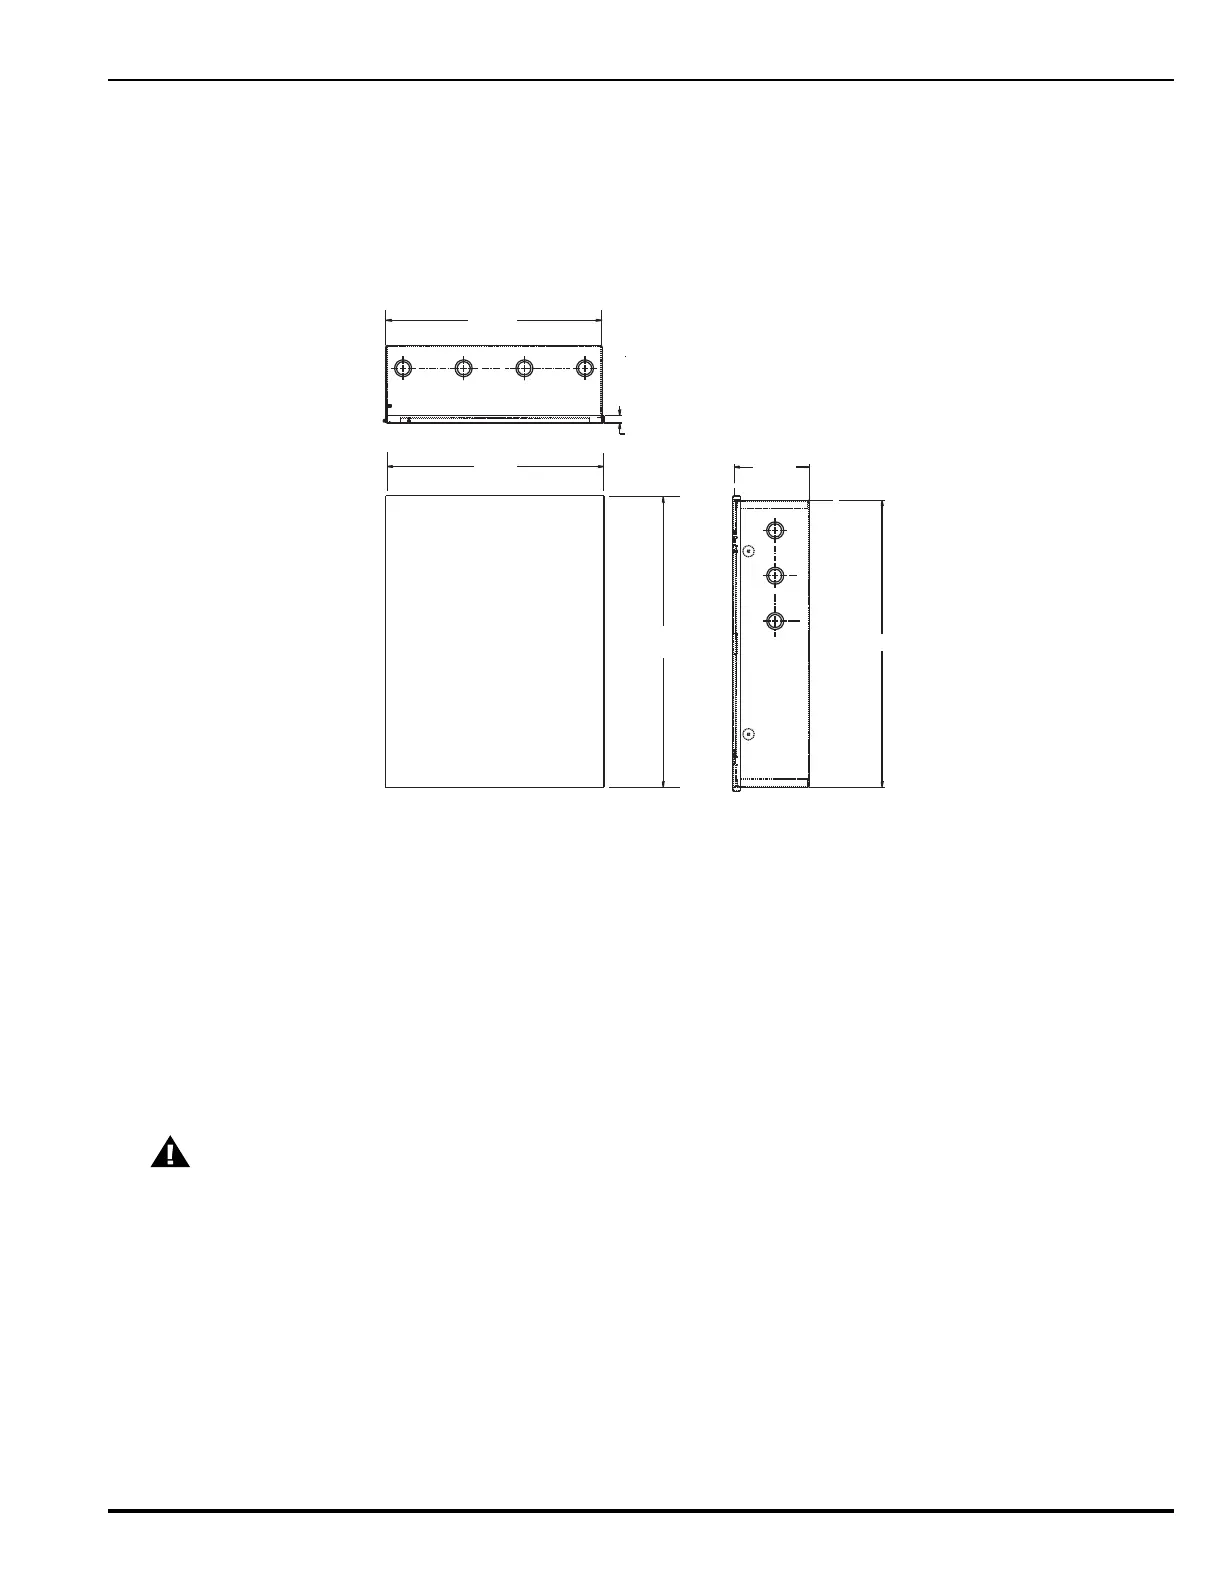
1. Cut and plumb an opening approximately 14.25” wide by 19” high in the wall on
which the control unit will be semi-flush mounted.
Figure 2-3. Semi-Flush Mounting Dimensions
2. Position and plumb the back box in the opening made in Step 1. Ensure that the
front edge of the back box is at least 3/4 inches from the surface of the wall. Refer
to Figure 2-3. Secure the back box to the wall with appropriate mounting bolts (up
to size 1/4-20).
3. Attach wiring conduit to the enclosure through the enclosure knockouts, and pull
the required number of wires through the conduit to the enclosure. Leave
approximately 2 to 3 feet of wire length in the enclosure for future internal
connections.
2-5 INSTALLING THE POWER SUPPLY
Note: Make sure the control unit location is dry and that the enclosure is free of construction
dust and metal shavings prior to installing the power supply.
1. Remove the power supply unit from its shipping carton.
2. Connect the wire harness that is packaged in the installation kit. Next connect the fork end
of the green ground wire that is also part of the installation kit to the earth-ground terminal
of the power supply. Refer to Figure 2-4 for wire harness and earth-ground connections.
CAUTION
Use a ground strap to prevent static discharge that could damage the power
supply.
19.00
14.25
14.25
0.500 Cover
Outside
5.000
19.00
Wall Cutout