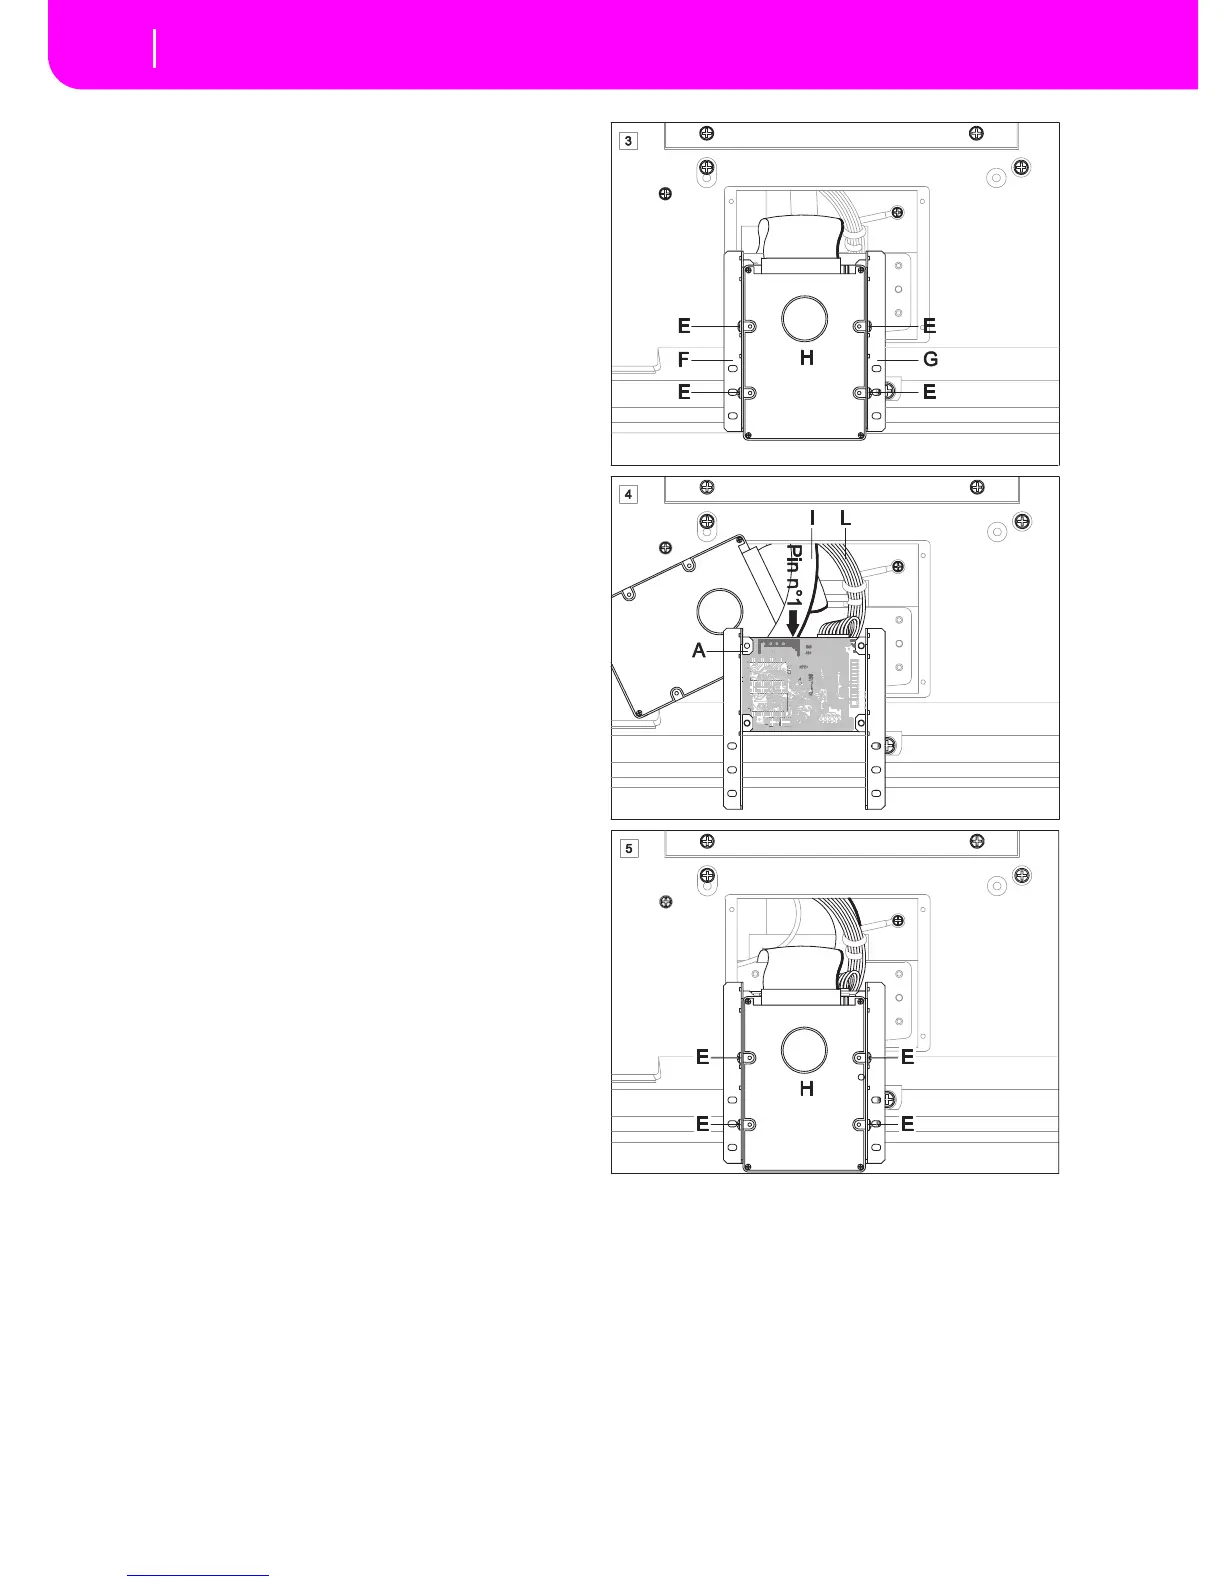
3. Remove the four HDD fixing screws (E), and unfasten the
supports (F, G) from the hard disk (H). You will no longer
need these supports.
4. Slide away the cables (I, L) from under the tab (metallized
film) screwed to the hard disk drive. Connect them to the
VHG1 board (A), lining the pin #1 on the flat cable with pin
#1 on the VHG1 board (A) connector. The cable conductor
corresponding to the pin #1 is marked in red.
5. Fix the hard disk drive (H) to the supports on the VHG1
board, using the four screws (E) previously removed. The
hard disk must be positioned as it was before it was removed
from the instrument.
 Loading...