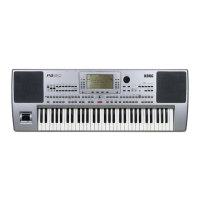
5. Fasten the screw (H) at its original position, using it to fix the
terminal lug of the cable (E). Place the cable so that it can’t
damage the video board (A) components. During this work,
be sure not to let the cable slide inside the instrument.
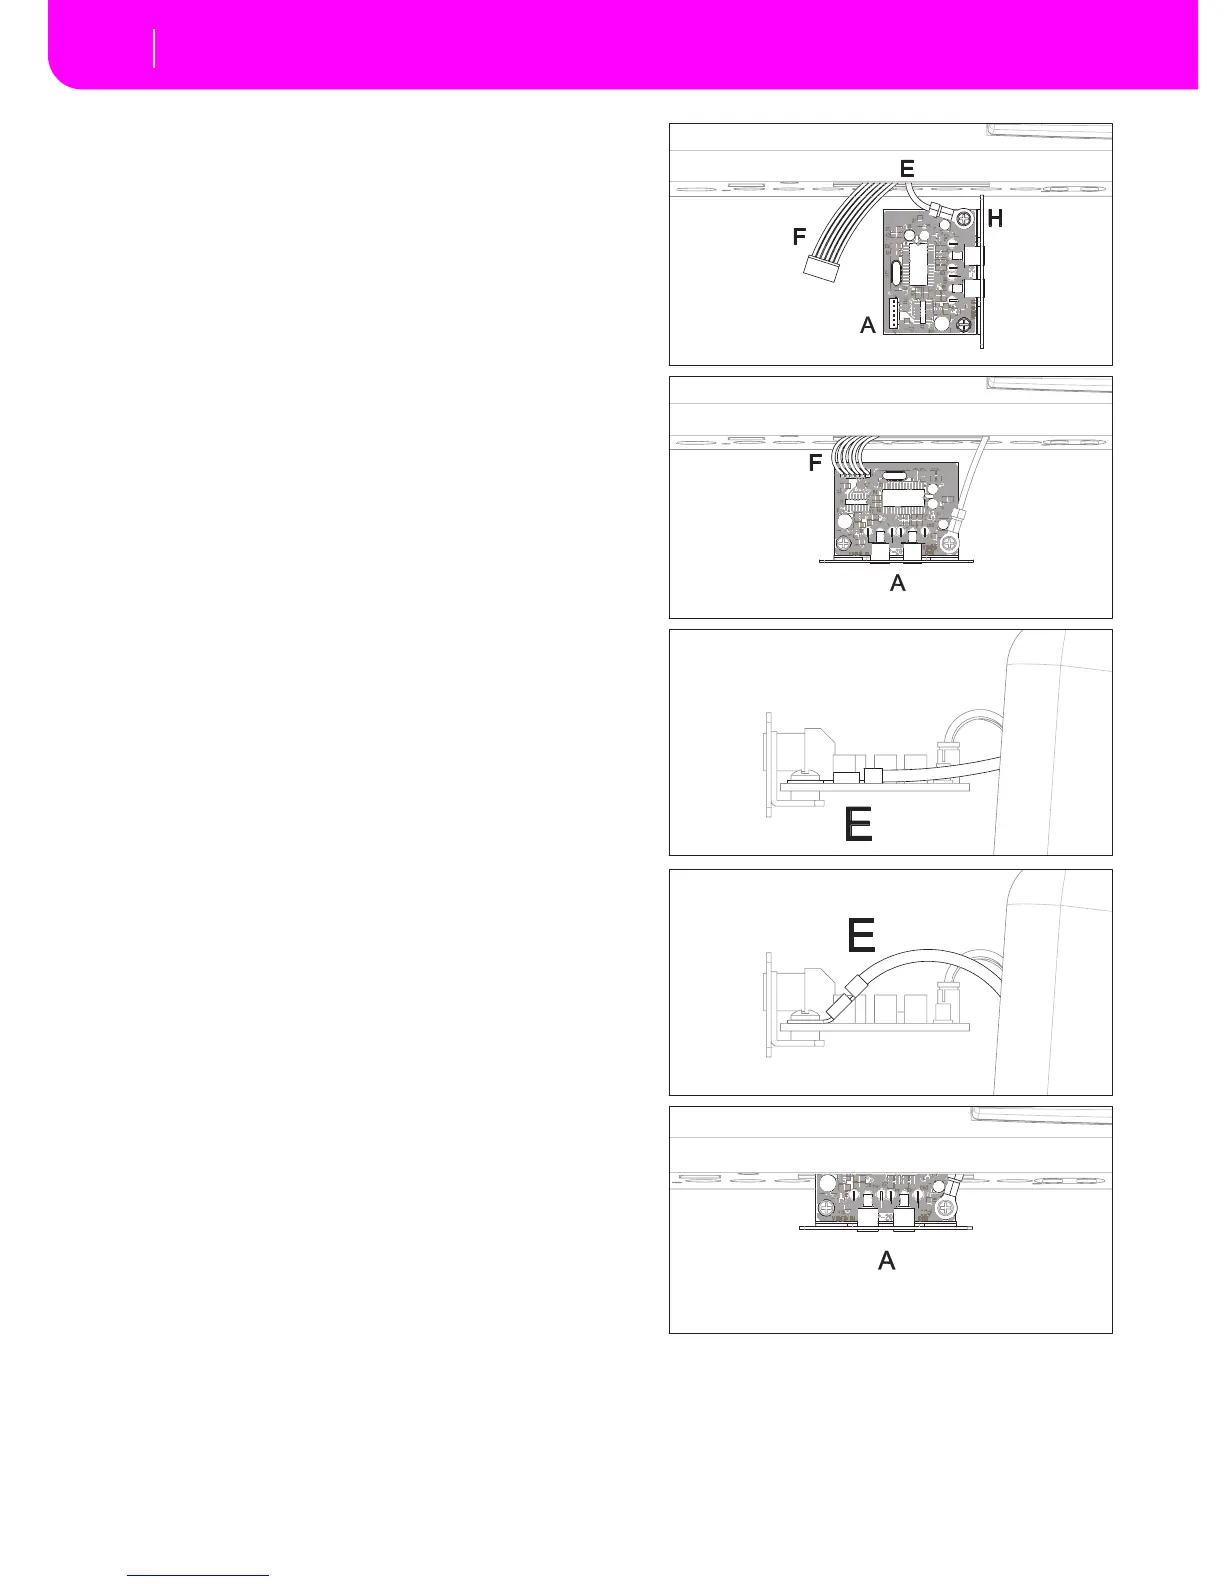
6. Connect the cable (F) to the video board connector. The
connector must be inserted along the guided direction.
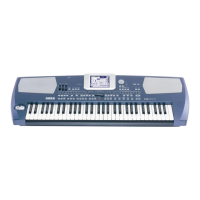
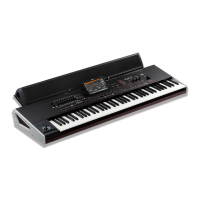
7. Bend up the terminal lug of the cable (E), to avoid its touch-
ing any of the board’s components.
8. After connecting all cables in the right way, carefully insert
the video board (A) in the slot located on the back of the
instrument, previously opened. The electronic components
must be faced upwards.