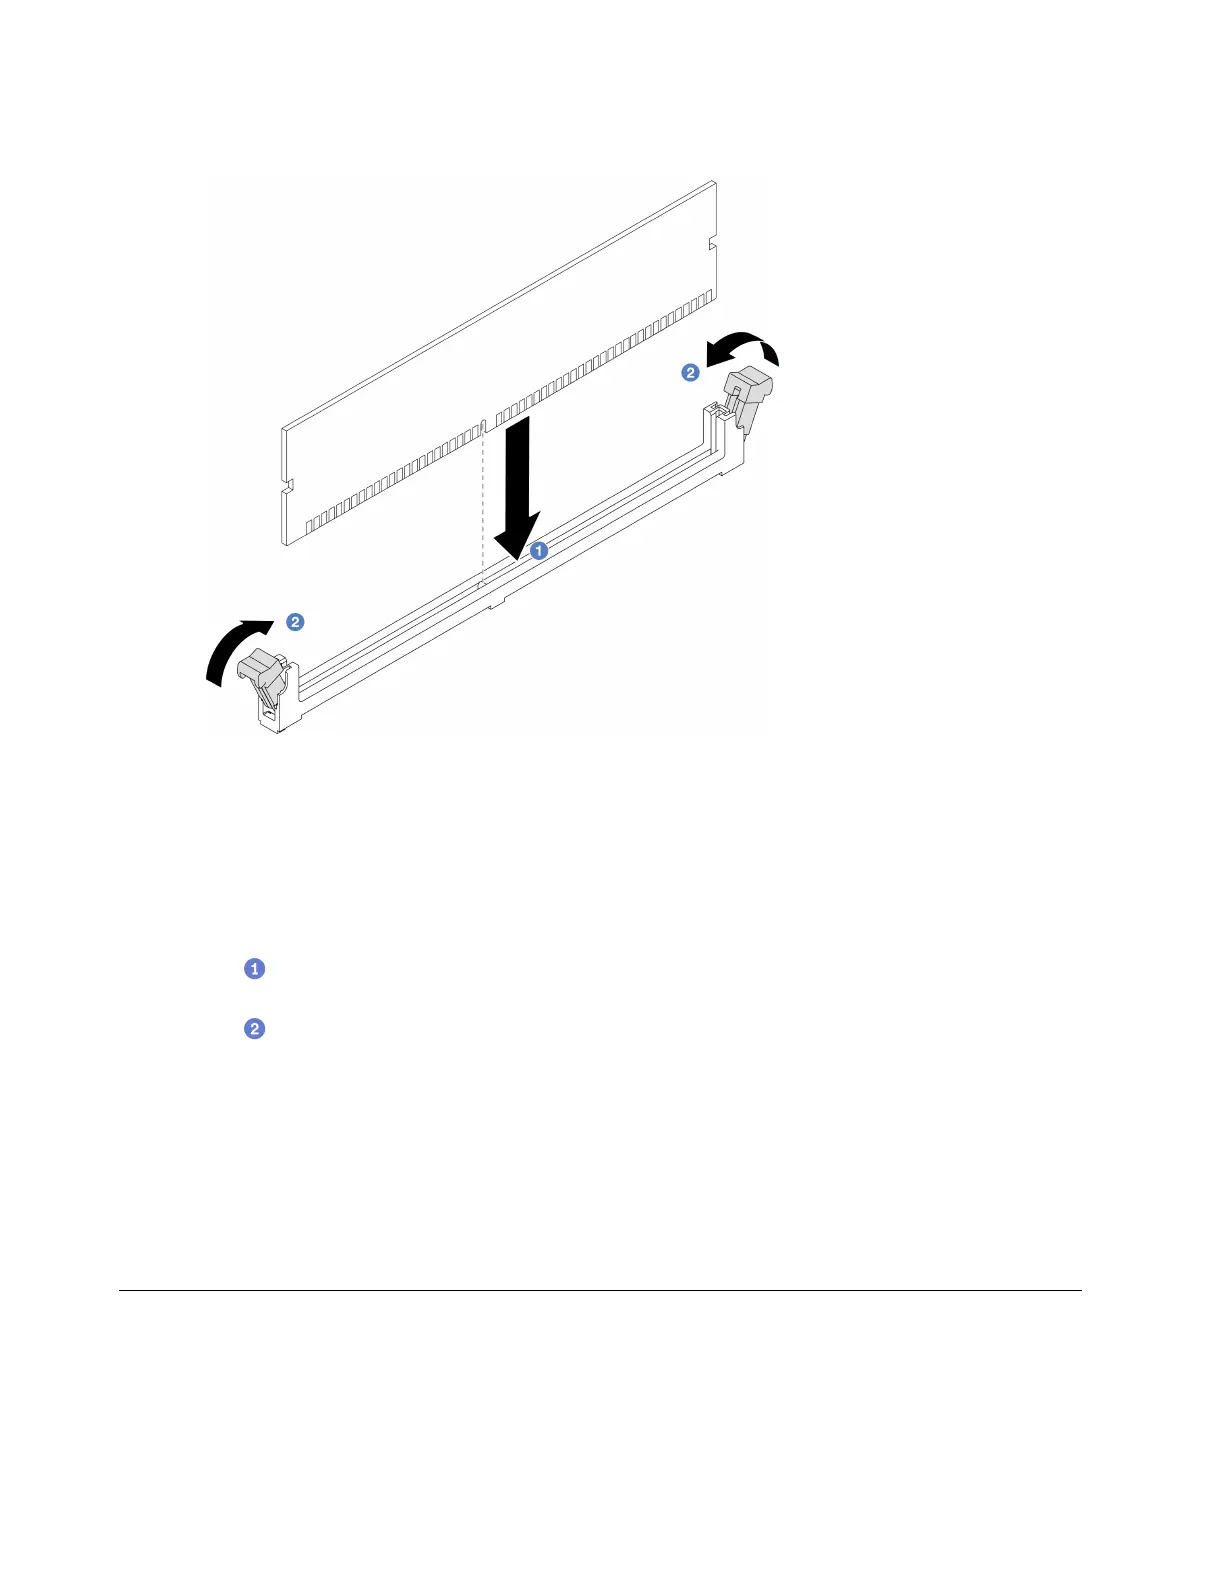
Step 4. Install the memory module into the slot.
Figure 49. Memory module installation
Attention:
• Before you install a memory module into the slot, make sure that the clips are on open position,
and the slot is clear of any debris.
• To avoid breaking the retaining clips or damaging the memory module slots, open and close the
clips gently.
a.
Identify the key on the memory module and then align the key to the slot, and gently place
the memory module into the slot with both hands.
b.
Firmly press both ends of the memory module straight down into the slot until the retaining
clips snap into the locked position.
Note: If there is a gap between the memory module and the retaining clips, the memory
module has not been correctly inserted. In this case, open the retaining clips, remove the
memory module, and then reinsert it.
After you finish
Complete the parts replacement. See “Complete the parts replacement” on page 154.
M.2 backplane and M.2 drive replacement
Use this information to remove and install the M.2 backplane and M.2 drive (an assembled M.2 backplane
and M.2 drive is also known as M.2 module).
• “Remove the M.2 backplane and M.2 drive” on page 83
82
ThinkSystem SR645 V3 User Guide

 Loading...


