Page 26
©2013 Technical Marine Service, Inc. LC-100 V2.97
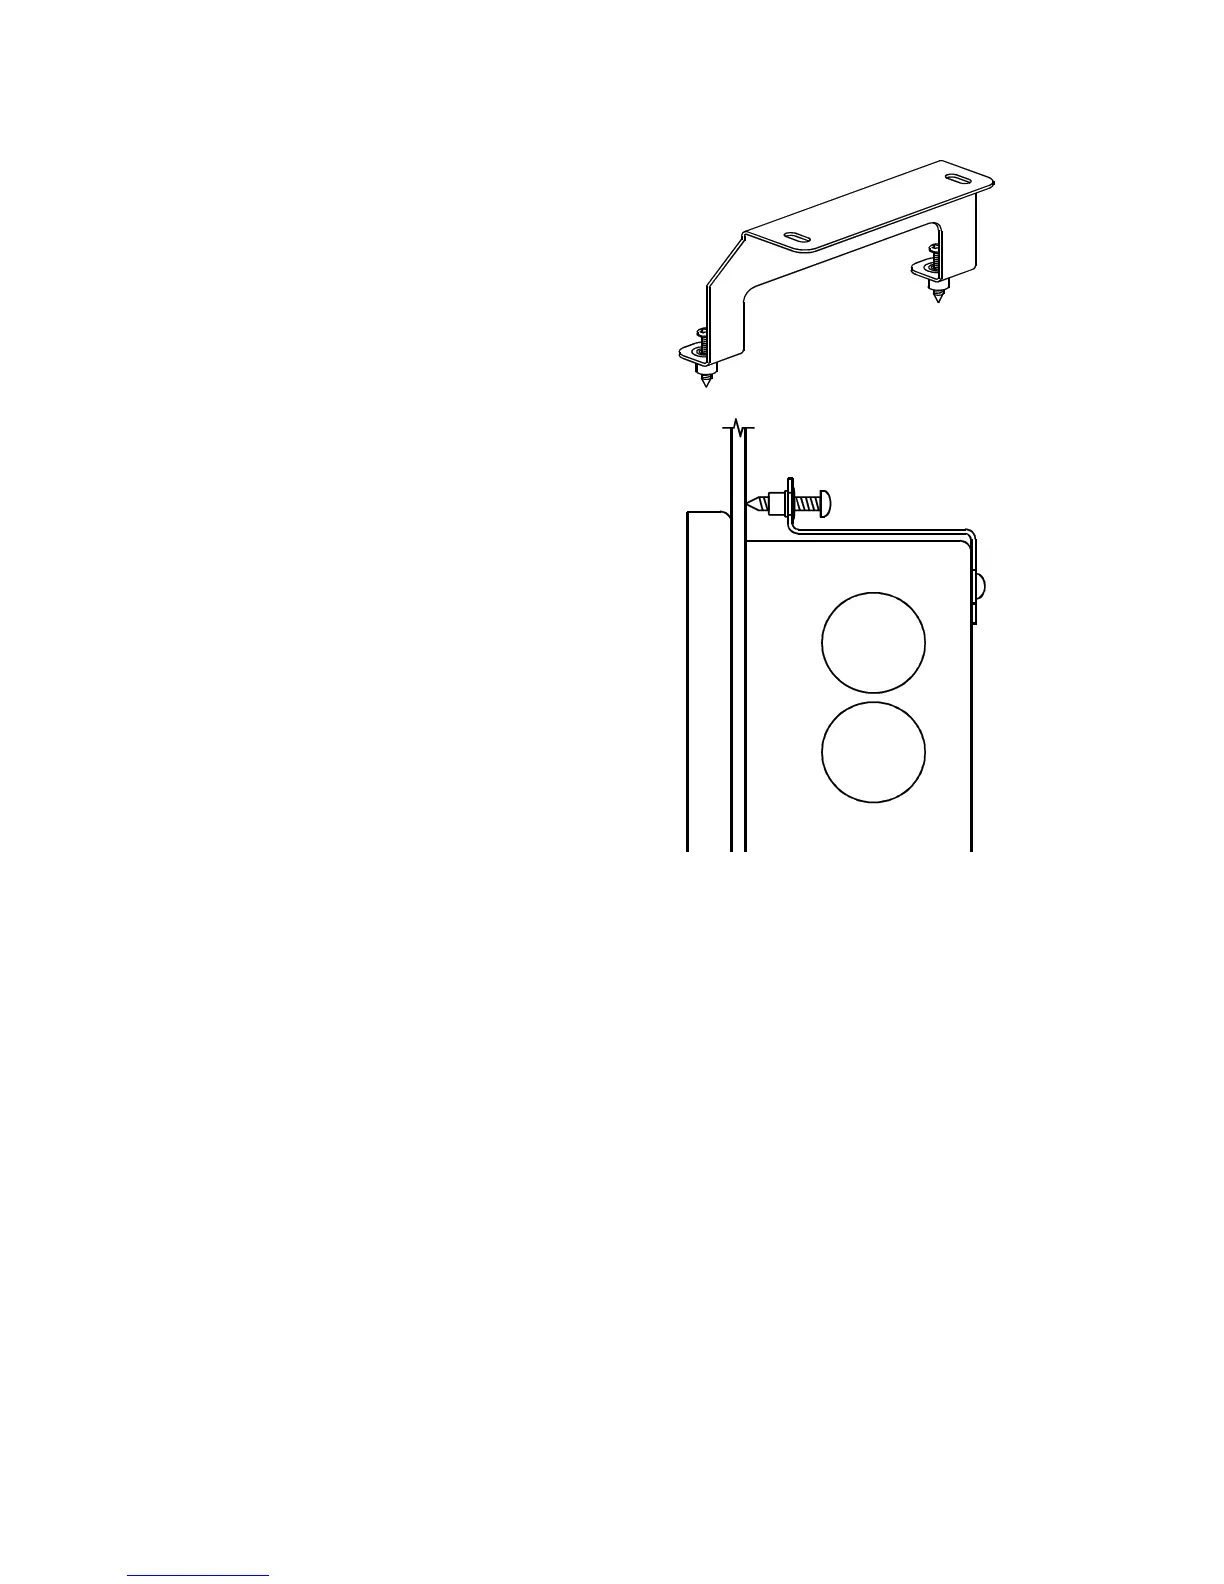
Flush Mounting
Flush mounting is accomplished with the
optional flush mount kit, which includes 2
stainless steel brackets, 4 - #10-32 x ½” screws and 4
- #10-32 x 1” pointed screws. The flush
mounting brackets replace the surface
mounting feet normally provided with the
LevelCom 100.
Figure 12 shows the Flush Mounting brackets and
how they are used to mount the LevelCom 100. Cut a
4.75” by 13.5” opening in the mounting surface. Pass
the LevelCom 100 through this hole from the front
of the panel and then mount the brackets to the rear
of the case with the short screws. Insert the
pointed screws into the threaded holes in the
brackets from the rear, and snug them evenly
against the back of the mounting surface. Do not
over tighten the long screws, since this may
distort the mounting brackets.
Figure 12 Flush Mounting Brackets