Repair information 4-43
7510
Inner cover removal
1. Open the printer front door assembly.
2. Remove the front left cover. See “Front left cover removal” on page 4-9.
3. Remove the waste toner cartridge cover. See “Waste toner cartridge cover removal” on page 4-39.
4. Remove the waste toner cartridge sensor assembly. See “Waste toner cartridge sensor assembly removal”
on page 4-39.
5. Remove the toner waste cartridge.
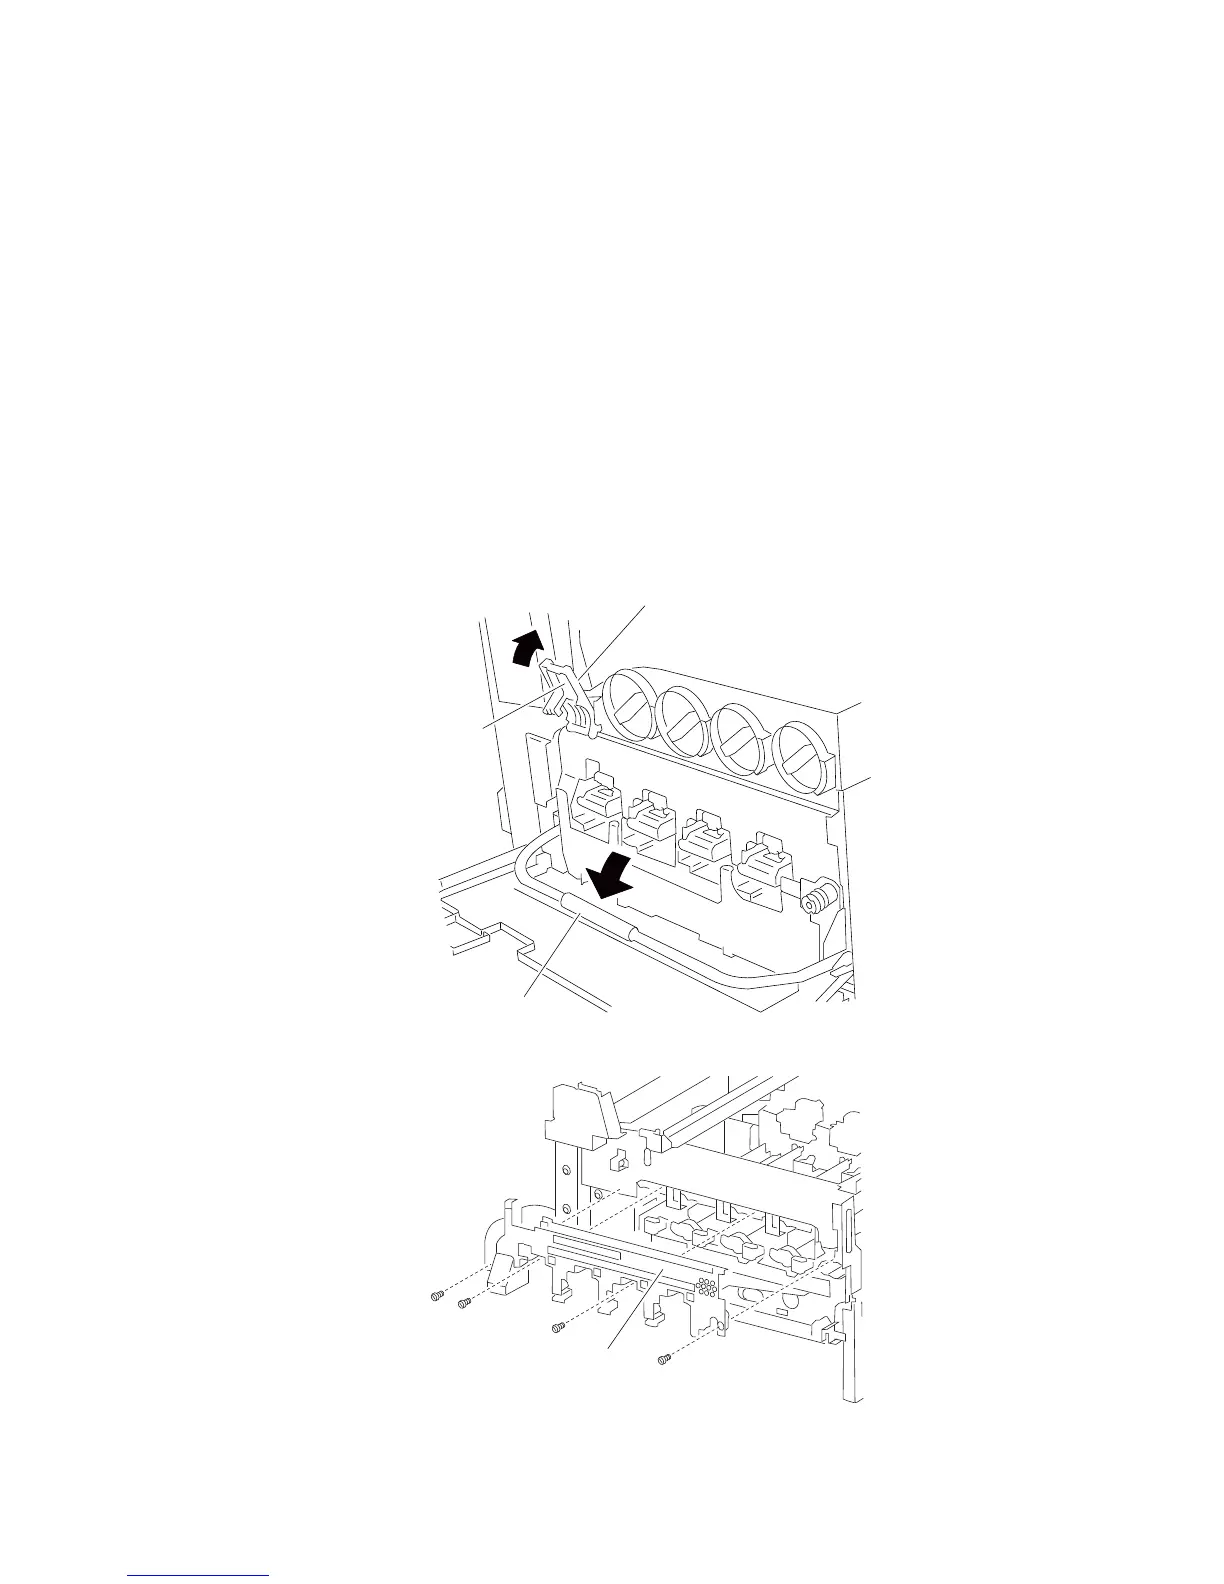
6. Press the button and raise the transfer belt lift latch assembly (A) to its upper-most position.
7. Move the transfer belt lift handle (B) to the lower-most position.
Warning: Ensure that all four PC cartridges are concealed from all sources of light, or damage will occur.
8. Remove the four PC cartridge units.
Note: After removing the four PC cartridges, ensure that each cartridge is marked according to its particular
color.
9. Remove the four screws securing the inner cover (C) to the machine.
10. Remove the inner cover (C).
 Loading...


