TRANSMISSION AND TORQUE CONVERTER CD3340B/YB4411
7-44
Published 04/07/2015 Control # 569-00
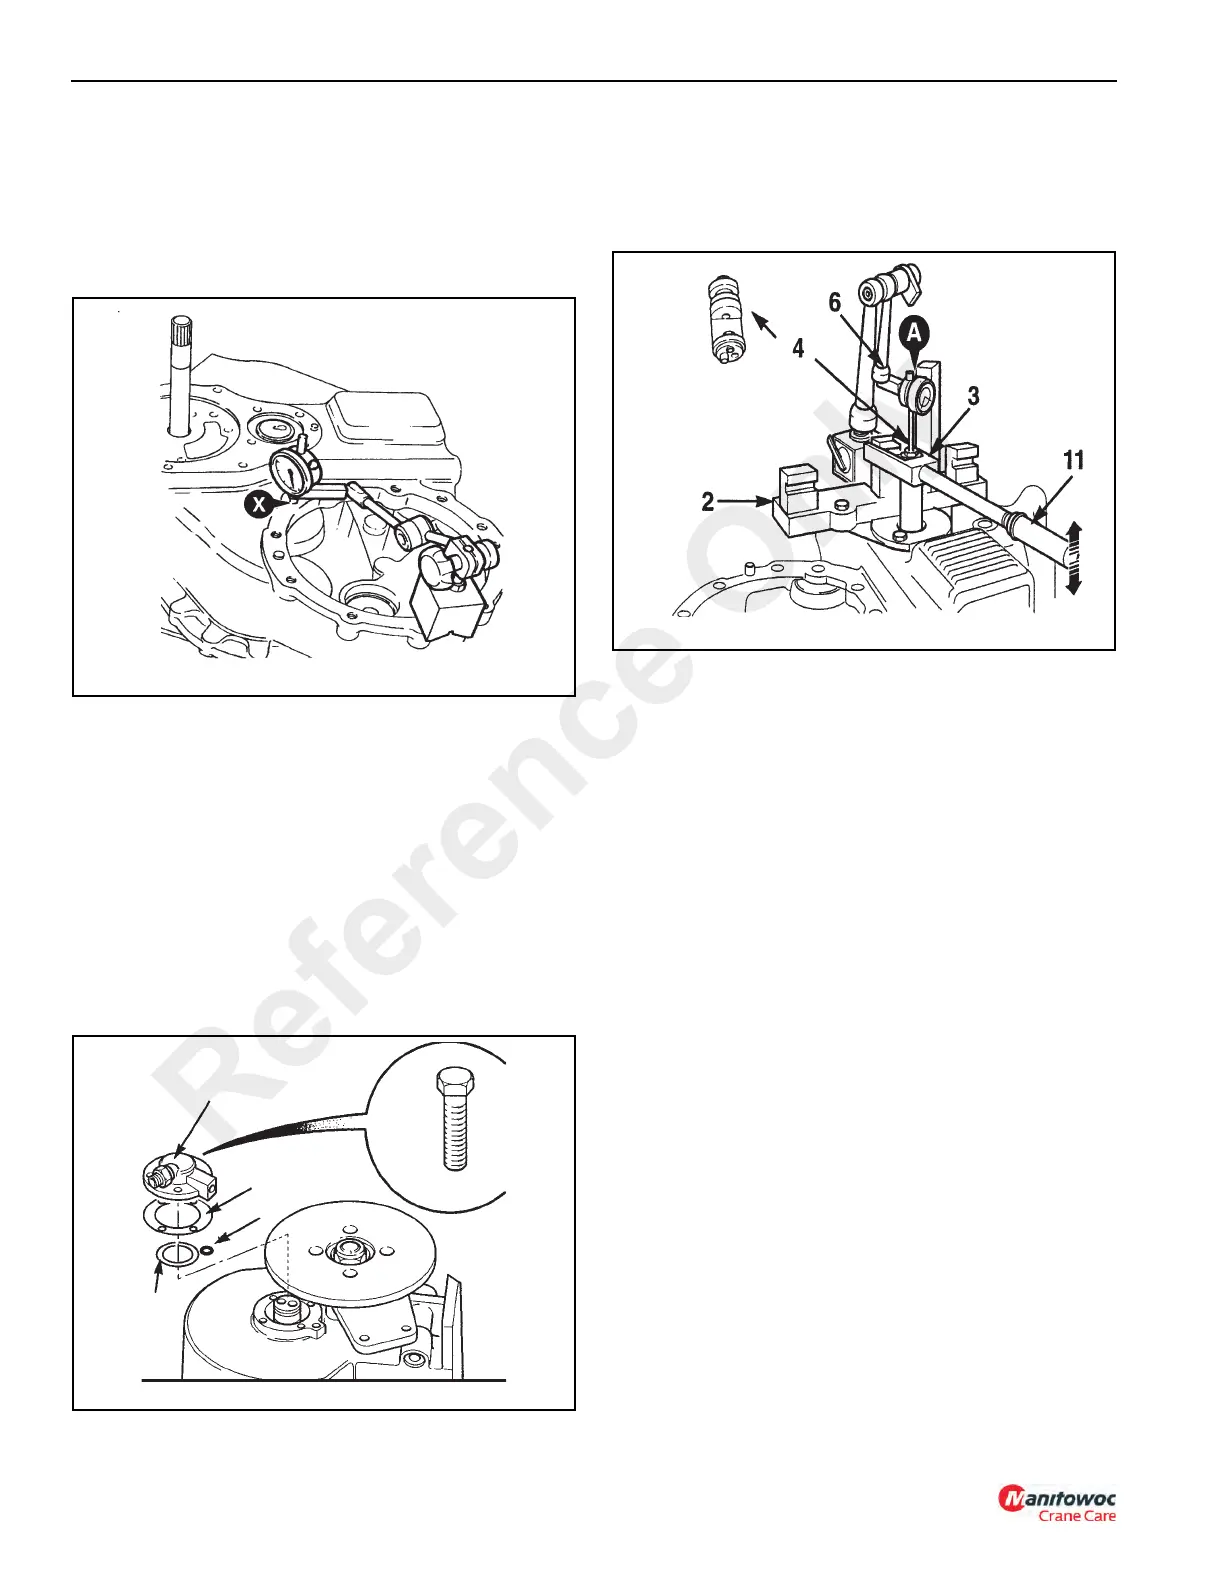
NOTE: Access to the layshaft end face is gained through
the 4WD bolt hole X, as shown in Figure 7-53.
Calculate the required thickness of shims to give
correct end play, which should be 0.03 - 0.08 mm
(0.001 - 0.003 in). The end shaft play should be set
as near as possible to the minimum tolerance.
23. Remove the layshaft end cap (27, Figure 7-54). Coat the
layshaft outer bearing with a Lithium Base, E.P. No. 2
bearing grease and add or subtract shims 29 to give
correct end play (install shims between the outer race of
bearing and layshaft end cap).
Ensure the gasket is used when calculating the shim
thickness.
24. Install new O-ring (30) in end cap (27). Coat the O-ring
with grease to hold in position.
25. Install the layshaft end cap (27) with new gasket (28).
Apply Loctite 243 to bolts (26) and tighten to a torque of
56 Nm (42 lb-ft).
26. Measure the end play of the main shaft using the end
play checking kit (see Figure 7-21)
NOTE: Numbers in Figure 7-55 correspond with numbers
in Figure 7-22.
a. Install adapter 4 into tapped hole in the main shaft
securing it with an M10 x 20 bolt.
b. Mount base plate 2 onto the transmission and locate
yoke 3 and wrench 11 into adapter 4 and pillar 6. Set
the wrench to 35 Nm (26 lb-ft).
c. Using a magnetic block, mount the dial test indicator
(DTI) A with the probe on the head of adapter 4 and
adjust to read zero.
d. While rotating the main shaft back and forth seat the
bearings, lift and depress wrench 11 and note the
reading on the DTI.
NOTE: To rotate the main shaft, use an air line and adapter
tool (Figure 7-19) and rotate the output flange.
e. Remove wrench 11, adapter 4, and end play setting
tool from the main shaft assembly.
f. Add or subtract shims to correct the end play. (The
end play should be set as close as possible to the
minimum tolerance.) The shims must only be
installed between the bearing outer race and
spacer. When the correct end play has been
established - INSTALL SPACER 50 WITH NEW O-
RINGS 51 (Figure 7-57)
g. Repeat steps 9A - 9E to recheck end play on the
input shaft.
h. Remove bolt A (see step 12) from the forward shaft
and install plug (50, Figure 7-56) using new O-rings
51.
Reference Only
 Loading...


