TRANSMISSION AND TORQUE CONVERTER CD3340B/YB4411
7-46
Published 04/07/2015 Control # 569-00
NOTE: On some gearboxes, locating dowels in the bell
housing have been removed and the pump
provides the location for the bell housing. If the
pump and bell housing are removed, the pump
MUST be installed before the bell housing.
NOTE: When the transmission pump only is being
installed, the flywheel housing need not be
removed, provided it was correctly aligned when
last installed.
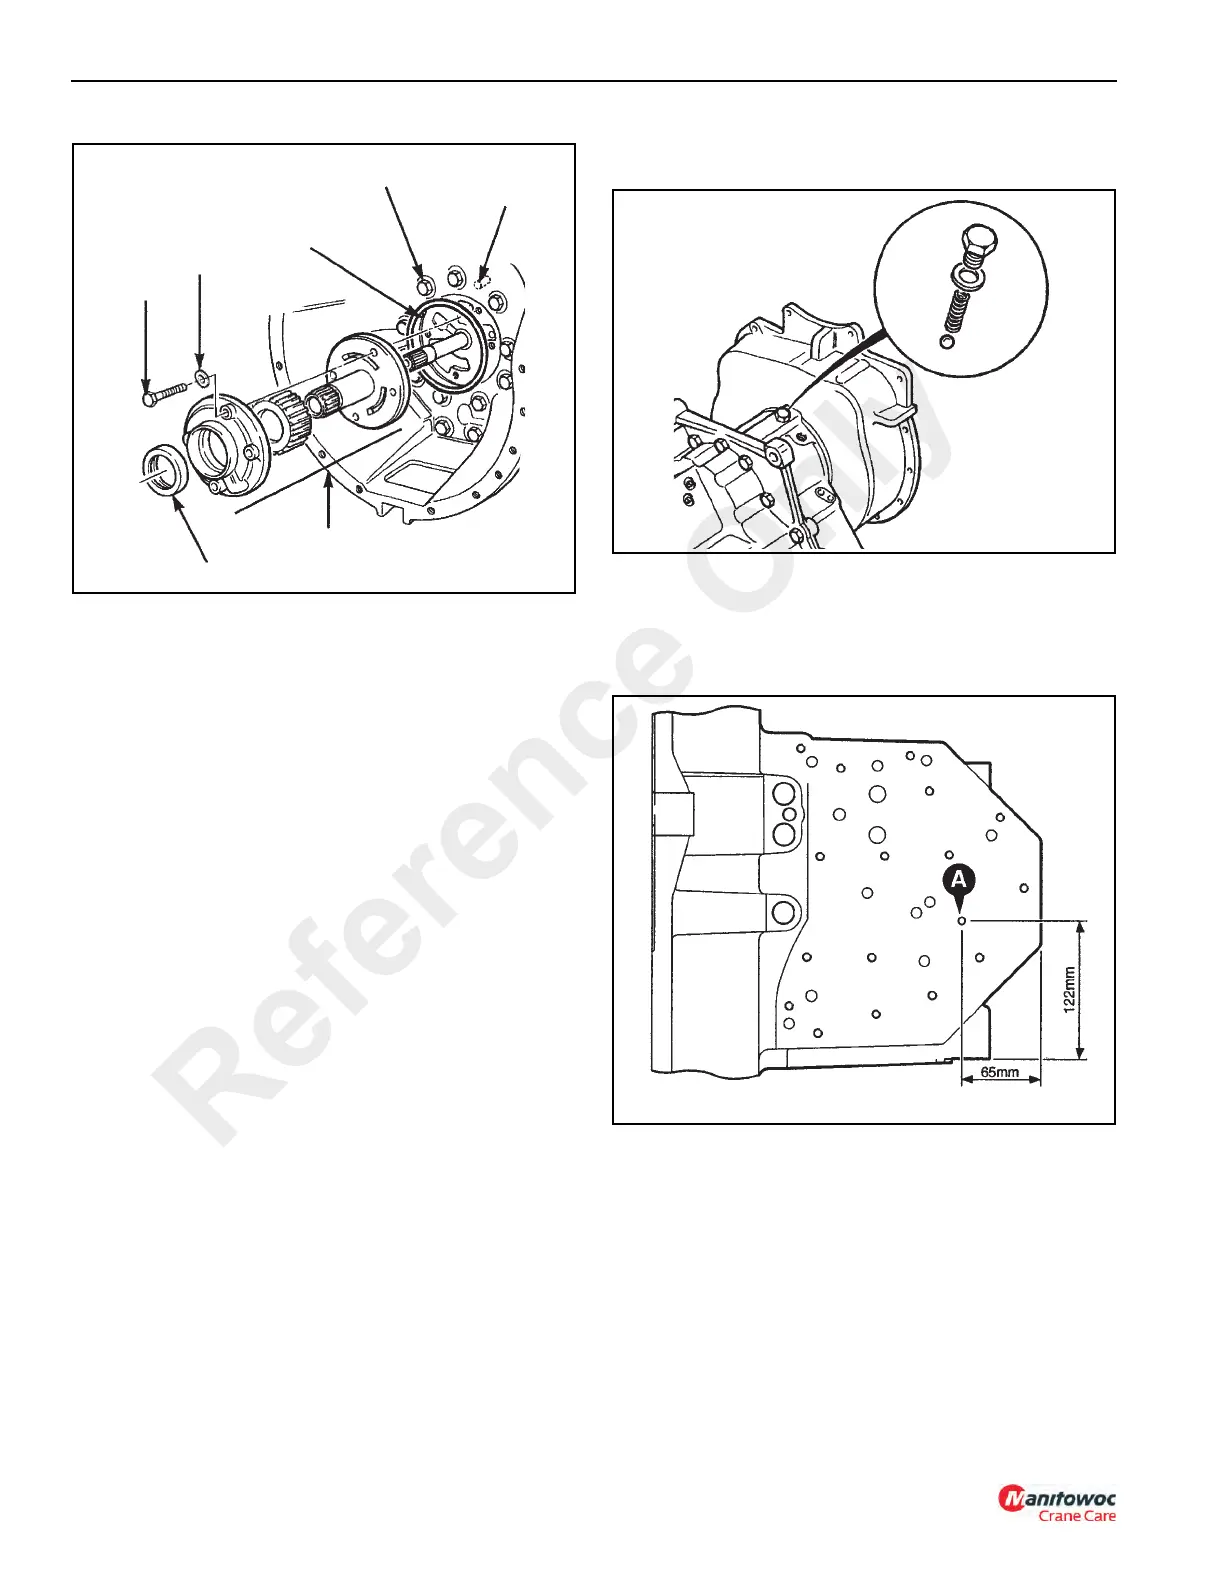
29. If disassembled, assemble pump (15, Figure 7-59).
Install the pump taking care to align mounting holes.
Apply Loctite 243 to bolts (14) and using new seal
washers (56), tighten the bolts to a maximum torque of
25 Nm (18 lb-ft). Use a new pump housing seal (17).
Install new O-ring (16). Ensure a sufficient quantity of
clean new oil (Mobil ATF 210) is added to pump for initial
start-up lubrication of the gears.
NOTE: After installing the transmission pump, rotate gear
A to ensure it has clearance and turns freely.
NOTE: There are two types of pump housing seals 17
depending on the pump type installed. Ensure the
correct seal is installed:
Existing seal outside diameter = 68 mm (2.67 in)
Alternate seal outside diameter = 68.22 mm (2.68
in)
30. Install torque converter relief valve ball and tapered
spring (25, Figure 7-60). Make sure that the larger
diameter of the tapered spring is located securely over
the spigot on the plug. Using a new seal washer, install
the plug and tighten.
31. Before installing the solenoid adapter block to the
casing, be sure that the M8 oilway plug (A, Figure 7-61)
is installed. Apply Loctite 243 to the threads of the plug
and screw into position 1 mm (0.04 in) below the valve
block surface.
Using a new gasket (52, Figure 7-62), install the solenoid
adapter block (21) to the casing. Apply Loctite 243 to bolts
and tighten to a torque of 25 - 28 Nm (18 - 20 lb-ft).
32. Assemble the pressure maintenance valve spool and
spring (19,Figure 7-62) into adapter block (21). Install
and tighten plug (18). Do not overtighten as damage to
the aluminum housing could result.
FIGURE 7-59
a0828
17
15
37
35
16
56
14
Reference Only
 Loading...


