Chapter 2
Periodic maintenance
Section 2 Maintenance and adjustment
2
—
14
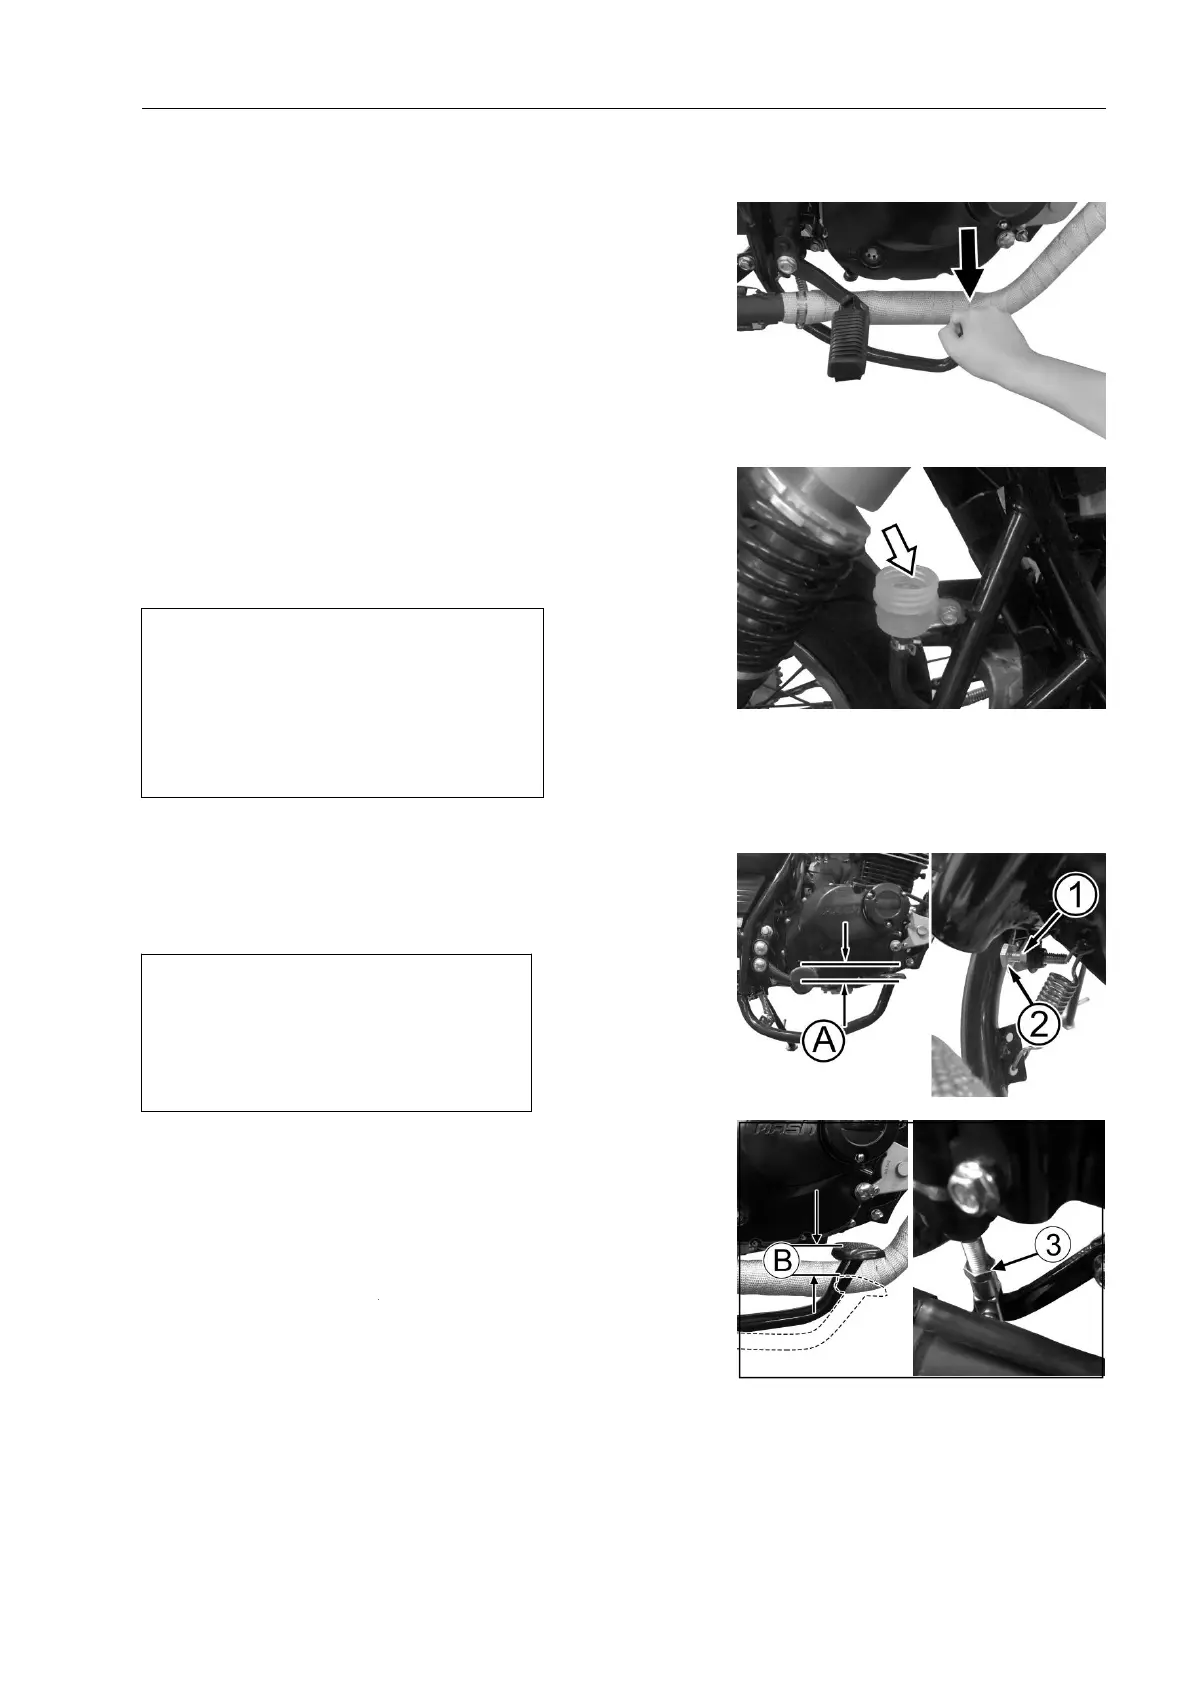
Continuously pressurized rear brake pedal by hand for
exhaust;
Keep pressurizing and refueling until the brake is
obviously felt, then press the pedal and release the exhaust
valve C for exhaust work;
Then screw the vent valve, squeeze the brake lever
and open the vent valve again (note: pedal downpressure
shall not be lifted before the vent screw is tightened during
the exhaust process).
The process is repeated until the liquid flows into the
container and there are no more bubbles.As Fig. 2.2.41.
The linkage vent valve B in the middle of the front
brake pump body shall continue exhaust treatment
according to the same steps above.
Note:
When air is bled from the brake
system, brake fluid should be
replenished at any time in order to
ensure that fluid can appear in the fluid
reservoir.
Close the bleeding valve, and then pull out the hose. Fill
the brake fluid to within the calibration line of the oil cup.
Exhaust valve torque:7.5N.(0.75kg.m)
Note:
The braking fluid should be
handled carefully: this fluid will
chemically react with painting and
rubber materials.
After completing the operations, put on the dust cap of the
bleeding valve.
Rear braking pedal height
Loosen the lock nut①.
Regulate the height
of the braking pedal by
rotating the adjustment bolt ②, and make the position of
20mm below the upper surface of the footrest.
As if Fig.2.2.42.
Adjustment of rear brake
Turn the adjustment nut③ to adjust the free stroke to
20-30mm. As in Fig.2.2.43.
Fig.2.2.41
Fig.2.2.42
Fig.2.2.42
Fig.2.2.43