20
LOADING THE CONSUMABLES
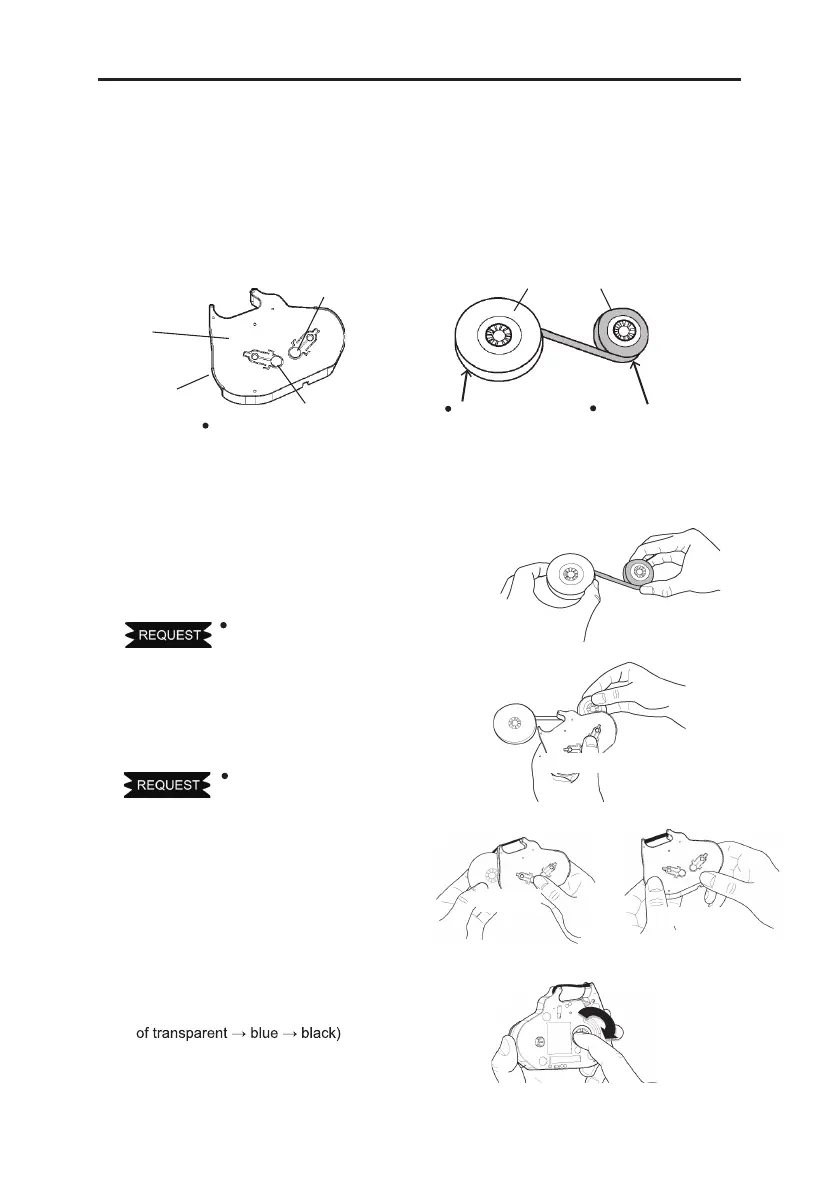
3. While pressing “Button A,” set the
winding core as shown in the
figure.
Then, release “Button A” to lock
the ribbon.
4. Rotate the ink ribbon toward the direction
of the arrow until the black surface
appears. (The color changes in the order
When the surface (black) has appeared,
stop rotating.
Press
The color changes.
Rotation
1. Install a new ribbon to the ribbon case.
2. While pressing “Button B,” set
the ribbon core as shown in
the figure. Then, release the
“Button B” to lock
the ribbon.
Pay attention to the top and
bottom of the ribbon case.
1. Holding the “Winding core”, pull
the “Ribbon core” lightly so that
the adhered portion comes off.
turn so that the ribbon is not gone slack.
5-1 INSTALLING OR REPLACING THE INK RIBBON
Note: Use a ribbon case (LM-RC500) for (LM-550A2 series)
Ribbon case LM-RC300 cannot be used for LM-550A2 series.
Also, ink ribbon LM-IR50B/LM-IR50W/LM-IR50BP cannot be set in ribbon case LM-RC300.
Transparent)
Winding core Ribbon core
The side with letters comes the top.
When pulling the “Ribbon core”, let the core
5. LOADING THE CONSUMABLES
Follow the steps bellow.
(2) Loading the tube or tape.
(1) Installing the ink ribbon to the ink ribbon case.
(3) Loading the ink ribbon case.
Insert
Insert
Press
 Loading...