CRIMP DATA ANALYZER
CDA10
REV.01
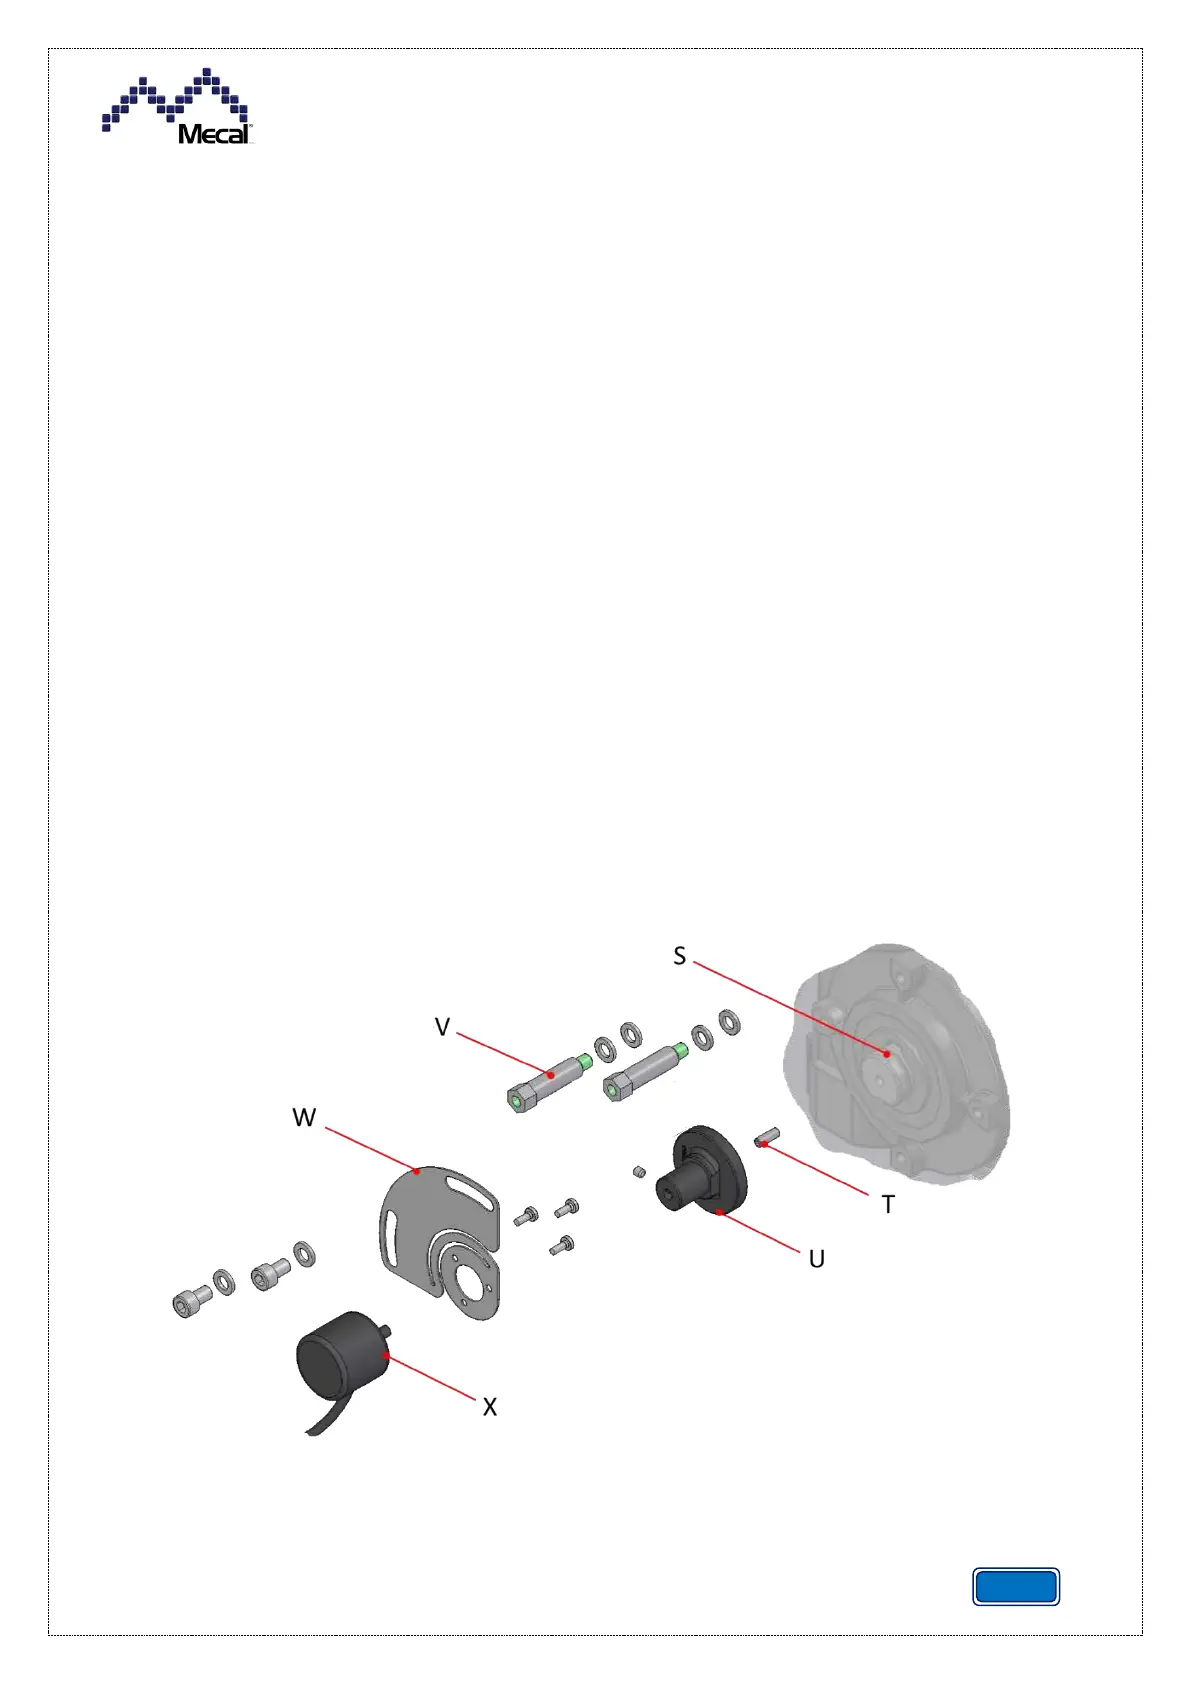
5.1.6 POSITIONING AND ASSEMBLING THE ENCODER
Proceed as follows to install the encoder unit:
• Tighten the headless screw, or grub screw (T), on the encoder control shaft (U);
• Tighten the hub (U) at the end of the output shaft (S) from the gear motor, on the grub screw (T)
that has just been inserted;
• Position the two spacers (V) and washers in the threaded holes on the gear motor flange of the
press and secure them;
• Install the encoder (X) on the encoder support plate (W) using three cylindrical-head screws with
Phillips head;
• Position the hub (U) on the encoder shaft (X), leaving it free;
• Take the support plate unit with the newly assembled encoder and secure it in place by
tightening the two hex socket head cap screws with washers;
• Connect the encoder connector to the sensing unit;
• Install the encoder on the sensing unit at angle 351° ±7° [follow the instructions in relative
paragraph 6.4.1];
• At the same time as the previous installation phase, tighten the headless screw, or grub screw,
on the hub (U).