11
11-93
Grinding of crankshaft
CAUTION
• If the crankshaft pins and journals are ground to undersiz-
es, be sure to use bearings of corresponding undersizes.
• Check the measurement in the table of service standards and
correct the crankshaft as follows.
• Do not change the center-to-center distance A between the
journal and pin.
• Do not change the journal width B and the pin width C.
• Finish the fillets D smoothly.
• Carry out a magnetic inspection to check for cracks possibly
caused by grinding. Also, check that the hardness of the sur-
face has not dropped below Shore hardness number (Hs) 75.
• If there is any abnormality, replace the crankshaft.
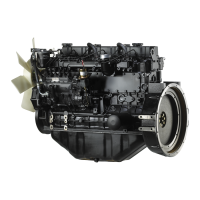
Mitsubishi 6M70 Crankshaft undersize dimensions (Unit: mm)
• When grinding, turn both the crankshaft and the grinder counter-
clockwise as viewed from the crankshaft front end.
• When finishing the crankshaft with whestone or sandpaper, ro-
tate the crankshaft clockwise.
Inspection: Distortion of crankcase top surface
• If the measurement exceeds the limit, correct the crankcase top
surface with a surface grinder.
CAUTION
• Do not grind the crankcase top surface so much as to com-
promise the correct piston protrusion.
Undersizes
0.25 0.50 0.75 1.00
Finished journal outside diameter 99.75 99.50 99.25 99.00
Finished pin outer diameter 83.75 83.50 83.25 83.00
Roundness 0.01 or less
Cylindricity 0.006 or less
-0.08
-0.10
-0.08
-0.10
-0.08
-0.10
-0.08
-0.10
-0.06
-0.09
-0.06
-0.09
-0.06
-0.09
-0.06
-0.09

 Loading...


