Function mode
[14]-3
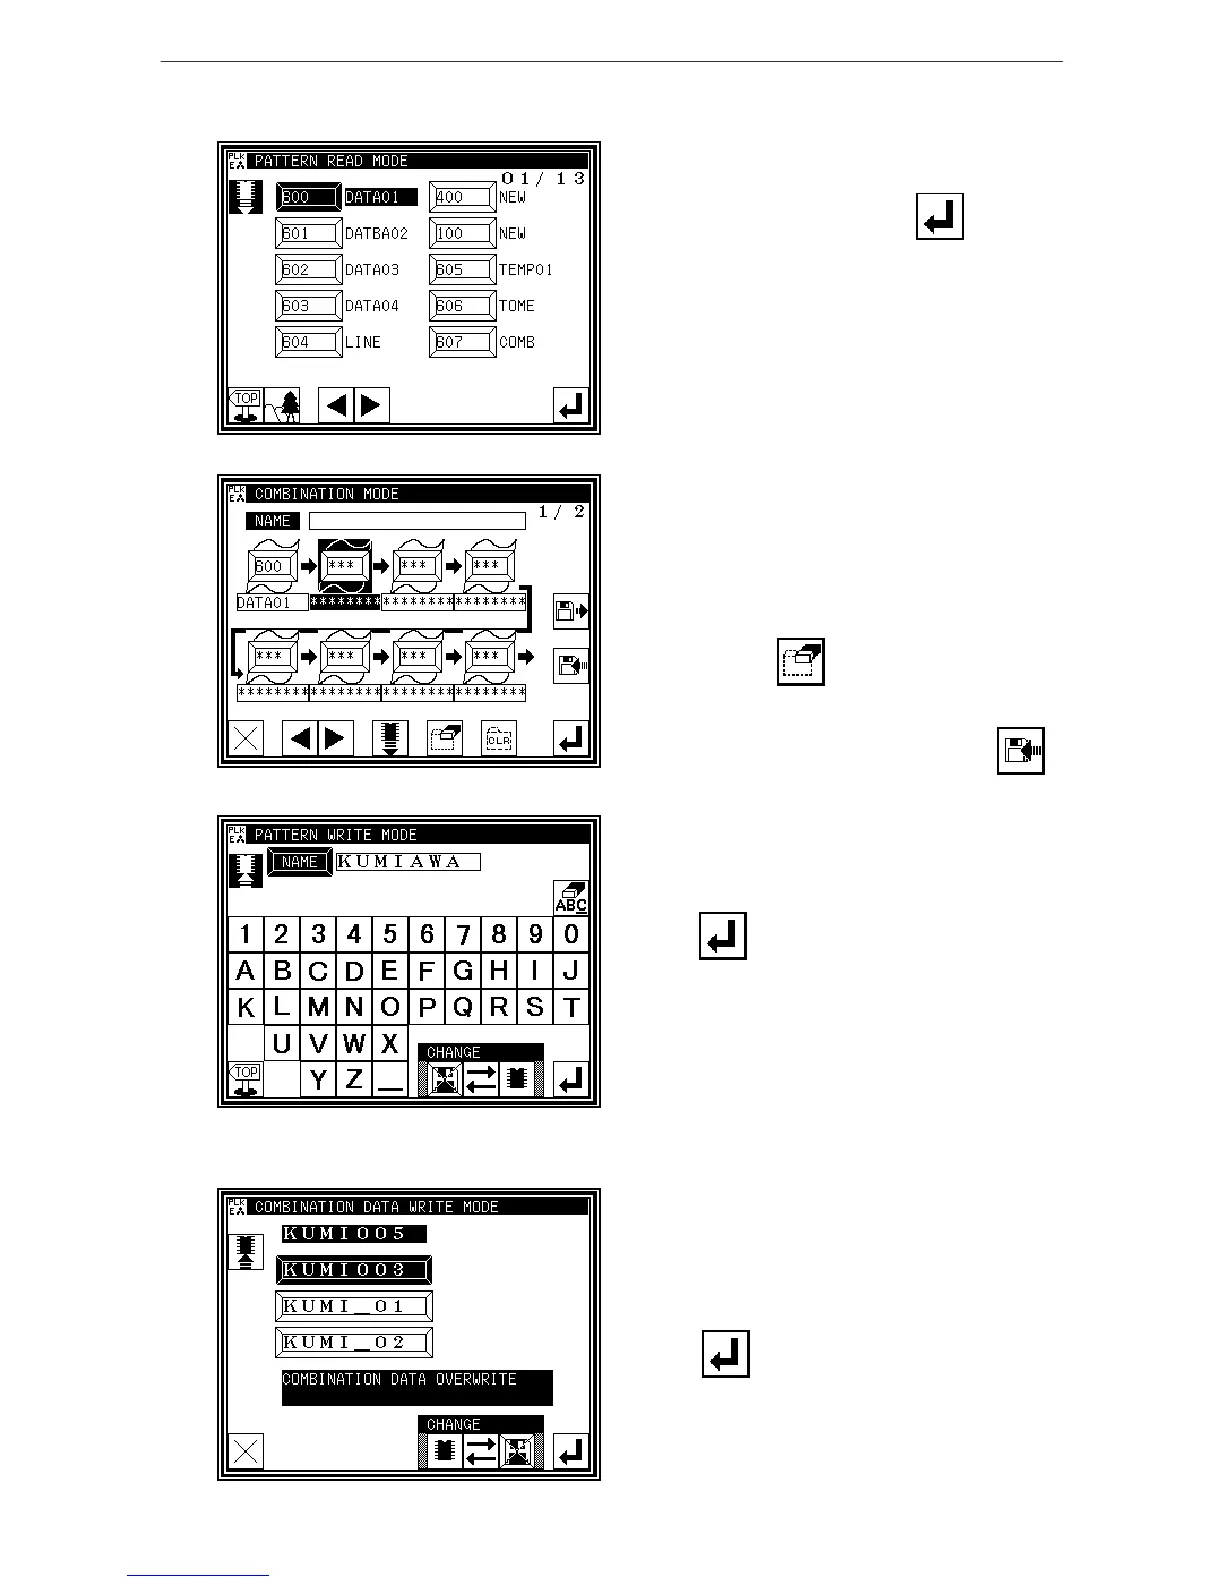
(3) Stitching Data Selection screen
* Select the stitching data to be added to
the combination, and then press .
(4) Adding stitching data
* Stitching data (No. 600 in this example) has been
added.
* Using the procedure explained in (2) and (3), up
to 20 stitching data items can be added to the
combination.
(To delete the added stitching data, select the data
and then press .)
* To write the created combination data into
the internal memory or floppy disk, press .
(5) Writing the combination data
* Select the write destination (internal
memory/floppy disk) in the same manner as
normal stitching data
write, input the pattern name, and then
press . (In this example, the data is written
to the internal memory.)
(6) Designating overwrite
* Up to three data items can be written into the
internal memory. If three data items already exist,
one of the combination data items will be
overwritten. Select which combination data to
overwrite.
* Press after making a selection.

 Loading...