Methods of creating stitching data
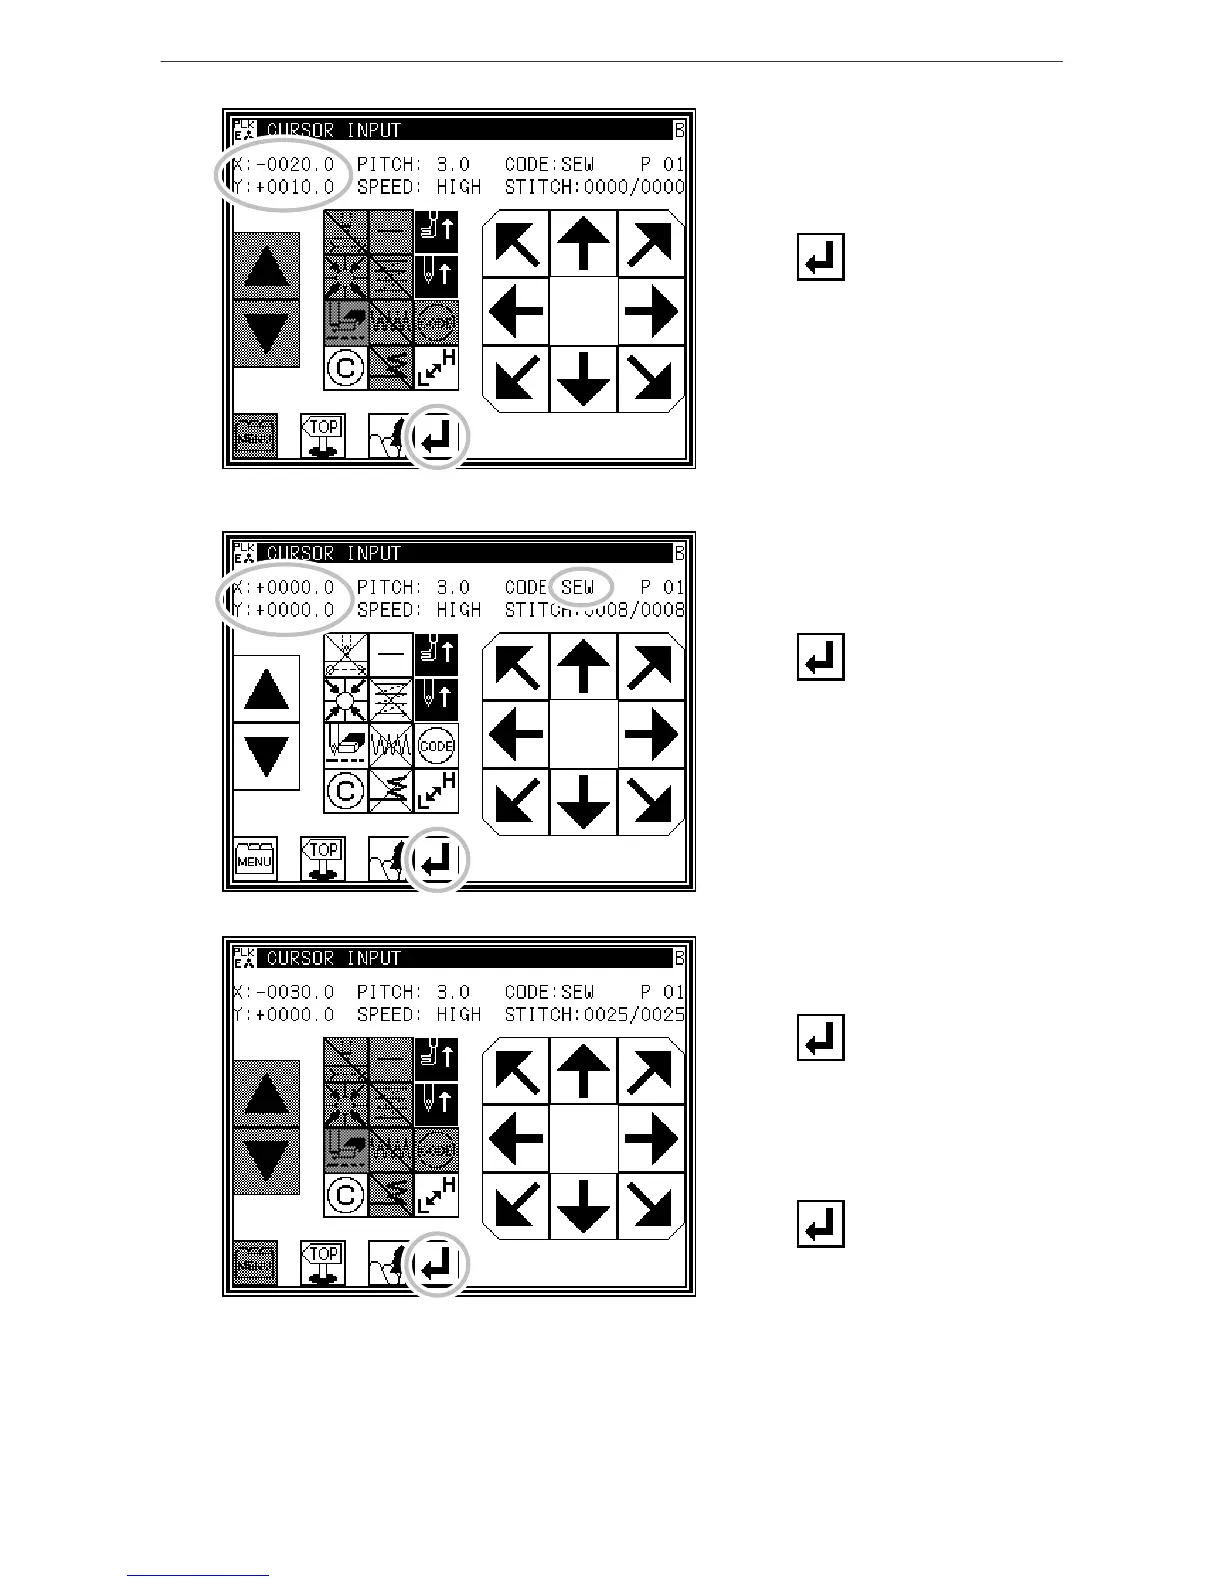
2. Setting feed data to A point
* The movement amount can be
confirmed.
[Example] X: -0020.0, Y: +0020.0
* Press to set the data.
(Data on feed data to point A will be
created.)
* The movement amount will be cleared.
X: -0000.0, Y: +0000.0
* The code will change to "SEW".
3. Inputting stitching to B point
* Press the arrow keys and move to the
B point.
* Press to set the data.
* Data on straight stitching to point B will
be created.
4. Inputting stitching from C point to D point
* Press the arrow keys and move to the
C point.
* Press to set the data.
* Data on straight stitching to point C will
be created.
* Press the arrow keys and move to the
D point.
* Press to set the data.
* Data on straight stitching to point D will
be created.

 Loading...