Methods of creating stitching data
[9]-2
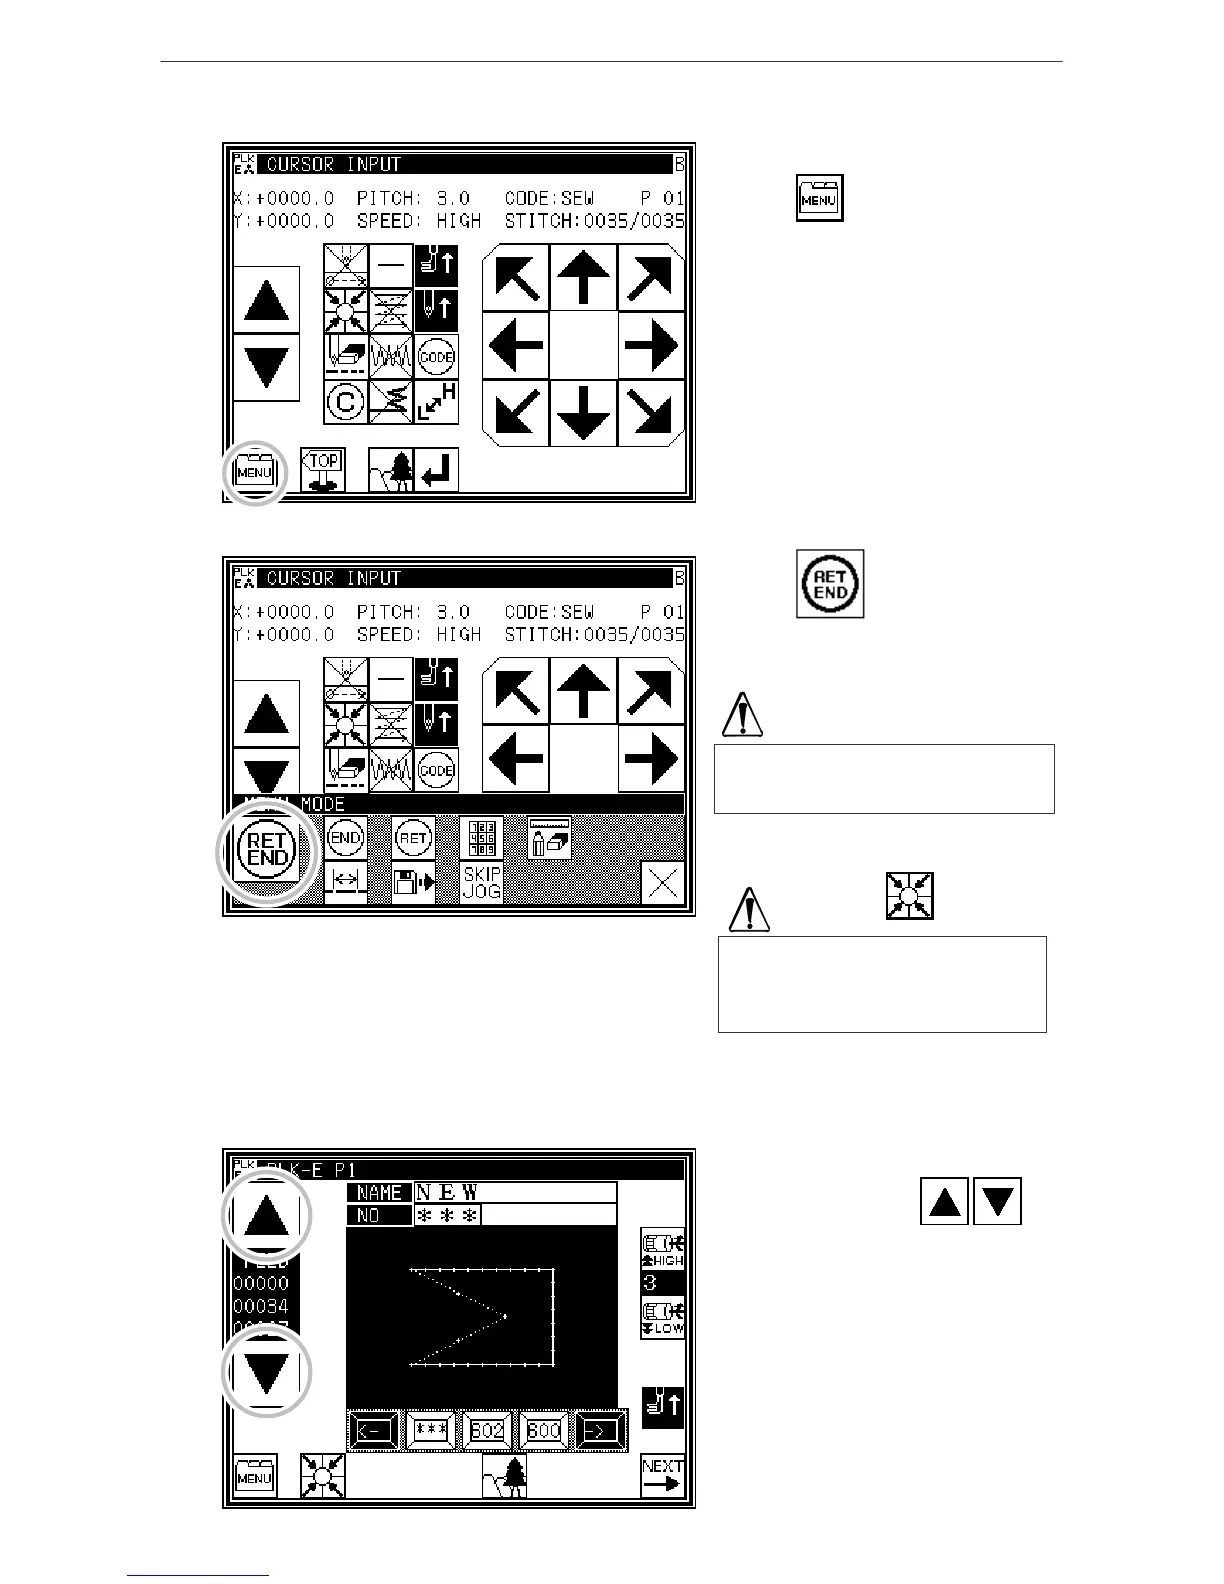
5. Setting stitching to D point
* Press .
6. Inputting the return/end code
* Press .
Data on feed data to the home position
and the end code will be created.
* A prompt for home position return will
appear.
Press .
* A message indicating that the data is
being created will appear, and then the
Standard screen will reappear.
7. Confirming the data
* Confirm the data.
Press the jog keys ( ),
so the sewing machine movement
can be confirmed. (Even if the data
input has not been completed, if the
data input last has been set, the
movement can be confirmed in the
same manner.)
The needle will rise to the UP position.
If the needle is not at the UP position,
it may lower once and then return to
the UP position.
The work holder will automatically return
to the home position. Take care when
the needle is lowered, etc.
* If the confirmed data is correct, save
the data.(Refer to [5] Reading, writing
and erasing data (floppy disk) and[6]
Reading, writing and erasing data
(internal memory).)
* If the data must be modified,
refer to section [12] Modification mode
Modifying the stitching data.

 Loading...