Disassembly/Reassembly Procedures: Radio Reassembly Sec 1: 8-35
8.9.1.7 Assemble Expansion Board Assembly (C)
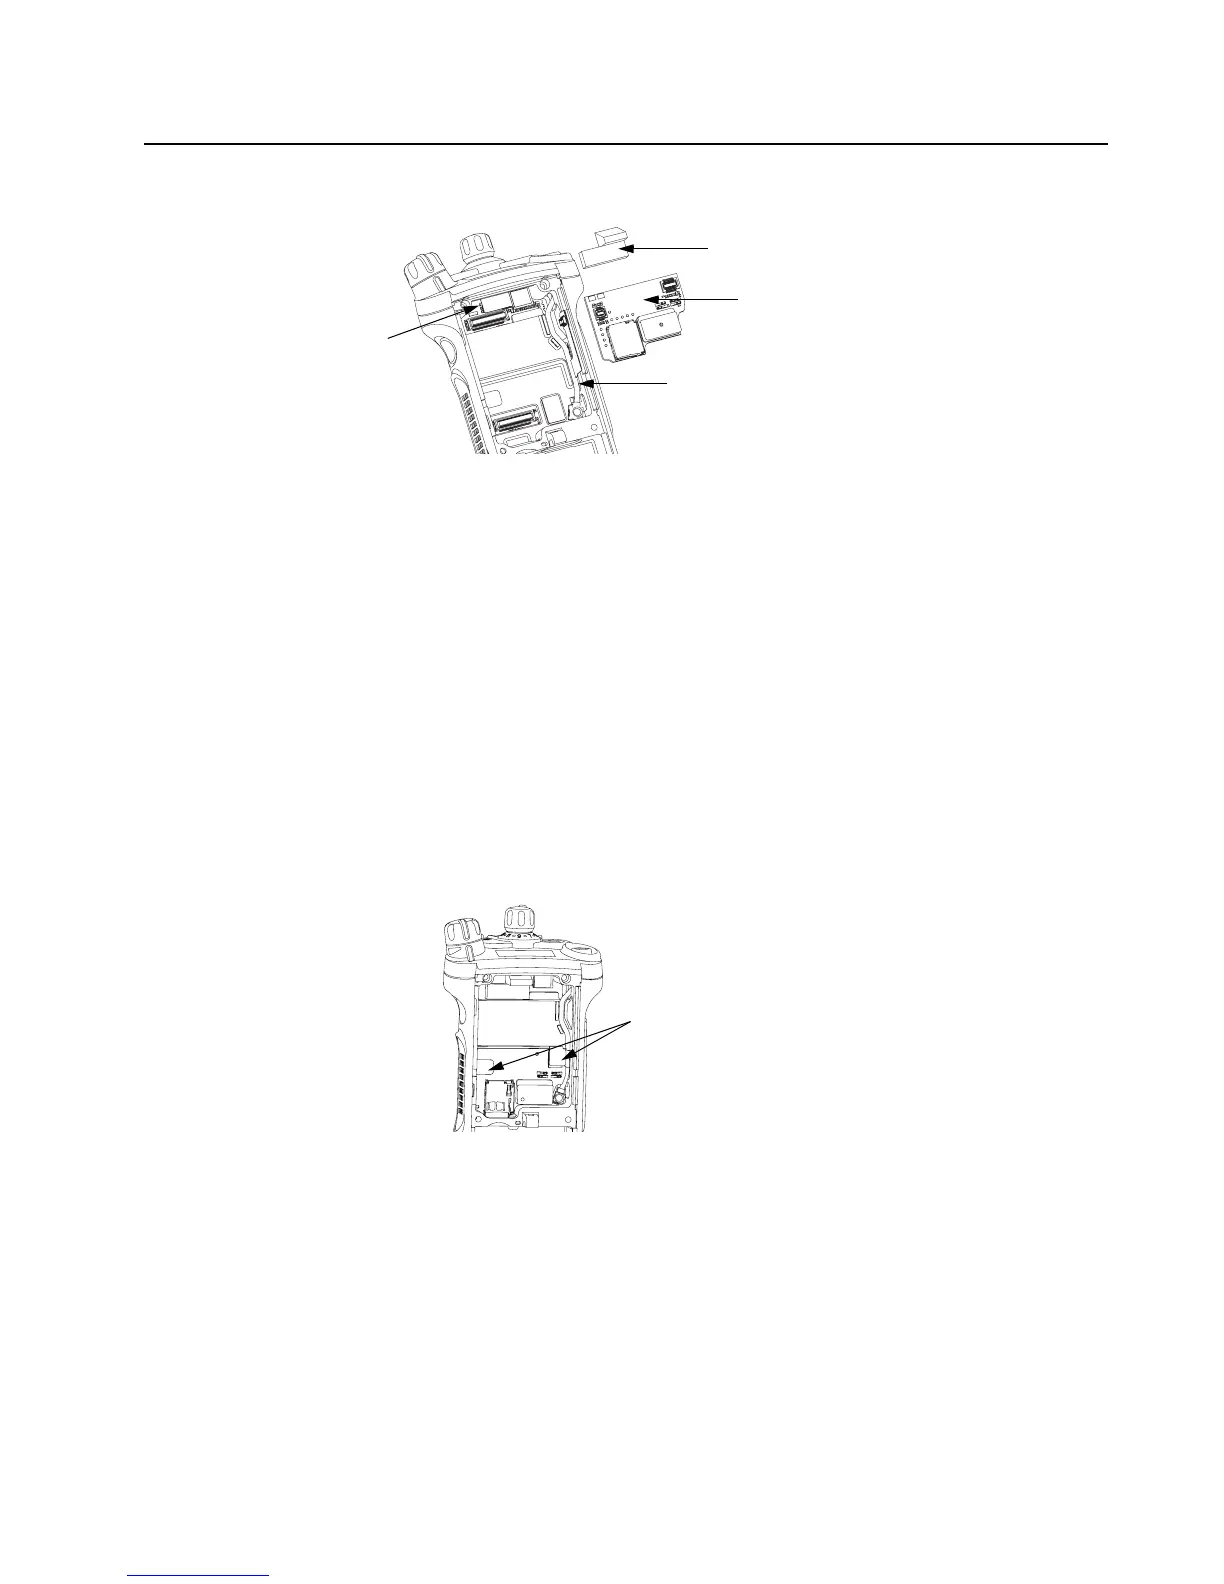
Figure 8-48. Assemble Expansion Board Assembly
1. If the Control Top Assembly (J) or VOCON Board Assembly (G, N) was NOT removed skip to
step 2.
Connect the Control Top Flex to the VOCON Board Assembly as shown in Figure 8-48.
2. If the RF Board Assembly (38) was NOT removed, skip to step 4.
Carefully align the Antenna Coax Plug to the Coax Receptacle on the RF board Assembly (F)
and slide the plug in using the Black Stick. Ensure the universal connector flex is not caught
under the antenna coax cable.
3. Tuck in the Antenna Coax Cable into its grooves as shown in Figure 8-48.
4. Plug the Expansion Board Assembly (C) to the VOCON Board Assembly (G, N) as shown in
Figure 8-48. Make sure the connector is fully engaged.
5. Connect the two Flex Connectors to their pairing connectors on the right and left sides of the
Expansion Board Assembly as shown in Figure 8-49.
Figure 8-49. Insert Flex Connectors
6. If the radio is equipped with an Option Board Assembly skip this step. Install the
Connector Plug (32) by inserting it onto the Option Board Connector on the VOCON Board
Assembly as shown in Figure 8-48.
Flex Connectors
Expansion Board Assembly (42)
Connector Plug (32)
Antenna Coax Cable
Flex Connectors

 Loading...