Disassembly/Reassembly Procedures: Ensuring Radio Submergibility Sec 1: 8-41
8.10.7.2 Attaching Grille Eliminator
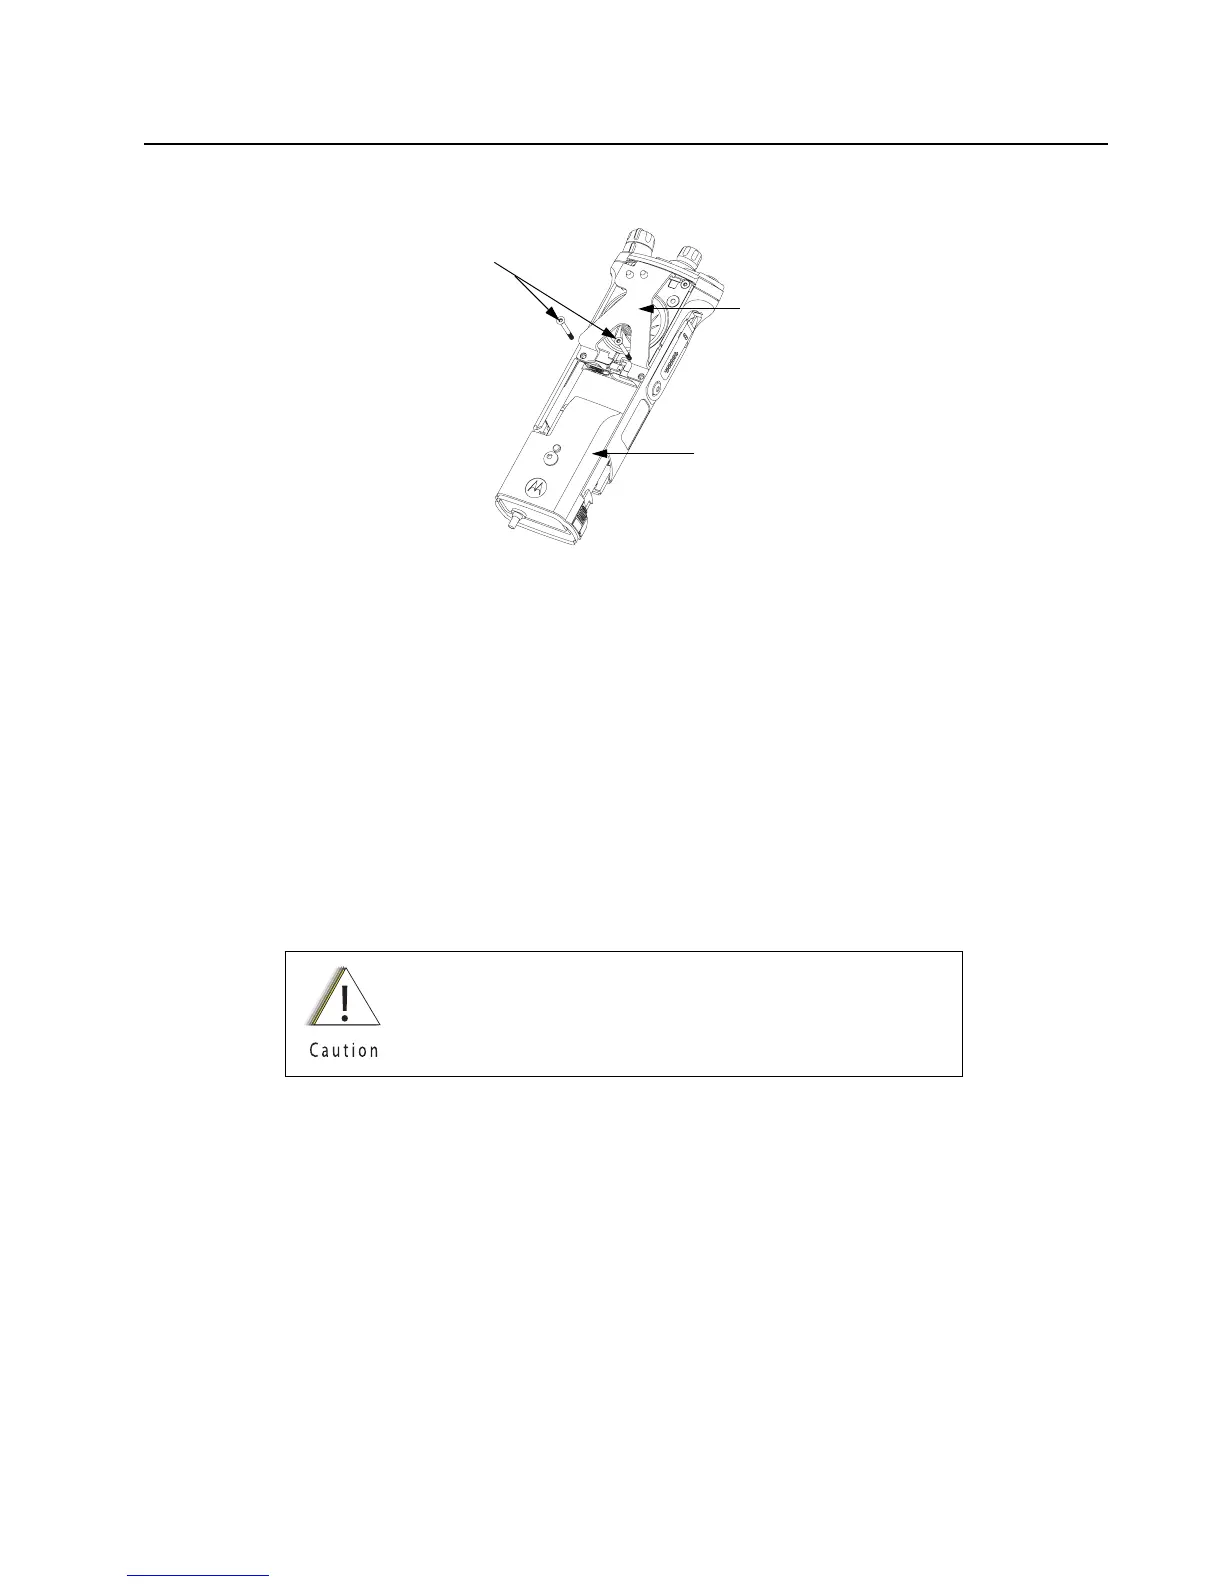
Figure 8-58. Attaching Grille Eliminator
1. Remove the Speaker Grille (27) by following steps in Section 8.7.1 on page 1:8-12 and
remove the Memory Door (33).
2. Slide the top of the Grille Eliminator under the Control Top Bezel (11) and swing it down
towards the radio. Secure the Grille Eliminator using the two center screws (29) with a torque
of 10 in lbs. See Figure 8-58.
8.10.7.3 Test Procedure
1. Attach the Vacuum Adapter onto the radio in the same manner as a radio battery. Ensure
both latches are clicked into place.
2. Place the radio on a flat surface with the Grille Eliminator facing upward.
3. Pull the knob on the Vacuum Pump to create vacuum. The vacuum test pressure should be
between 5-7 inHg.
4. Observe the gauge for approximately 2 minutes.
• If the needle falls less than 2 inHg, the radio passes the vacuum test.
i. Remove the Grille Eliminator
ii. Visually inspect the Port Seal Label (26) for proper adhesion to the
Speaker Module (23). Make sure there are no wrinkles or cuts to the material that would
cause a leak. Replace seal if damaged. (See appropriate section for servicing the
seals).
iii. If the seal passes this inspection, this radio is approved for submergibility. No additional
testing is required.
iv. Replace the Speaker Grille Assembly (27) and Memory Door (33) as described in the
reassembly procedures.
Ensure that the vacuum pressure NEVER exceeds 7 inHg.
The radio has pressure sensitive components that can be
damaged if the pressure exceeds this limit.
Grille Eliminator
Vacuum Adapter
Screws

 Loading...