MSENSE
®
DGA 9 7045899/02 EN – 11.2020 Page 33
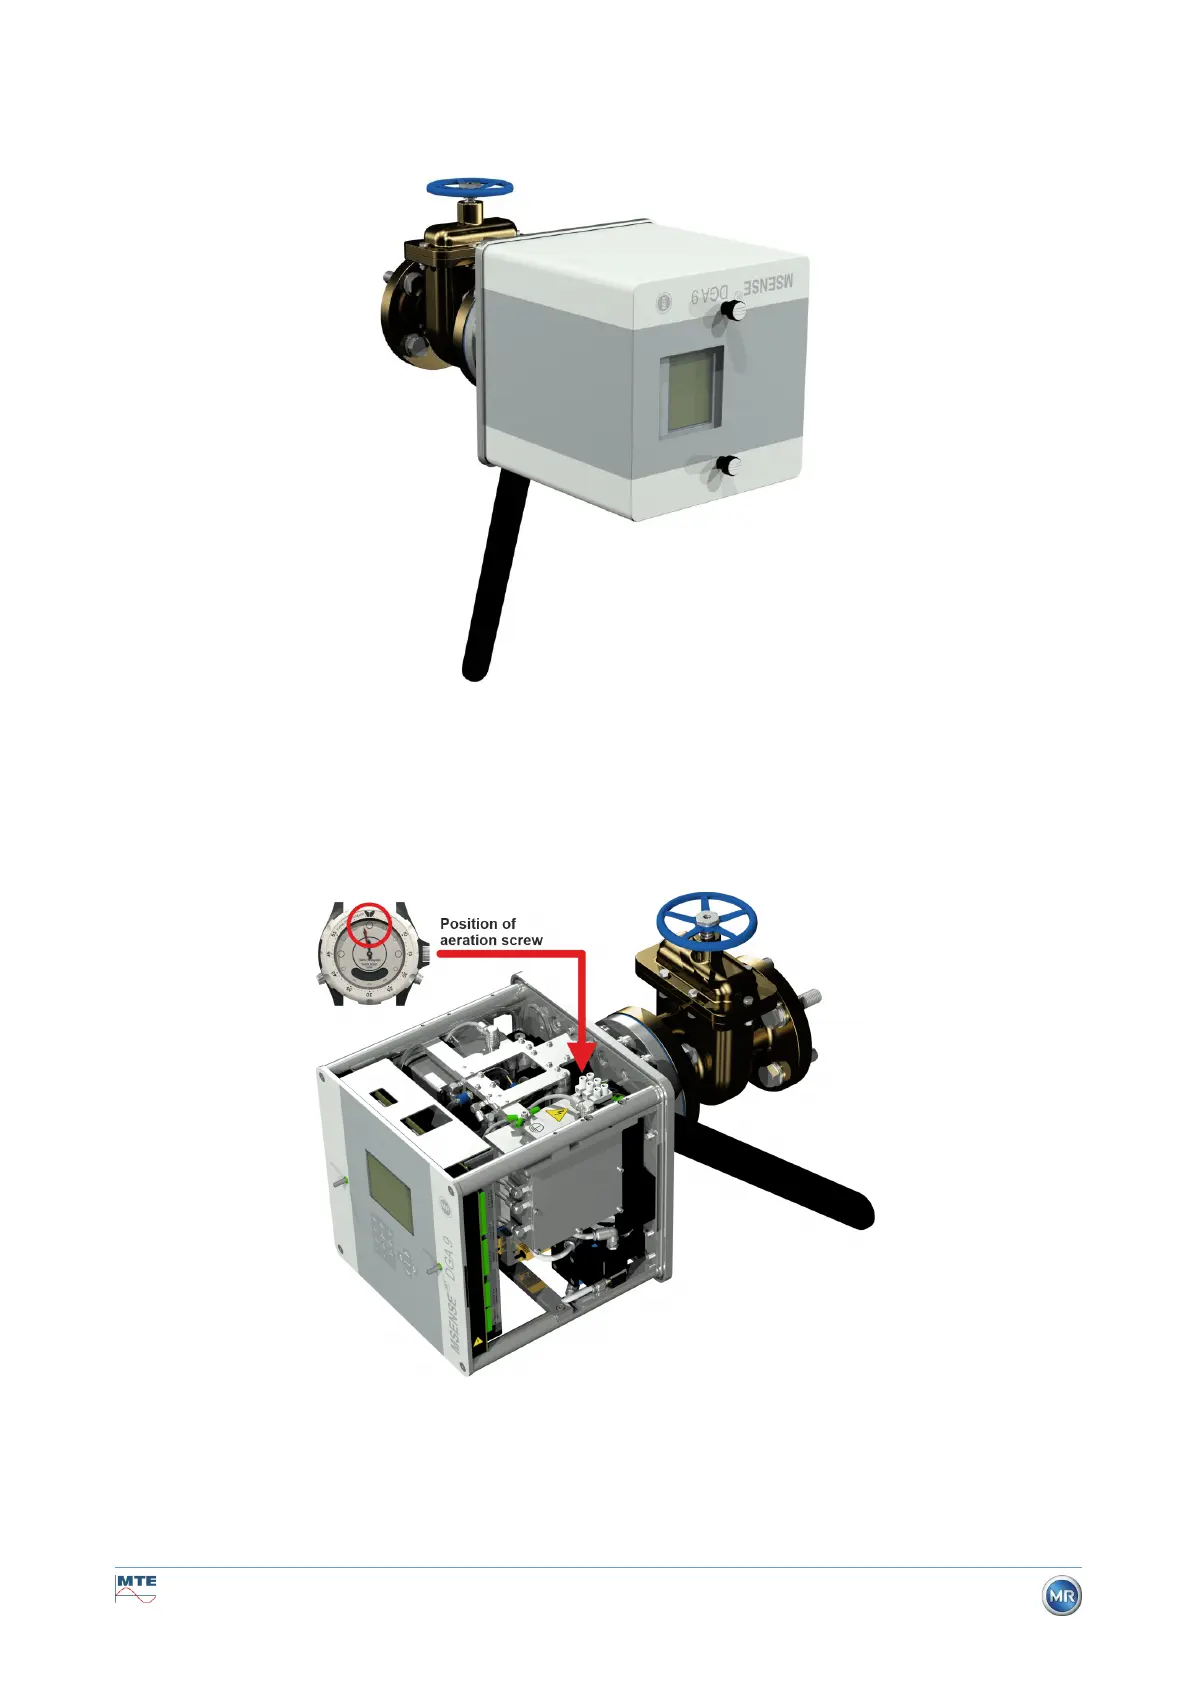
• Now use an M55 open-ended spanner or a 1½" adjustable spanner to screw the MSENSE®
DGA 9 by a further 5 or 6 turns clockwise into the threaded flange and stop when the vent screw
is in the 9 o'clock position.
Remark: If the unit can be screwed in without a great deal of effort being necessary, too little thread
sealing adhesive has been used. The device has to be unscrewed again, the thread sealant has to
be completely removed with a brass brush and the mounting has to be carried out again.
• Remove the two knurled screws and the device protective cover.
• Now align the device by turning it clockwise until the vent screw is at the 12 o'clock position at
the top. Make sure the device is fitted firmly in this final position.