MAINTENANCE MANUAL
VC2E-MM-00
31
Replacing X-Motor
Please follow the steps below to replace the X-motor.
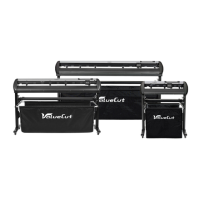
1. Loosen the 4 retaining screws securing
the bracket. (No need to remove them)
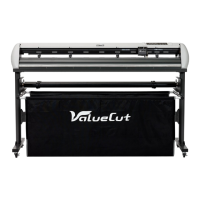
2. Loosen the tension adjustment screw.
(No need to remove them)
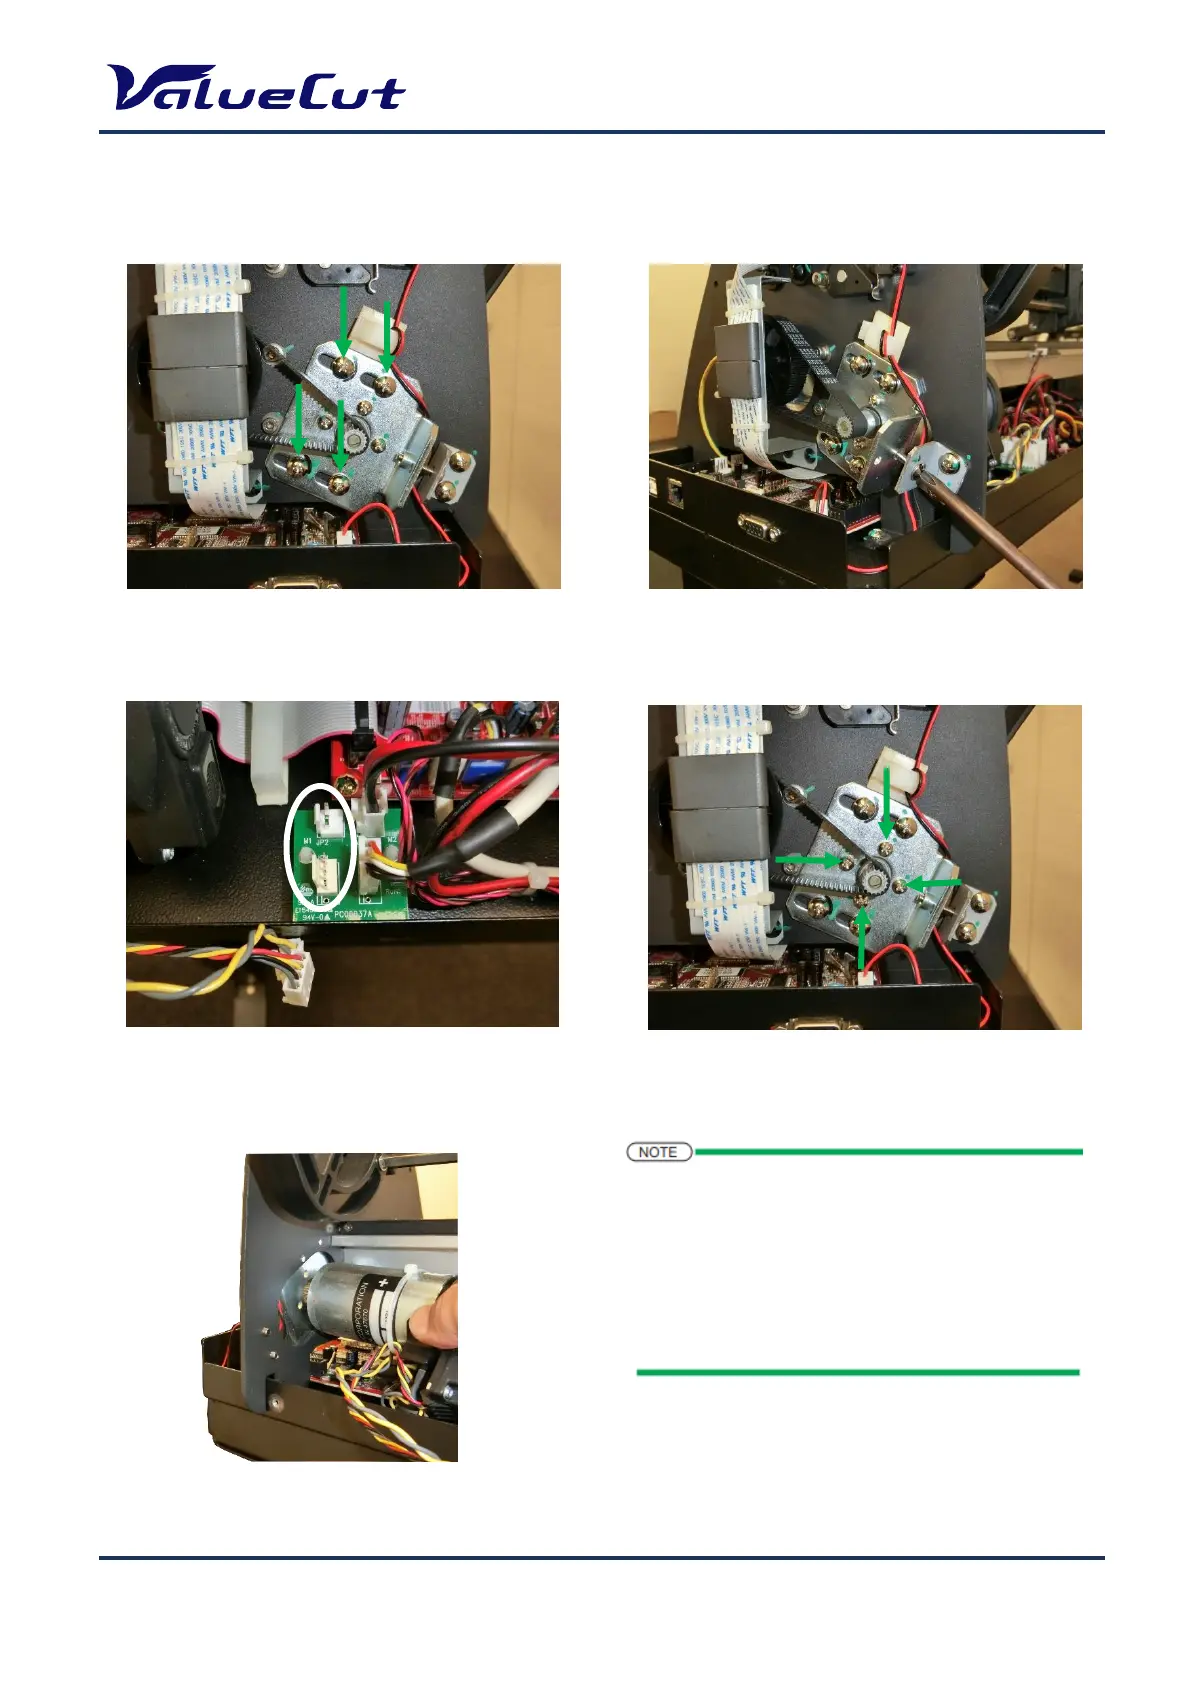
4. Remove the 4 screws securing the X-motor.
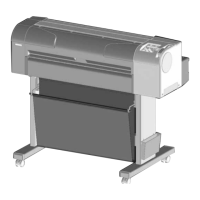
3. Disconnect the 2 cables connected to the
motor.
1: Install the X-motor in the reverse order of removal.
2: Belt tension adjustment is required after the
replacement.
For details, refer to “Belt Tension Adjustment”.
3: Please connect the cables to the X-motor after the
belt tension adjustment is completed.