By default, the Enable radio button is selected and the access point receives its time from a default
NETGEAR NTP server.
5. Select the Use Custom NTP Server check box.
6. Take one of the following actions:
• Enter the host name of the NTP server.
By default, the Hostname radio button is selected.
• Select the IP address radio button and enter the IP address of the NTP server.
7. Click the Apply button.
Your settings are saved. When the access point connects over the Internet to the new NTP server, the
date and time that display on the page are adjusted according to your settings.
For information about setting the time zone, see Set the Time Zone on page 96.
Set the Time Zone
The access point might detect the time zone automatically or you might need to adjust the time zone and
daylight saving time settings.When the access point synchronizes its clock with a Network Time Protocol
(NTP) server, the page shows the date and time. If the page does not show the correct date and time, you
might need to set the time zone and adjust the daylight saving time setting.
To set the time zone and adjust the daylight saving time setting:
1. Open a web browser from a computer that is connected to the same network as the access point or to
the access point directly through an Ethernet cable or WiFi connection.
2. Enter the IP address that is assigned to the access point.
A login window opens.
3. Enter the access point user name and password.
The default user name is admin. The password is the one that you specified the first time that you
logged in.The user name and password are case-sensitive.
The Dashboard page displays.
4. Select Management > Configuration > System > Basic > Time.
The page that displays lets you change the time settings.
5. From the Time Zone menu, select the time zone for the area in which the access point operates.
6. Click the Apply button.
Your settings are saved. When the access point connects over the Internet to an NTP server, the date
and time that display on the page are adjusted according to your settings.
For information about other time settings, see Specify a Custom NTP Server on page 95.
Manage and Maintain the Access Point
96
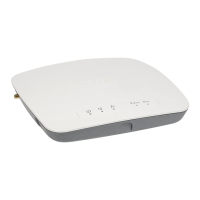
Insight Managed Smart Cloud Wireless Access Point WAC505 User Manual
 Loading...