14
DRAFT
CHAPTER 3
3 –
SETTING UP SMARTNA-X
This chapter provides instructions on setting up the SmartNA-X hardware and connecting to the Management/
Network port and Console/Serial port, which provides local access to command line interface. The chapter covers
the following major topics:
• Check items included, page 14
• Installing the SmartNA-X chassis and TAP modules, page 14
• Powering up the system, page 15
• Connecting to the Management/Network port, page 16
• Logging in to SmartNA-X, page 16
Check items included
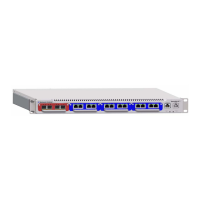
The following items are included with the SmartNA-X system:
• SmartNA-X chassis
• SmartNA-X TAP modules (R
ed=10 Gbit/s, Blue=1 Gbit/s)
• 10G optical cables
• Serial Management Cable – DE-9 female to 8P8C (1.5 meters)
• Chassis rack mounting kit (brackets and screws)
•2 x power leads
Check all items are included and repor
t any missing or damaged items immediately to Network Critical for
replacement. See, Appendix I,“Contact & Support” for contact information.
Installing the SmartNA-X chassis and TAP modules
CAUTION: Electrostatic discharge can damage electrical components. SmartNA-X components are wrapped in
antistatic bags to prevent this damage. B
efore handling SmartNA-X components, attach an antistatic wrist strap to
a grounded metal surface to prevent electrostatic discharge from damaging your hardware. If you do not have a
wrist strap, just prior to removing the product from ESD packaging and installing or replacing hardware, touch an
unpainted metal surface for a minimum of 5 seconds.