EDH0162En1040 – 06/99 8.22
MM4005 Appendix D — Motion Program Examples
Before starting to write the actual program, we need to consider one more
thing: to assure a good result, the glue must start being dispensed while
the motion is in progress. Thus, we have to start the motion first and then
turn on the dispenser.
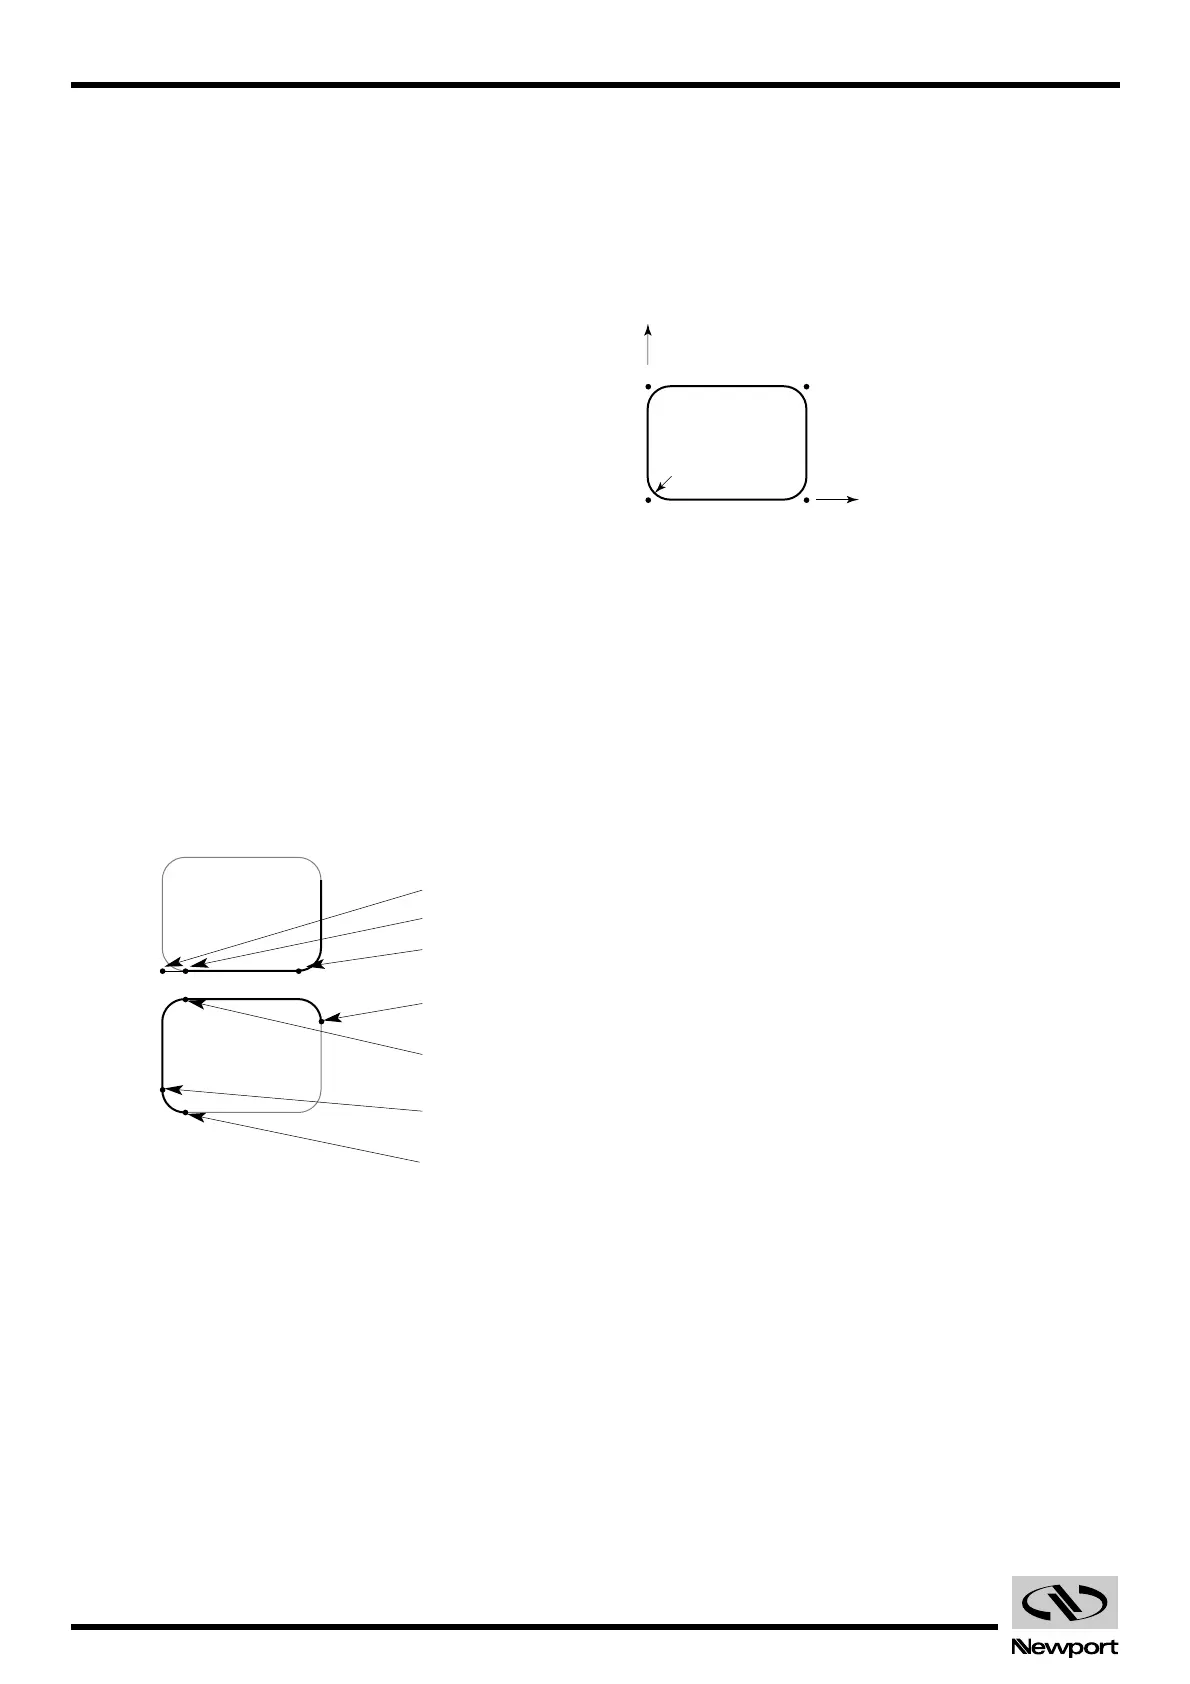
The motion we decide to perform is shown in Fig. D.4.
Fig. D.4 — Desired Motion Result.
The program will have the following listing:
3XX
Erase program #3, if it exists.
3EP Enter programming mode and store all entries as
program #3.
CB Clear all output I/O bits; set all bits to zero.
1PA0,2PA0,WS Move axes #1 and #2 to absolute position 0 mm;
wait for all axes to complete motion.
1VA4,2VA4 Set velocity of axes #1 and #2 to 4 mm/sec.
1AC8,2AC8 Set acceleration of axes #1 and #2 to 8 mm/s
2
.
1PA14 Move axis #1 to absolute position 14 mm.
1WP2,3SB Wait for axis #1 to reach position 2 mm; set bit #3.
1WP12,2PA10 Wait for axis #1 to reach position 12 mm; start axis
#2 and move to position 10 mm.
2WP8,1PA0 Wait for axis #2 to reach position 8 mm; start axis
#1 and move to position 0 mm.
1WP2,2PA0 Wait for axis #1 to reach position 2 mm; start axis
#2 and move to position 0 mm.
2WP2,1PA4 Wait for axis #2 to reach position 2 mm; start axis
#1 and move to position 4 mm.
1WP2,3CB Wait for axis #1 to reach position 2 mm; clear bit #3.
3QP End of program #2; quit programming mode.
Artisan Technology Group - Quality Instrumentation ... Guaranteed | (888) 88-SOURCE | www.artisantg.com
 Loading...