ACCESS GATEWAY
68 Installing the Access Gateway
1. Choose an appropriate physical location that allows a minimum clearance of 4cm either
side of the unit (for adequate airflow).
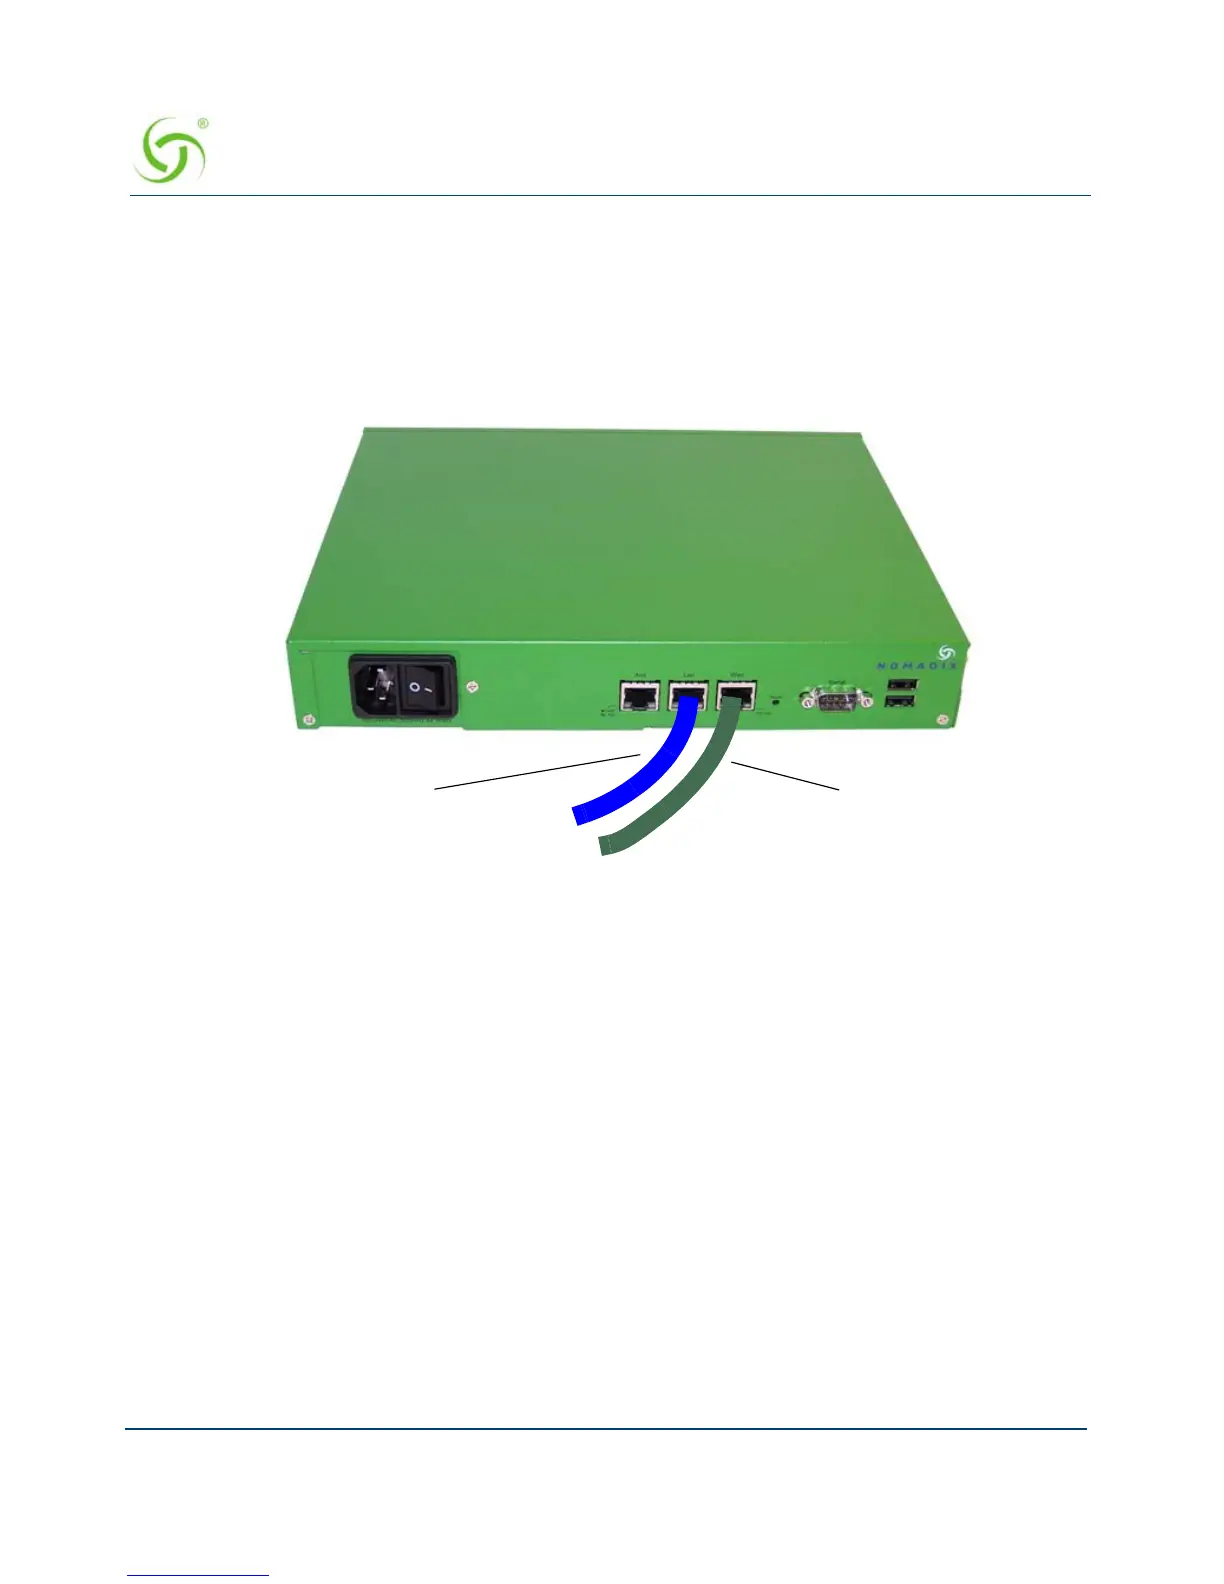
2. Connect the Access Gateway to the router, then connect the Access Gateway to the
customer’s subscriber port.
3. Connect the power cord and turn on the Access Gateway.
4. Go to “Establishing the Basic Configuration for Subscribers” on page 68.
Establishing the Basic Configuration for Subscribers
When you have successfully established the start up configuration and installed the unit onto
the customer’s network, connect to the Access Gateway via Telnet. You must now set up the
basic configuration parameters for subscribers, including:
Setting the DHCP Options – DHCP (Dynamic Host Configuration Protocol) allows
you to assign IP addresses automatically (to subscribers who are DHCP enabled). The
Access Gateway can “relay” the service through an external DHCP server or it can be
configured to act as its own DHCP server.
Setting the DNS Options – DNS (Domain Name System) allows subscribers to enter
meaningful URLs into their browsers (instead of complicated numeric IP addresses).
DNS converts the URLs into the correct IP addresses automatically.