Chapter 4 Reprocessing Operations
95
ENDOSCOPE REPROCESSOR OER-Pro Operation Manual
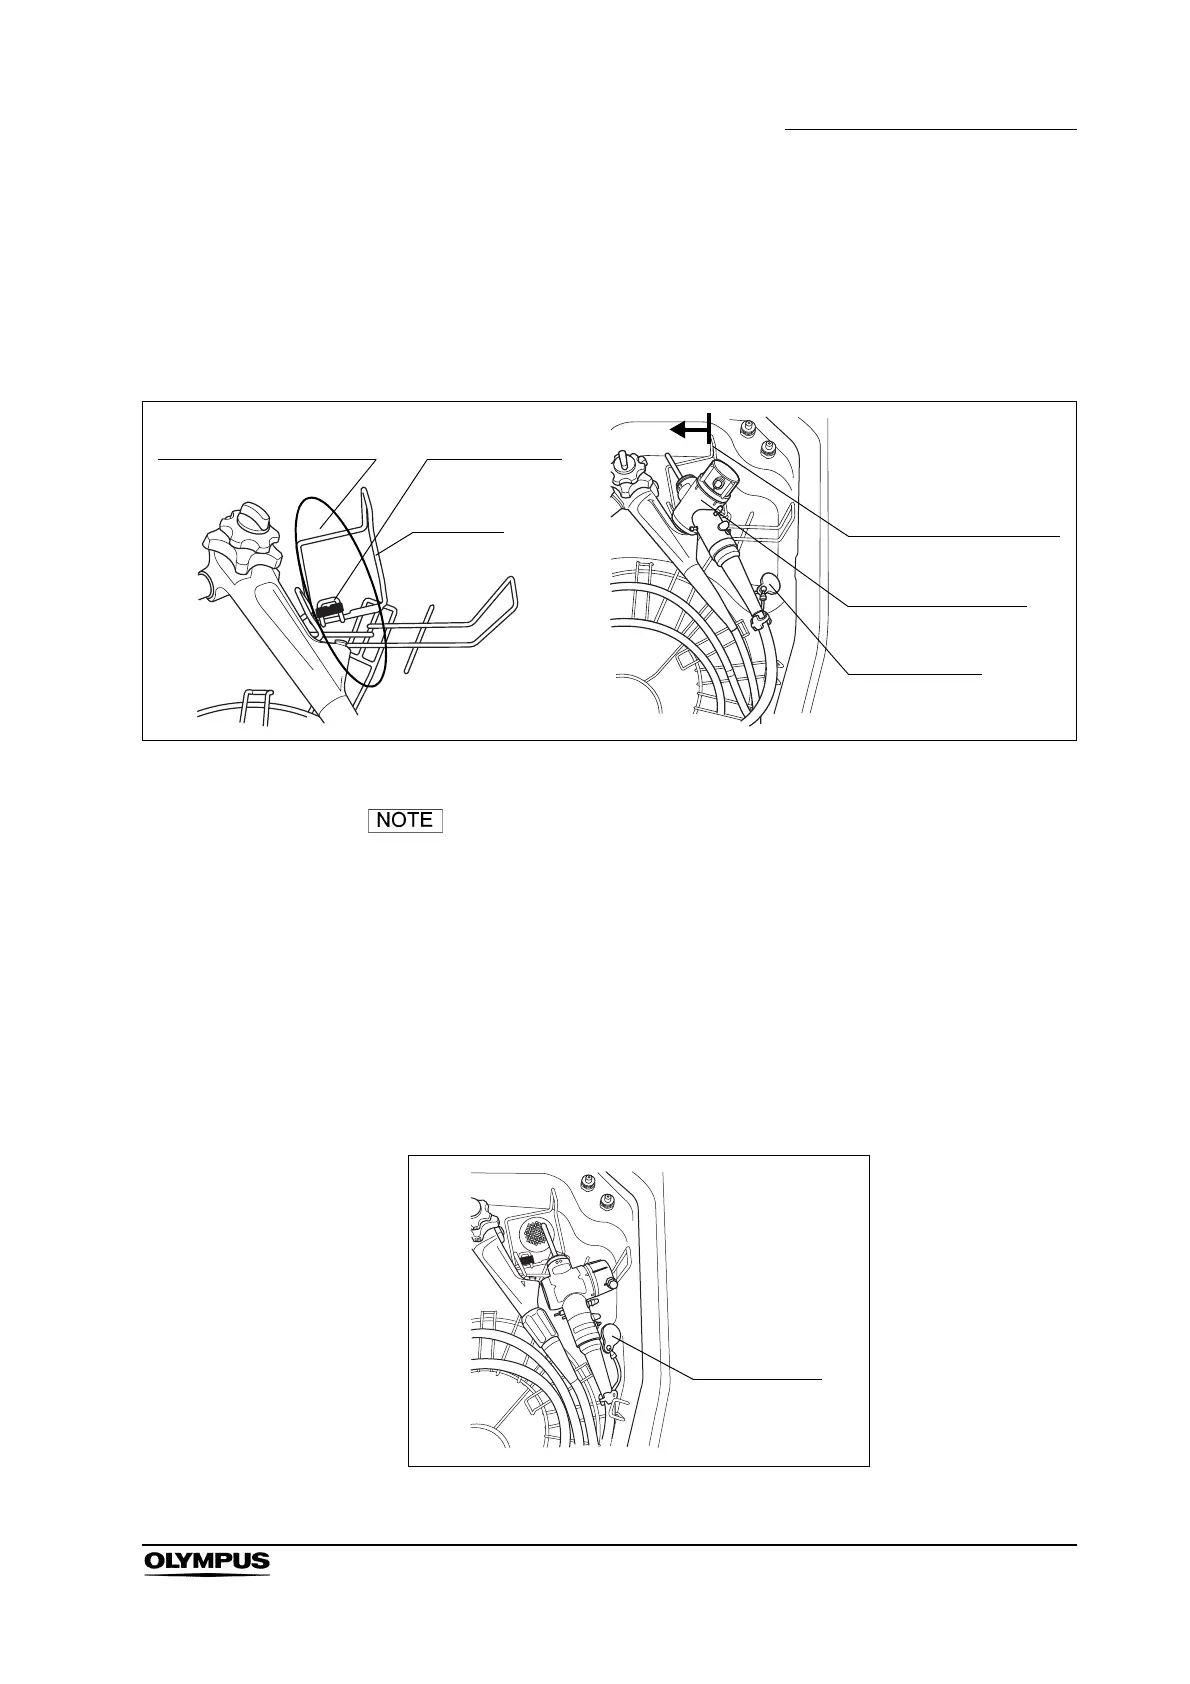
When loading a 180 or older series endoscope as a first
endoscope
Tilt the endoscope connector and place it over the black marker located on the
left side of the divider as shown in Figure 4.15. If scope ID tag is attached to the
endoscope, place the scope ID tag in the position shown in Figure 4.15.
Figure 4.15
• For setup of “OSF-V60”,”two channel endoscope”, and
“ultrasonic endoscope”, refer to the “OER-Pro Quick
Reference Guide”.
• When loading only one conventional endoscope or two
conventional endoscopes that are 180 series or older, it is
possible to place endoscope connector without tilting. In this
case, the endoscope connector of the first endoscope should
be placed on rear right of the basin horizontally as shown in
Figure 4.16. If scope ID tag is attached to the endoscope,
place the scope ID tag in the position shown in Figure 4.16.
Figure 4.16
Scope ID tag
Tilt the endoscope
connector
Make sure that the
endoscope connector is
placed to the left of the
divider.
Setting position for first
endoscope connector
Black marker
Divider