69
OS32C
User’s Manual
Chapter3
Basic Operation of Configuration Software
E
iii) Click OK.
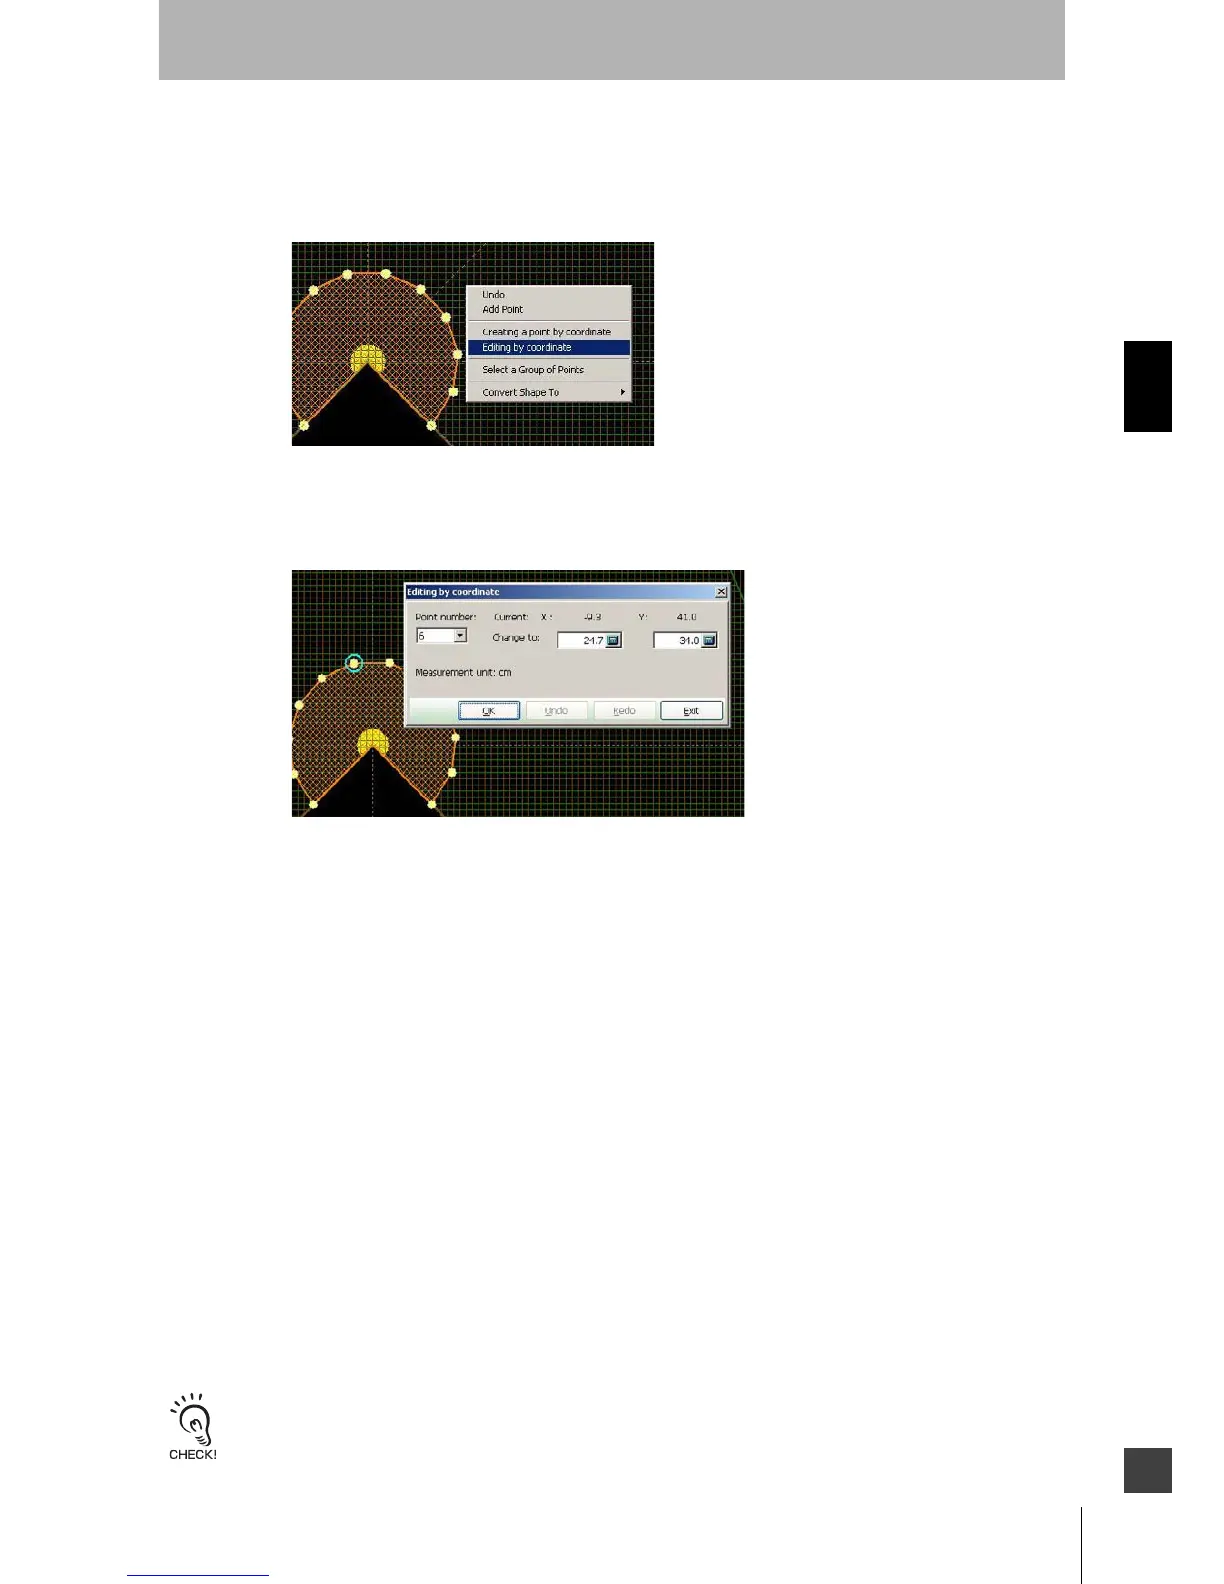
c) To change the location of a point by specifying a coordinate:
i) Right-click on the zone and select Editing by coordinate
Fig. 3-58 Edit a Point by Coordinate
ii) Select the point to be modified by selecting the point number from the pull-down menu. The
selected point will be circled.
Fig. 3-59 Specify x-y Coordinate
iii) Specify the new desired x-y coordinates for the selected point.
iv) Click OK.
d) To remove points:
i) From the Edit menu select Select a Group of Points. (This menu can also be accessed by
right-clicking on the zone).
ii) Use the mouse to select the desired point(s).
iii) From the Edit menu select Delete Selected Points.
4. When zone edit is finished, click Edit Zones from Configuration menu and verify if the checkbox is
being unselected. Now zone configuration is complete.
5. Send the configured zone information to the OS32C for registration. From Configuration menu, click
Send to Sensor/Enter CFG Mode, All Changes. Configure by following instructions on a displayed
message.
6. Reset the OS32C by following the prompts.
Configuration is now complete.
Safety and warning zones must be configured so that they maintain a distance of 100mm from the wall or fixtures.
 Loading...