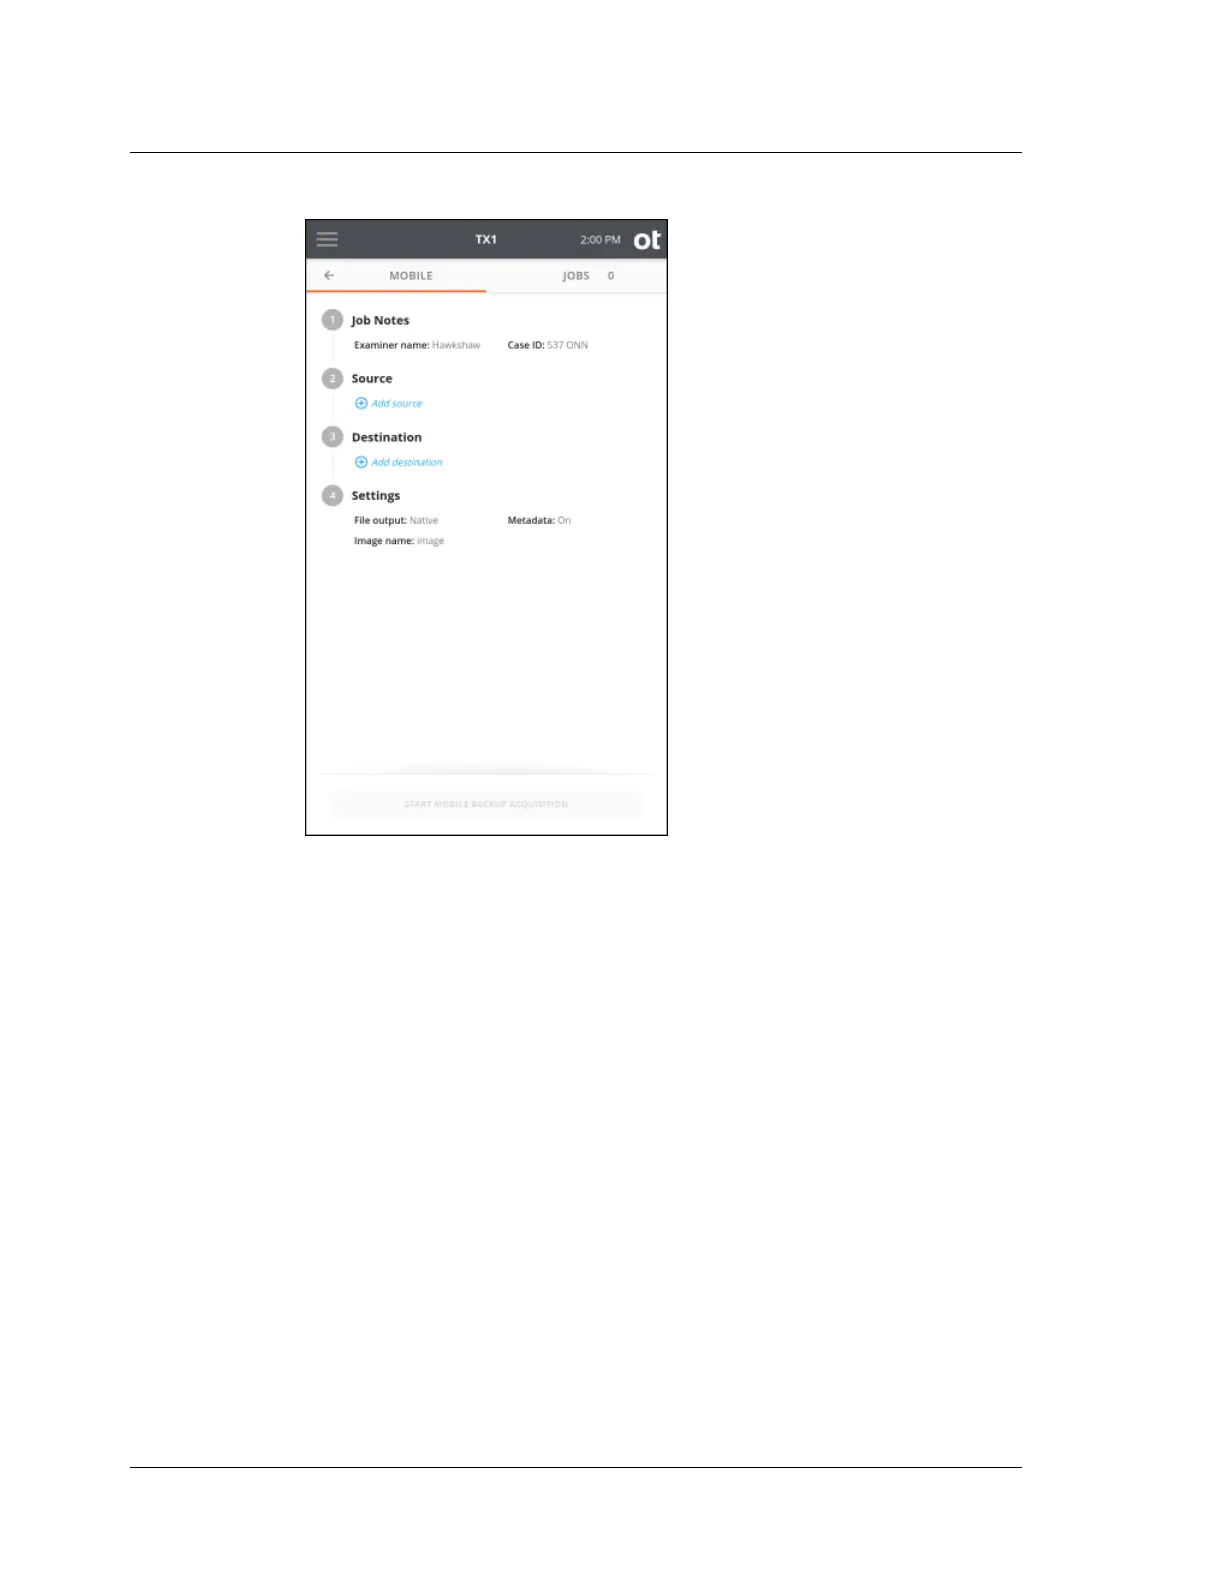
The job setup screen is organized in a natural workflow from top to bottom, but
most steps and settings can be accessed in any order. The default values display
for each step and setting. Tap on the step number or heading to expand the
section and view or change the settings.
If only one source and one destination (with a detected filesystem) are
connected, they are automatically selected. If you are satisfied with the default
settings and the selected source and destination devices, press the Start Mobile
Backup Acquisition button at the bottom of the screen to begin the job.
3. To modify or enter job notes, tap the 1 or Job Notes heading to expand the
section. Tap a text box to modify or enter Examiner Name, Case ID, or Notes
values and the virtual keyboard is displayed on the bottom half of the screen. If
desired, you can also attach a USB keyboard to one of the front Accessory USB
ports to make data entry easier.
Chapter 4 Using TX1
156
OpenText™ Tableau™ Forensic TX1 Imager
ISTX240300-UGD-EN-1