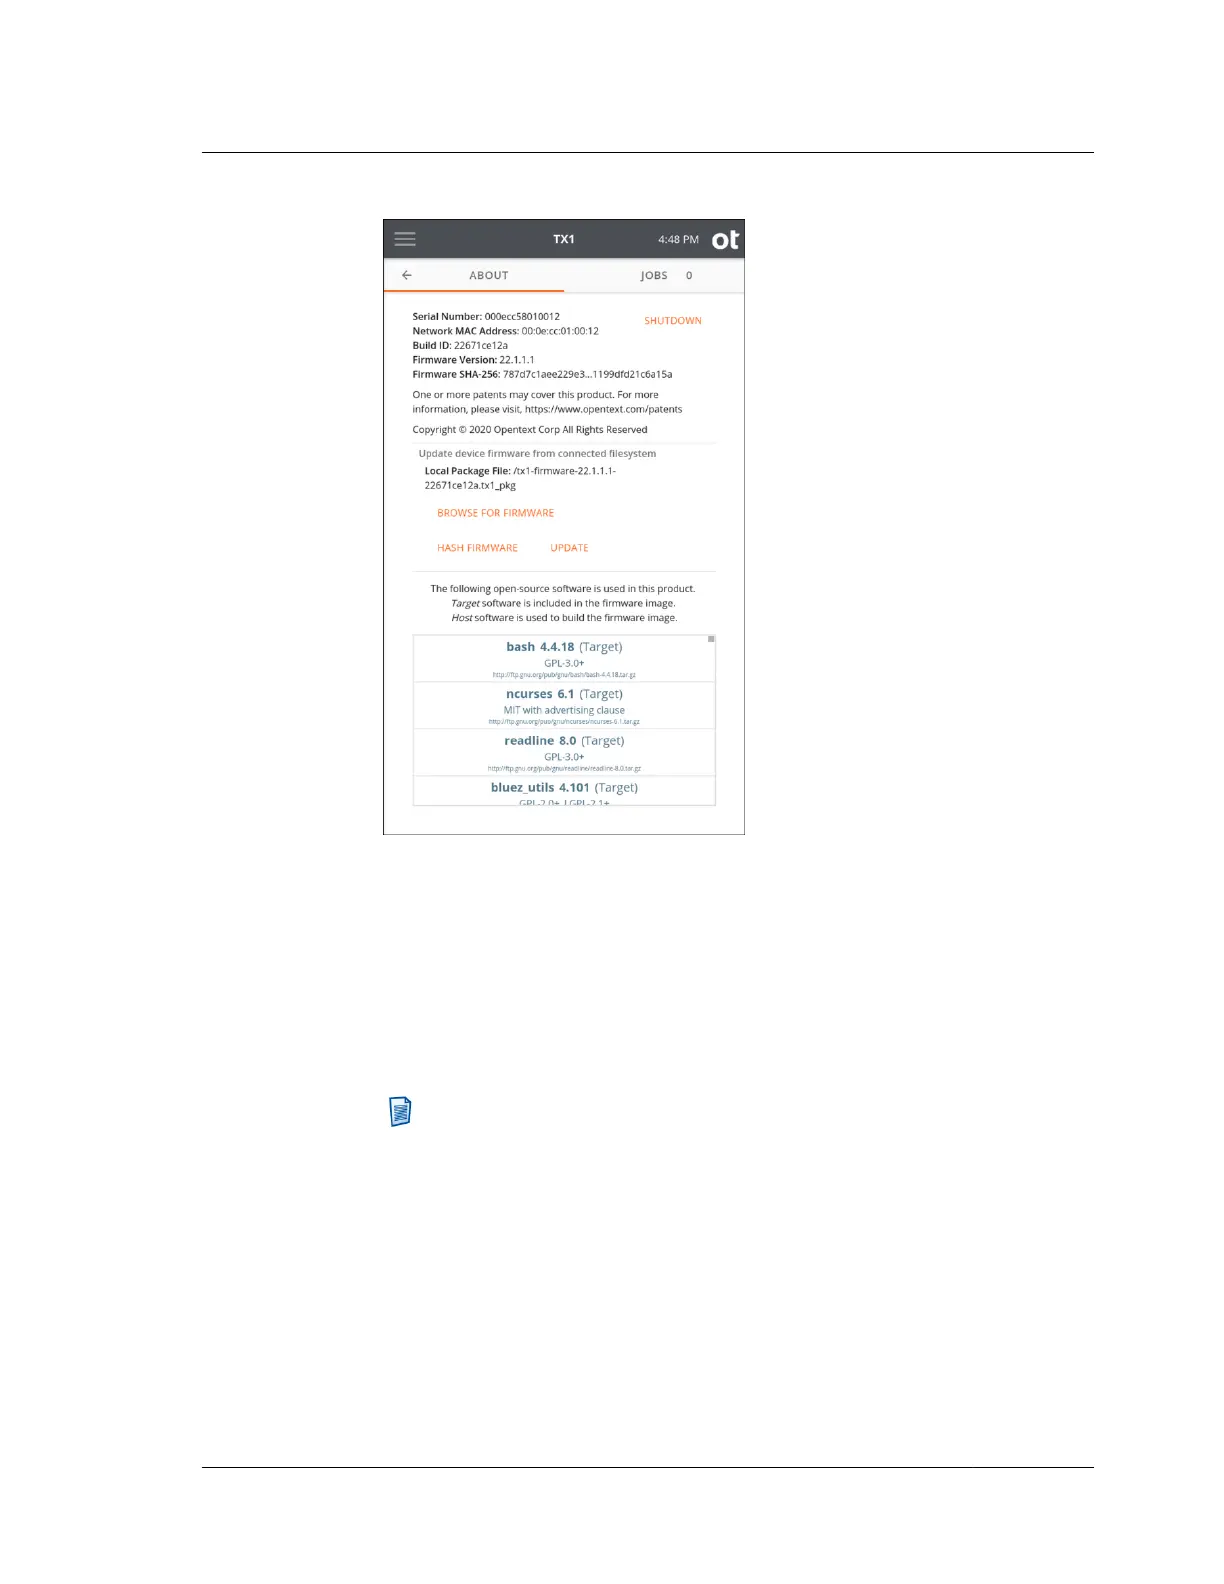
6. Tap Browse for Firmware, which will display a screen that lists all mounted
drives/shares.
7. Tap on the desired drive/share and then use the Browse window to navigate to
the folder that contains the TX1 firmware package file.
8. Select the desired .tx1_pkg file, and then tap the Select button in the bottom
right corner. The browse screen will automatically close, showing the name of
the local package file that was selected in the About screen.
Note: At this point, you may opt to just run a SHA-256 hash on the
selected firmware package file to confirm it is the right one as compared to
the hash value specified in the Release Notes for the same firmware
version. After doing so, you will be able to proceed with the update
process.
9. When you are ready to update the TX1’s firmware, tap Update and the
firmware update process will begin. Note that updating TX1 firmware
completely takes control of the unit, intentionally preventing you from
performing any other TX1 actions during the update process. Also, once the
firmware update process is complete, the TX1 will automatically be rebooted
using the new firmware.
3.2. Configuring TX1
ISTX240300-UGD-EN-1
User Guide
41