No. P10355
|39 |
10. OPERATION (continued)
10.1.8
WAVE PULSE Function (optional)
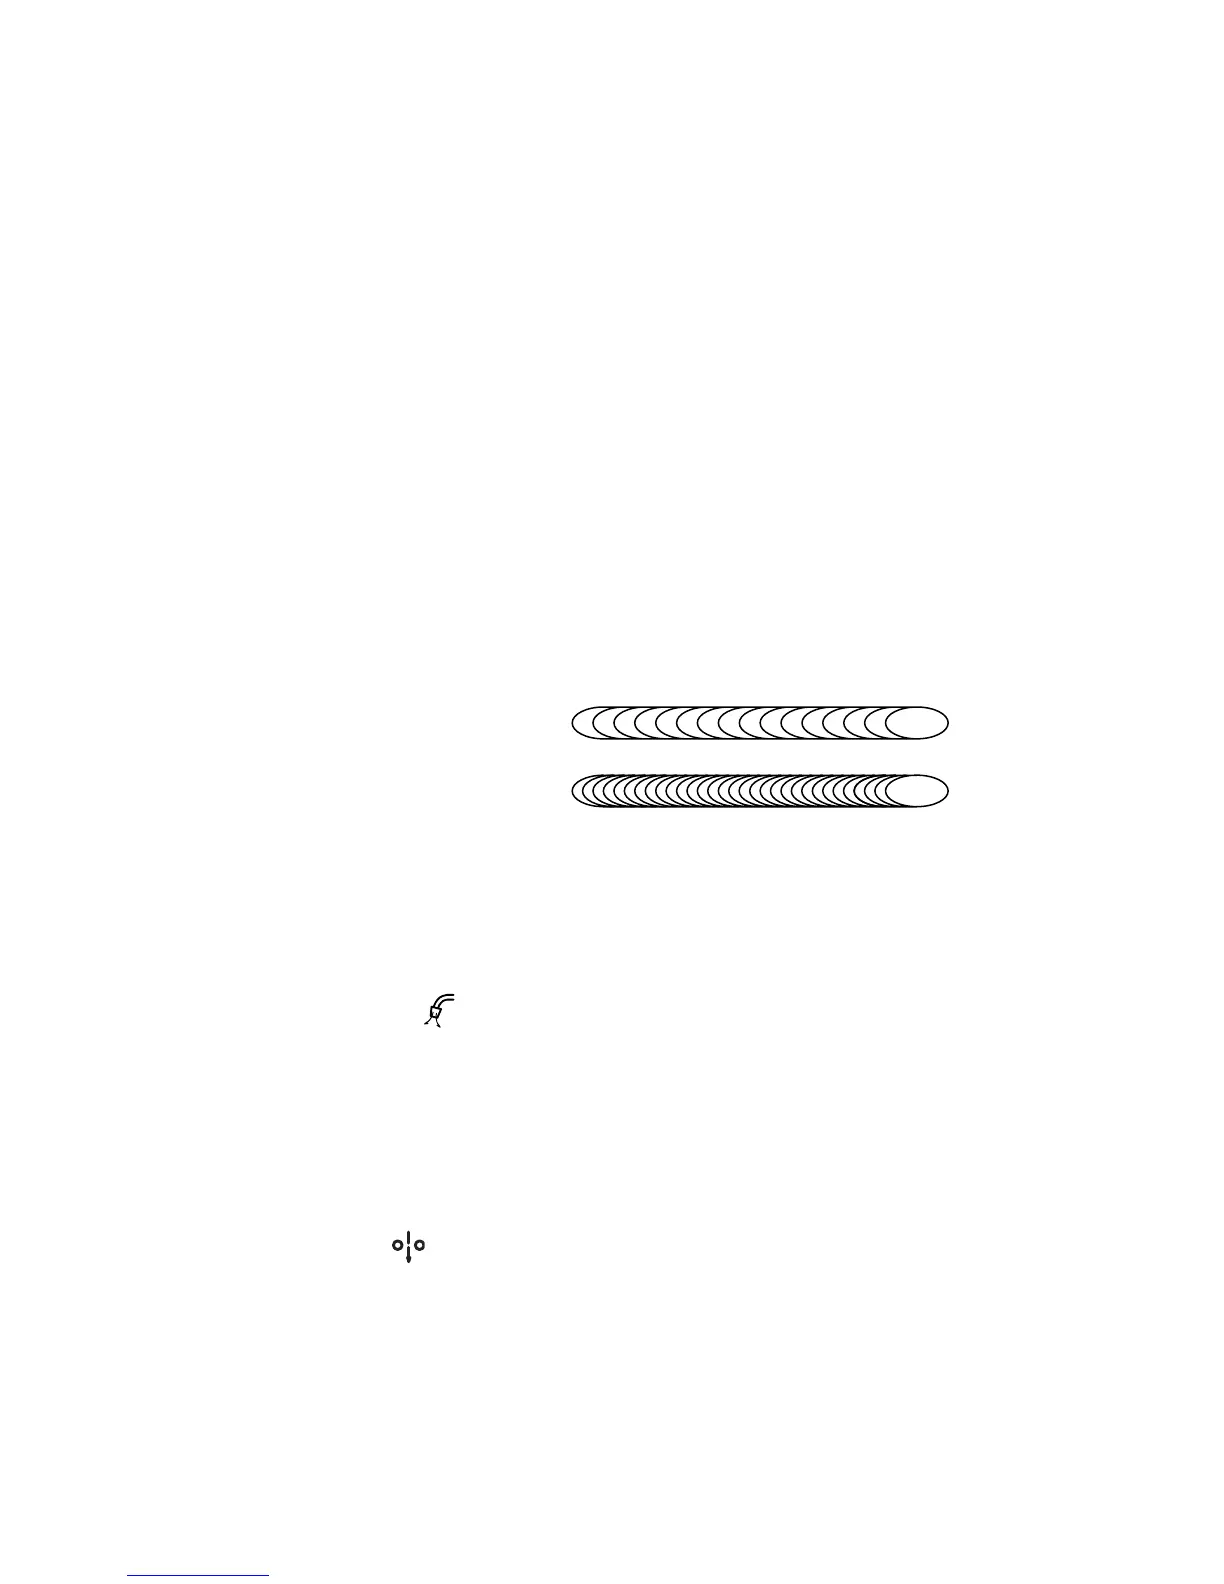
In wave pulse welding, the ripple bead appearance is changed by applying two separate
pulses cyclically at low frequency. This feature will also assist in welding joints that have
some poor fit up or gaps. Although, the wave mode is usually most applicable for fully
automatic welding, benefits are also achieved even in semi-automatic applications. Good
bead appearances are obtained by setting the wave frequency to 5Hz or more even for
semi-automatic.
When setting wave pulse frequency, select “DC WAVE PULSE” with the WELDING
METHOD key [1]. Normally, the WELDING METHOD key does not function during pulse
welding or no-pulse welding. When the WAVE PULSE key is pressed while “INITIAL
CONDITION”/ “MAIN CONDITION”/ “CRATER-FILL. CONDITION” is selected, the WAVE
PULSE lamp (located at the upper left of the WAVE PULSE key) lights up, the setting value
appears in the left display, the “Hz” LED lamp lights up. Under these conditions, wave pulse
frequency can be adjusted while turning the parameter adjusting knob. The setting range of
wave pulse frequency is 0.5 Hz to 32 Hz. Adjust wave pulse frequency until you can obtain
the desired bead appearance.
When pressing the WAVE PULSE key or DISPLAY CHANGE key again, return to the last
parameter that you have set. When changing the display to a current-related parameter,
press the A/m/min selector key [4]. When changing the display to a volt-related parameter,
press the V/r selector key [5].
high frequency
low frequency
NOTE:
xWave pattern of the welding bead varies depending on the heat input during
welding.
xWhen using annealed wire, bead surface may blacken somewhat if shorting occurs
frequently during the welding operation.
10.1.9 GAS CHECK
Function (with gas save function)
This function is used when opening the discharge valve of the shield gas and when adjusting
the gas flow rate. When pressing the GAS CHECK key [17] once, the GAS CHECK lamp
(located at the upper left of the GAS CHECK key) lights up and allows gas to flow. Pressing
the GAS CHECK key again turns off the GAS CHECK lamp and stops discharging gas. In
more than two minutes after the GAS CHECK key is pressed, gas discharge automatically
stops and the GAS CHECK lamp goes out. In the event that the machine is started while
gas is being checked, gas stops flowing after welding is completed (upon completion of post-
flow) and gas does not continue to flow during down period.
10.1.10 INCHING Function
When pressing the INCHING key [18], the INCHING lamp (located at the upper left of the
INCHING key) lights up and begins feeding wire. Releasing the key stops wire feeding and
causes the INCHING lamp to go out. When changing the wire feed rate by turning the
parameter adjusting knob [6], make sure that the INCHING lamp lights up. When connecting
to the analog remote control (optionally available), the INCHING key on the front panel can
not be used for inching operation. When connecting to the analog remote control, use the
inching switch on the remote control to activate the INCHING function.