376
SEP 2006
Ver. 1.0
DP-8020E/8020P/8016P
Note:
Align the ADF if required by following the steps
below.
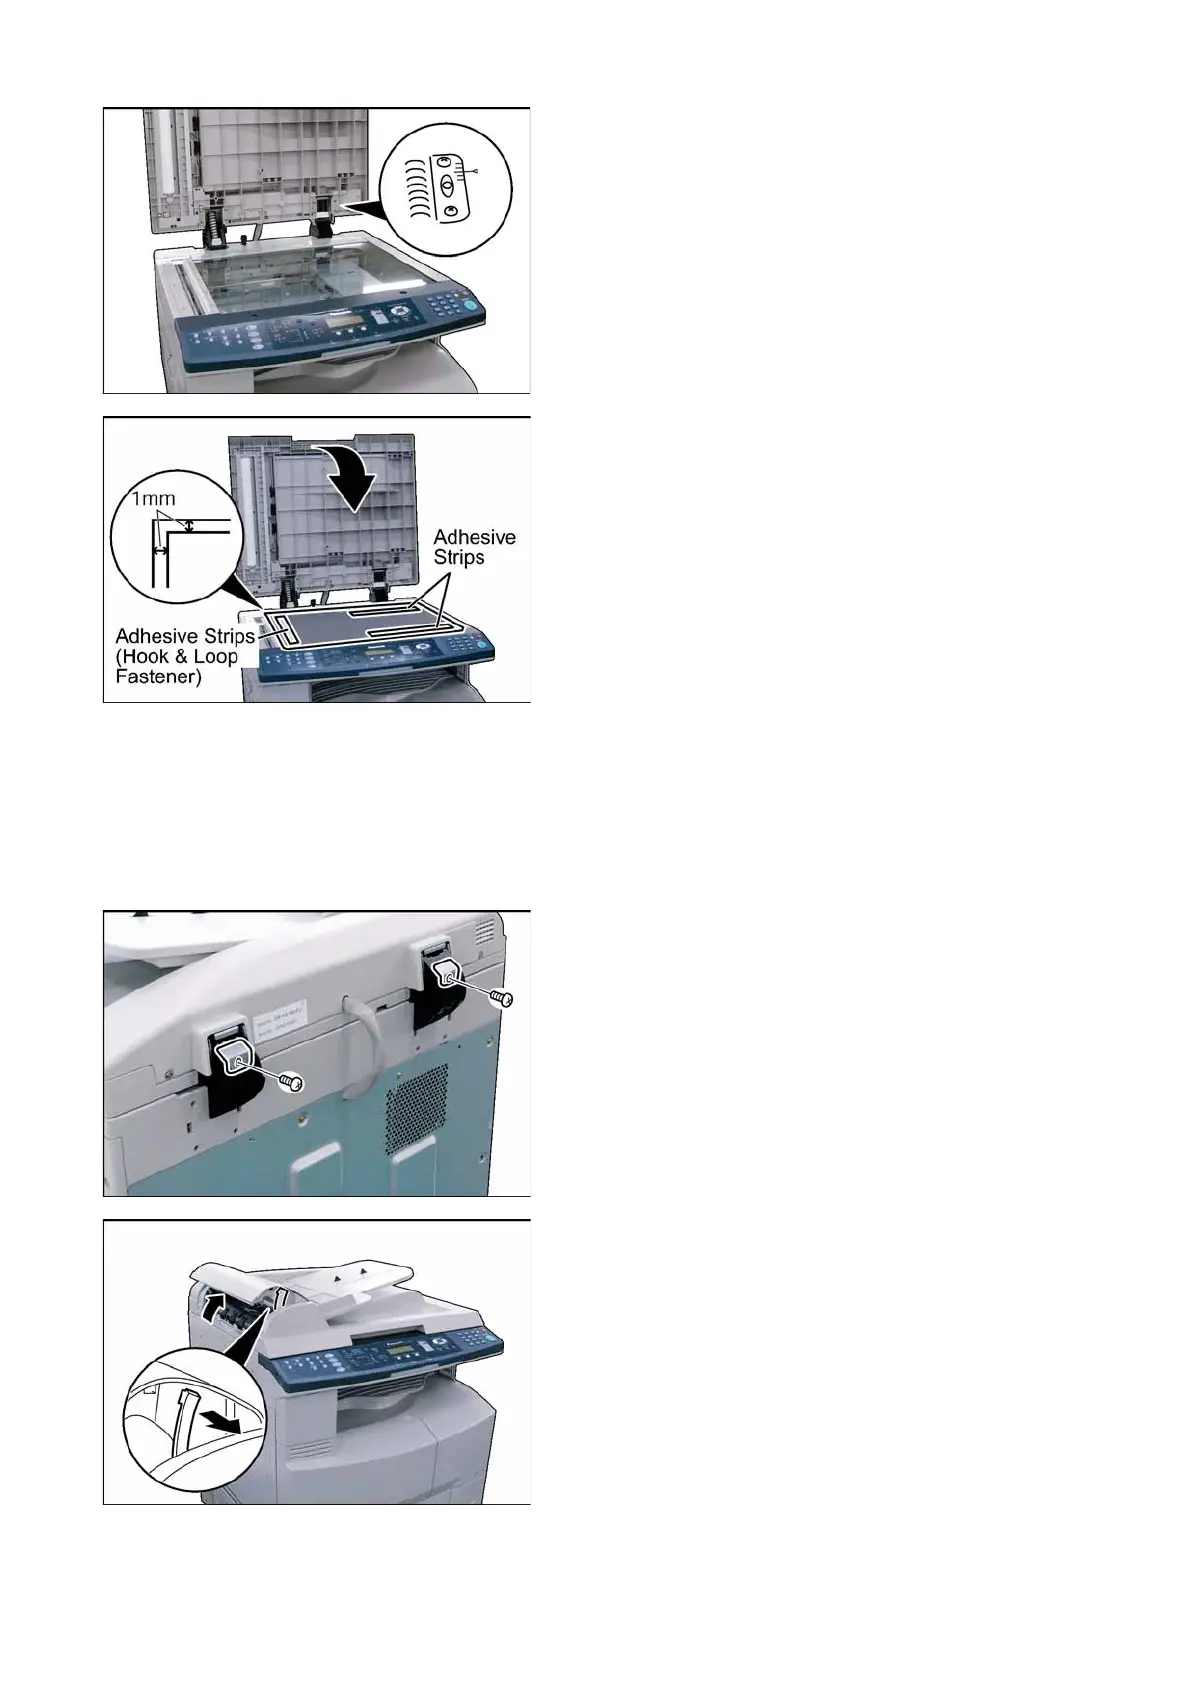
(A) Release 4 Screws.
(B) Adjust the right side of the ADF, and the ADF
Mounting Bracket as illustrated.
(C) Secure the ADF with 4 Screws.
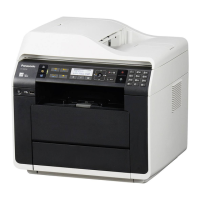
(11) Peel off 2 adhesive strip protectors from the
Scanning Pad.
(12) Place the Scanning Pad on the glass,
aligning with the upper left corner, keeping 1mm
space as illustrated. (Hook and Loop Fastening
Tape positioned to the Left Side of machine)
Note:
Failure to install the Scanning Pad correctly may
cause a Black vertical, horizontal (or both) line(s)
to appear on the copies in the Double Exposure
Copy Mode. Upon completing the ADF installation,
verify that the Double Exposure operation.
(13) Close the ADF.
Note:
Reopen the ADF Unit, and push the Scanning Pad
gently to glue it properly.
(14) Install 2 Angle Plates.
(15) Secure 2 Angle Plates with 2 Screws (M3 x 8).
(16) Plug the AC Power Cord, and turn the Power
Switch on the Right Side of the machine to the
ON position.
(17) Reconnect the Telephone Line Cable if it was
disconnected.
(18) Copy an Original using the ADF.
<Check the alignment of the Original's copy.
If the Copy Image is skewed, adjust the ADF's
alignment as follows>
(19) Open the ADF Cover, and release the Stopper.