Chapter 2 Getting Started — Setting up
ENGLISH - 43
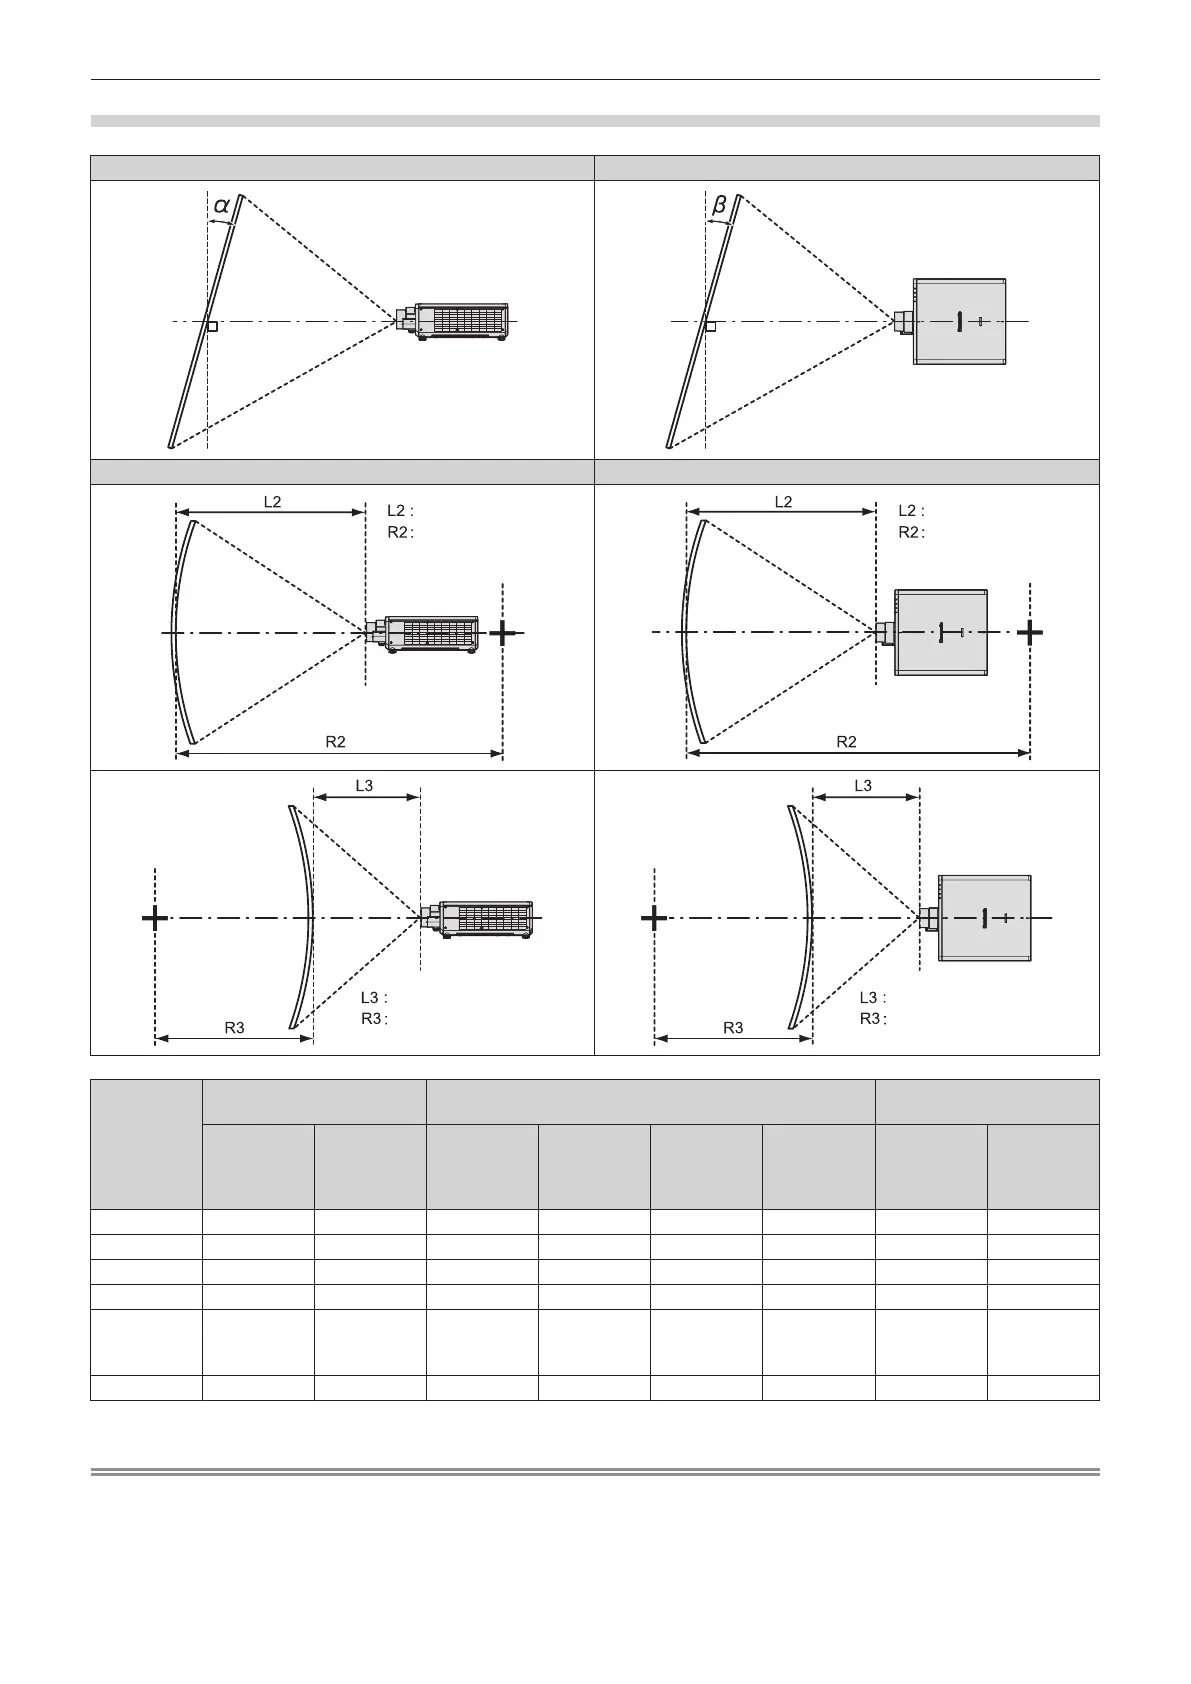
[GEOMETRY] projection range
[VERTICAL KEYSTONE] (viewed from the side) [HORIZONTAL KEYSTONE] (viewed from above)
Vertical arc correction (viewed from the side) Horizontal arc correction (viewed from above)
Projection
lens Model
No.
Only [KEYSTONE] used
*1
[KEYSTONE] and [CURVED CORRECTION] used together
Only [CURVED
CORRECTION] used
Vertical
keystone
correction
angle α (°)
Horizontal
keystone
correction
angle β (°)
Vertical
keystone
correction
angle α (°)
Horizontal
keystone
correction
angle β (°)
Min. value of
R2/L2
Min. value of
R3/L3
Min. value of
R2/L2
Min. value of
R3/L3
ET-C1U100 ±5 ±3 - - - - - -
ET-C1W300 ±10 ±5 - - - - - -
ET-C1W400 ±16 ±10 - - - - - -
ET-C1W500 ±22 ±15 ±8 ±8 1.3 3.3 0.8 1.9
Standard
zoom lens/
ET-C1S600
±40 ±40 ±20 ±15 1.3 3.3 0.8 1.9
ET-C1T700 ±40 ±40 ±20 ±15 0.9 2.0 0.5 1.1
*1 When [VERTICAL KEYSTONE] and [HORIZONTAL KEYSTONE] are used simultaneously, correction cannot be made exceeding total of 55°.
Note
f When [GEOMETRY] is used, the focus of the entire screen may be lost as correction increases.
f Make the curved screen a circular arc shape with one part of a perfect circle removed.
f Adjustment range of the [GEOMETRY] items may not match the listed projection range depending on the projection lens. Use this projector
within the projection range, otherwise the correction may not work.
Screen
Screen
Screen
Projection distance
Arc radius
Screen
Projection distance
Arc radius
Arc center
Screen
Projection distance
Arc radius
Arc center
Screen
Projection distance
Arc radius