Chapter 4 Settings — [NETWORK] menu
224 - ENGLISH
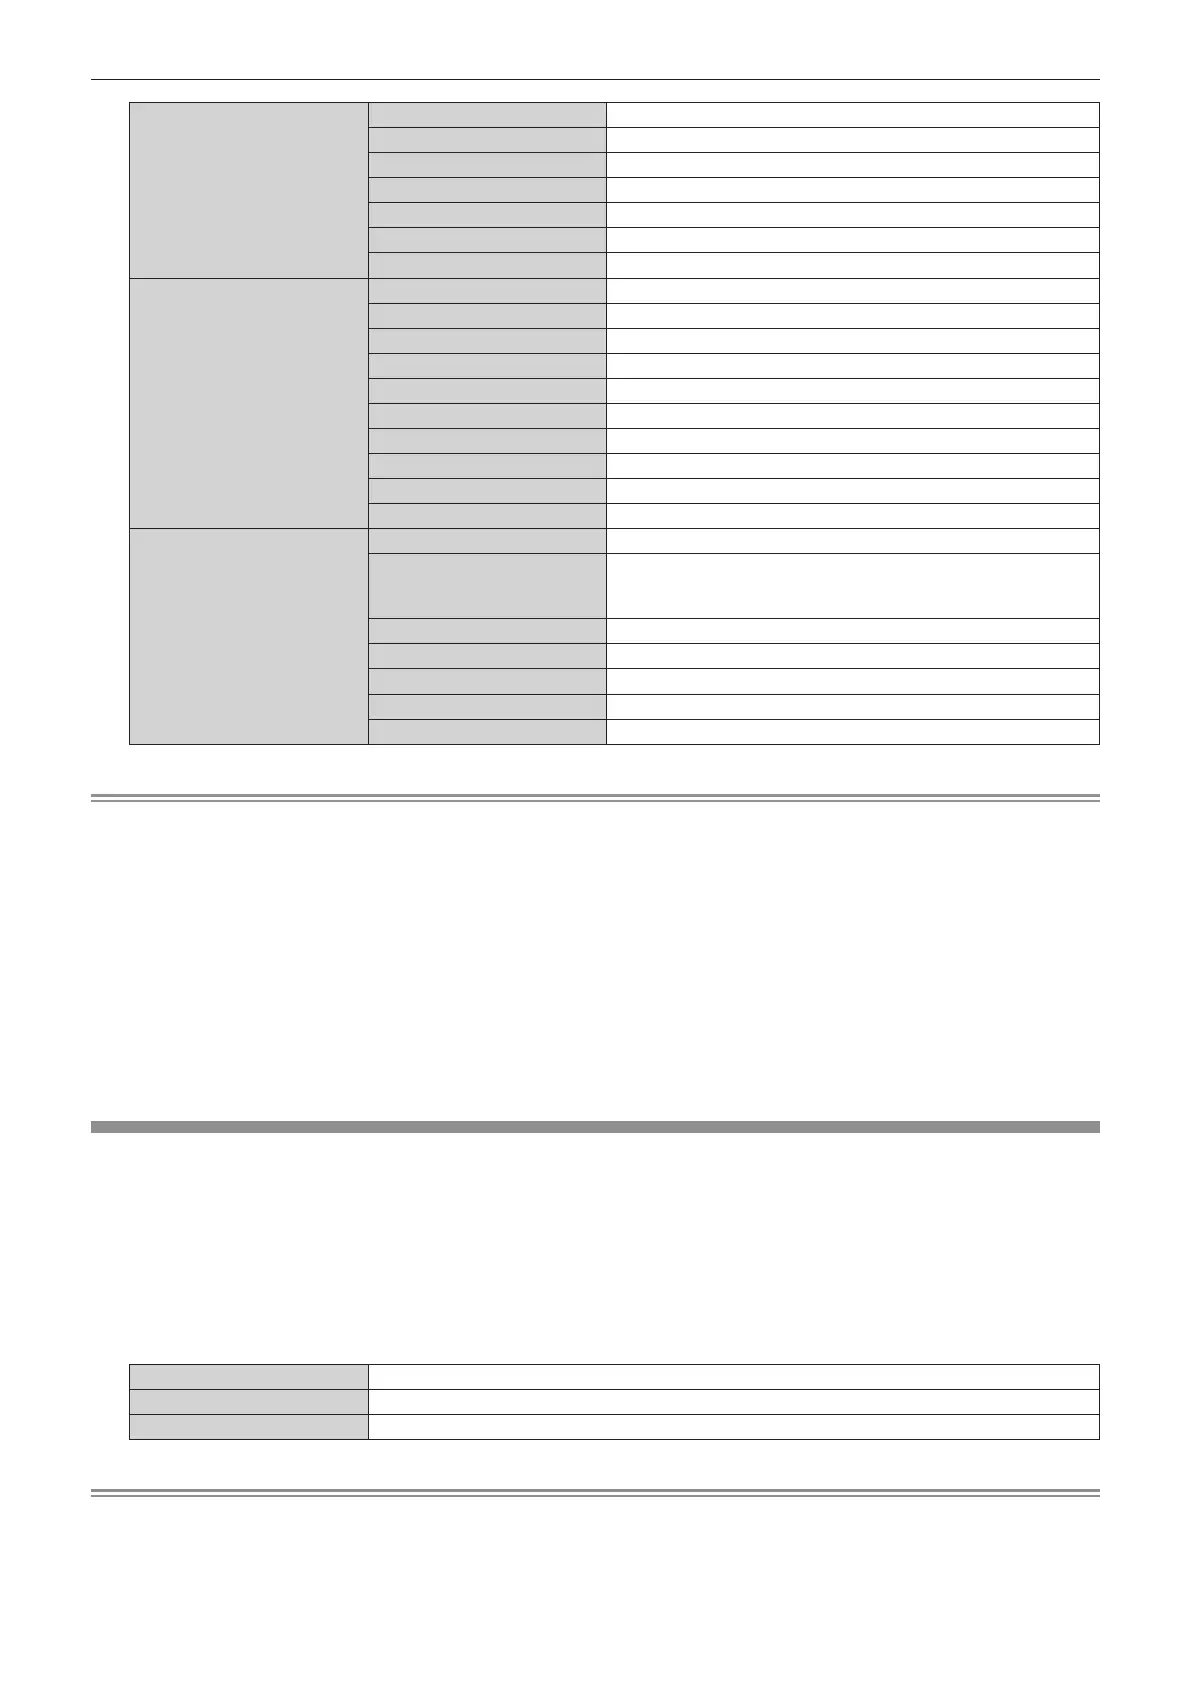
[WIRED LAN(IPv4)]
[DHCP] Displays the [DHCP] setting.
[IP ADDRESS] Displays the [IP ADDRESS].
[SUBNET MASK] Displays the [SUBNET MASK].
[DEFAULT GATEWAY] Displays the [DEFAULT GATEWAY].
[DNS1] Displays the address of the preferred DNS server.
[DNS2] Displays the address of the alternate DNS server.
[MAC ADDRESS] Displays the [MAC ADDRESS] of wired LAN.
[WIRED LAN(IPv6)]
[AUTO CONFIGURATION] Displays the [AUTO CONFIGURATION] setting.
[LINK LOCAL ADDRESS] Displays [LINK LOCAL ADDRESS] and [PREFIX LENGTH].
[STATEFUL ADDRESS] Displays [STATEFUL ADDRESS] and [PREFIX LENGTH].
[STATELESS ADDRESS] Displays [STATELESS ADDRESS] and [PREFIX LENGTH].
[TEMPORARY ADDRESS] Displays [TEMPORARY ADDRESS] and [PREFIX LENGTH].
[IP ADDRESS] Displays [IP ADDRESS] and [PREFIX LENGTH].
[DEFAULT GATEWAY] Displays the [DEFAULT GATEWAY].
[DNS1] Displays the address of the preferred DNS server.
[DNS2] Displays the address of the alternate DNS server.
[MAC ADDRESS] Displays the [MAC ADDRESS] of wired LAN.
[WIRELESS LAN]
[SSID] Displays the string of SSID.
[KEY]
Displays the connection key.
Displays/hides the connection key by pressing the <ENTER>
button.
[AUTHENTICATION] Displays the user authentication method.
[ENCRYPTION] Displays the encryption method.
[IP ADDRESS] Displays the [IP ADDRESS].
[SUBNET MASK] Displays the [SUBNET MASK].
[MAC ADDRESS] Displays the [MAC ADDRESS] of wireless LAN.
Note
f The [STATELESS ADDRESS] screen is displayed by pressing the <ENTER> button while [WIRED LAN(IPv6)] (page 2/5) is displayed, and
details of the stateless address can be conrmed. Furthermore, the screen will be switched to the [TEMPORARY ADDRESS] screen by
pressing qw, and details of the temporary address can be conrmed.
f There are items that are displayed or not displayed in the [WIRED LAN(IPv6)] page, depending on the setting in the [NETWORK] menu →
[WIRED LAN] → [IPv6 SETTINGS] → [AUTO CONFIGURATION].
f The [WIRED LAN(IPv4)] page in the [NETWORK STATUS] screen is not displayed when the [NETWORK] menu → [WIRED LAN] → [IP
VERSION] is set to [IPv6].
f The [WIRED LAN(IPv6)] page in the [NETWORK STATUS] screen is not displayed when the [NETWORK] menu → [WIRED LAN] → [IP
VERSION] is set to [IPv4].
f The [WIRELESS LAN] page in the [NETWORK STATUS] screen is not displayed in following cases.
g When the optional Wireless Module (Model No.: AJ-WM50 Series) is not attached to the <USB> terminal
g When the [NETWORK] menu → [WIRELESS LAN] is set to [DISABLE]
f A QR code, which makes connection setting with a smartphone easier, is displayed in [WIRELESS LAN] (page 4/5). To directly connect a
smartphone to the projector using the QR code, refer to “Using the QR code” (x page 237).
[NFC SETTING]
Set the operation of the NFC function when the application software “Smart Projector Control” which performs the
setting and adjustment of the projector is used.
1) Press as to select [NFC SETTING].
2) Press the <ENTER> button.
f The [NFC SETTING] screen is displayed.
3) Press as to select an item, and press the <ENTER> button.
[READ/WRITE] Select this item when allowing to read and write the projector setting information.
[READ ONLY] Select this item when allowing only to read the projector setting information.
[OFF] Select this item when not allowing to read and write the projector setting information.
Note
f [NFC SETTING] cannot be set when the NFC function of the projector is disabled.
The optional NFC Upgrade Kit (Model No.: ET-NUK10) can be used to enable the NFC function of the projector. Note that there are some
models that have the NFC function enabled from the time of factory shipment, and there are some countries or regions where the NFC
Upgrade Kit cannot be applied.

 Loading...


