Chapter 1 Preparation — About your projector
32 - ENGLISH
About your projector
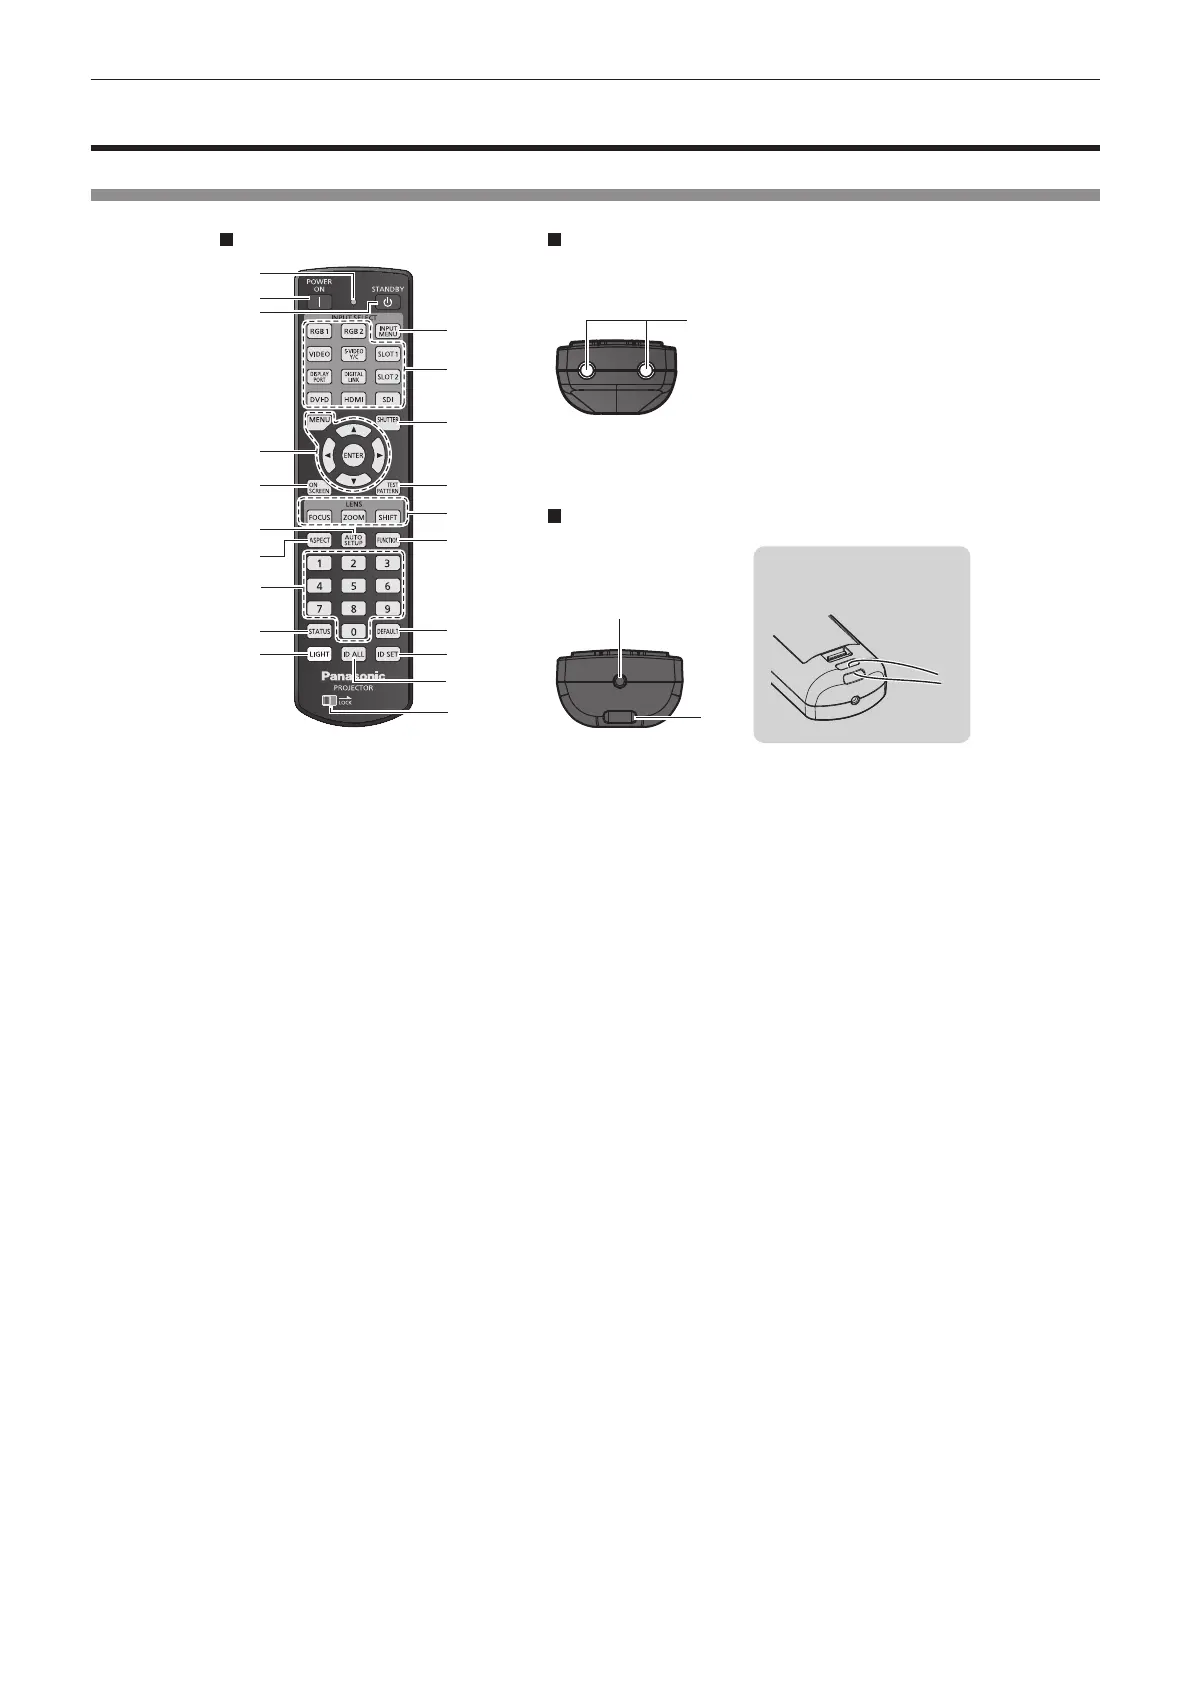
Remote control
1
2
6
4
7
5
8
9
10
3
13
12
11
20
14
15
16
23
17
18
19
21
22
Front Top
Bottom
A strap can be attached
depending on the usage.
1 Remote control indicator
Blinks if any button in the remote control is pressed.
2 <POWER ON> button
Sets the projector to projection mode when the <MAIN
POWER> switch on the projector is set to <ON> and the power
is turned off (standby mode).
3 <STANDBY> button
Sets the projector to the state where the projector is turned
off (standby mode) when the <MAIN POWER> switch on the
projector is set to <ON> and in projection mode.
4 <MENU> button/<ENTER> button/asqw buttons
Used to navigate through the menu screen. (x page 102)
5 <ON SCREEN> button
Switches the on-screen display function on (display) or off
(hide). (x page 97)
6 <AUTO SETUP> button
Not used with this projector.
7 <ASPECT> button
Switches the aspect ratio of the image. (x page 98)
8 Number (<0> - <9>) buttons
Used for entering an ID number or a password in a multiple
projector environment.
9 <STATUS> button
Displays the projector information.
10 <LIGHT> button
Pressing this button lights up the remote control buttons. The
lights will go off when the remote control operation goes idle for
10 seconds.
11 <INPUT MENU> button
Displays the input selection screen. (x page 85)
12 Input selection buttons (<HDMI>, <DISPLAYPORT>, <SDI>,
<DIGITAL LINK>, <SLOT 1>)
Switches the input signal to project. (x page 84)
<SDI> button, <DIGITAL LINK> button, and <SLOT 1> button
can be used when the optional Function Board equipped with
corresponding input is installed in the slot on the projector.
Following buttons are not used with this projector.
<RGB1> button, <RGB2> button, <VIDEO> button, <S-VIDEO
Y/C> button, <DVI-D> button, <SLOT 2> button
13 <SHUTTER> button
Used to temporarily turn off the image. (x page 97)
14 <TEST PATTERN> button
Displays the test pattern. (x page 98)
15 Lens buttons (<FOCUS>, <ZOOM>, <SHIFT>)
Adjusts the focus, zoom, and lens shift. (x page 86)
16 <FUNCTION> button
Assigns a frequently used operation as a shortcut button.
(x page 98)
When the <FUNCTION> button is held down, the [FUNCTION
BUTTON] screen is displayed. (x page 200)
17 <DEFAULT> button
Resets the setting of the displayed sub-menu to the factory
default. (x page 103)
18 <ID SET> button
Sets the ID number of the remote control in a multiple projector
environment. (x page 39)
19 <ID ALL> button
Used to simultaneously control all the projectors with a
single remote control in a multiple projector environment.
(x page 39)
20 <LOCK> button
Used to prevent unintended operation by careless pressing of
the buttons and prevent draining the remote control batteries.
Operation of each button on the remote control is disabled by
sliding the <LOCK> button toward the arrow.
21 Remote control signal transmitter
22 Remote control wired terminal
This is a terminal used to connect to the projector via a cable
when the remote control is used as a wired remote control.
(x page 40)
23 Strap hole

 Loading...


