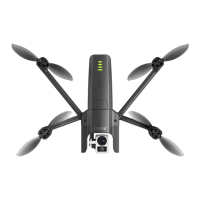
Note: By activating advanced RTH features, if you select return to Pilot or Custom position, the drone
might not be able to reach its destination in case of low battery. Parrot will not be held responsible in
case the drone lands in a different location.
End behavior and Hovering height
Parrot recommends ending RTH sequences by hovering (default value) as it enables the pilot to control
the end of the flight. However, for missions at sea, Parrot recommends you modify the hovering
altitude over 2m (default value). Up to 2m, at the end of the RTH, the drone will compute its height
over the ground, with its ultrasonic sensor. Above 2m, it will compute its height over its take-off point,
with its barometer.
For example, if the drone takes off from the deck of a ship, 40m above the sea level, with a hovering
altitude set at 2m, at the end of the RTH, the drone will look for the ground and could stop 2m above
the surface of the sea.
If it takes off with a hovering altitude set at 3m, it will stop 43m (40 + 3) above the surface of the sea.
Tap RESET ALL SAFETY PREFERENCES to reset Safety preferences to the default values.
Camera
Camera preferences allow you to select camera options, both in photo and video modes.
Correct horizon and Cameras alignment
Only resort to the Correct horizon and the Cameras alignment procedures if you notice your videos
and photos are systematically tilted on the same side or if your visible and thermal cameras are
misaligned. Refer to the “Camera Calibration” section of this guide for the detailed procedure.
Overexposure display
When this setting is activated, the HUD of FreeFlight 6 USA shows all overexposed areas of the screen
as hatched, which enables you to fine-tune your framing, your EV settings, or both.
Anti-flickering
This setting and the associated technology aim to eliminate the flicker effect which can arise due to
some artificial lights. The AUTO option works for most users, but depending on your country, you can
try other settings if you feel bothered by a flicker effect on your device’s screen, your artificial light
videos, or both.
Tap RESET ALL CAMERA PREFERENCES AND SETTINGS to reset Camera preferences to the default
values.