52
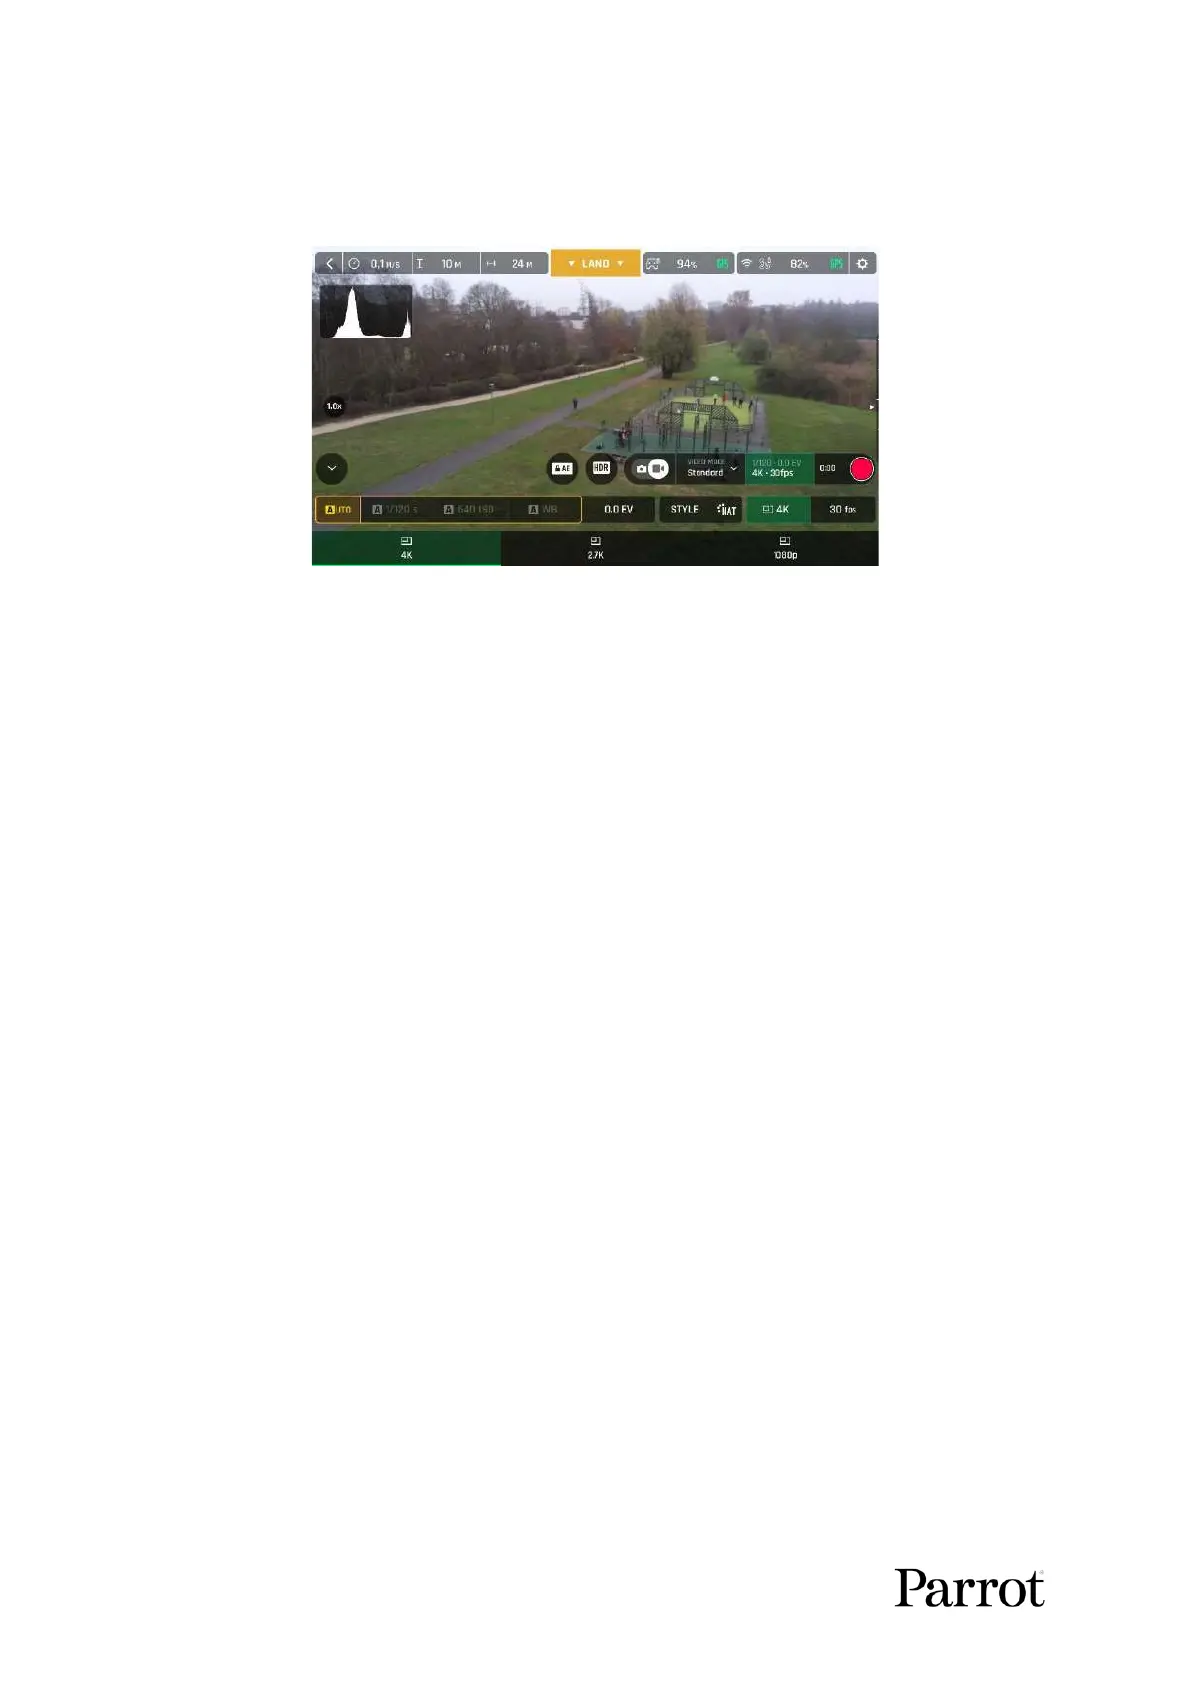
In the following screen shot, Standard video mode is activated. Available video resolutions are 4K
(UHD), 2.7K and 1080p (FHD), either in 24, 25 or 30fps, which you would find out by tapping 30 fps on
the bottom right of the screen.
iOS Standard video format menu
When you are happy with your settings and your framing, press the hard shutter button on the right
of Skycontroller (or tap the soft shutter button of the HUD) to start filming.
The soft shutter button of the HUD animates and displays a cycle between a red square and red circle.
The timer starts running.
Press the hard shutter button of the controller (or tap the soft shutter button of the HUD) again to end
the recording. The soft shutter button of the HUD comes back to steady red and round. The timer
resets.
Taking photos
To access the photo camera of ANAFI USA, tap the photo/video toggle in the middle of the bottom
bar of the HUD, to circle the photo camera (left icon) in white.
Seven photo modes are available on ANAFI USA: Single shot, Burst, Bracketing, Timelapse, GPS
Lapse, and Panorama (5 formats).
ANAFI U SA produces three main picture formats:
- rectilinear JPEG (up to 16MP);
- wide 21MP JPEG and DNG (Digital NeGative: Adobe open standard RAW format)
- composite panoramas (JPEG), up to 32MP
Main photography options are accessible from the HUD of FreeFlight 6 USA.
First, select a photo mode by tapping the corresponding box of the HUD.
The options appear on your device. Tap a photo mode to select it and tap the photo mode box again
to confirm your choice.
When the Single mode is selected, the soft shutter button of the HUD appears as a full white circle.
When the Burst mode is selected, the soft shutter button of the HUD displays the Burst icon inside a
white circle.
Selecting the Bracketing mode opens three options: 3 photos (-1 EV, +0.0 EV, +1 EV), 5 photos (-2 EV