© 2023 Parrot Drones SAS. All Rights Reserved.
Change the direction of the ANAFI USA’s camera by pressing and holding on the white arrow. Rotate
the arrow to the desired camera direction.
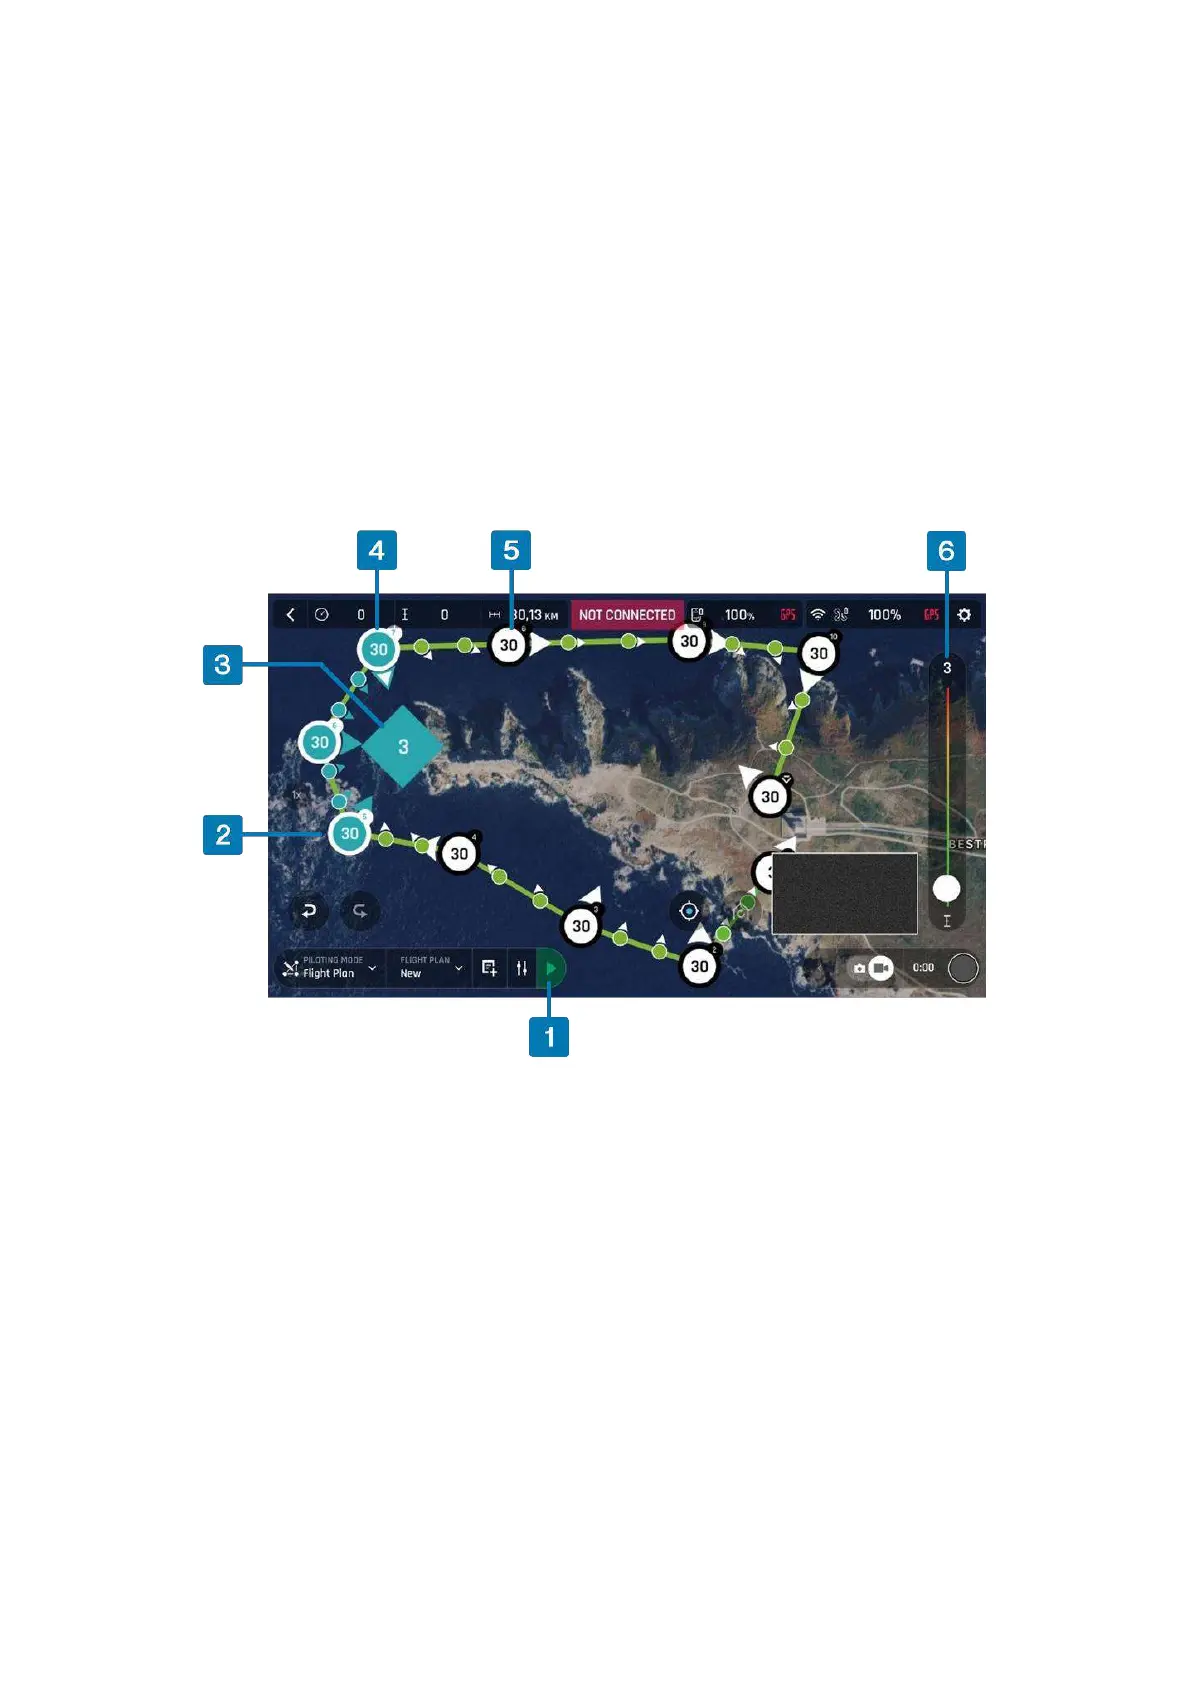
Tap the map to create more waypoints. The distance between the current waypoint and the previous
waypoint appears on the flight path.
Tap the distance between the waypoints to change the figure from waypoint distance to drone speed
between those 2 waypoints. Use the slider to increase or decrease the speed.
To change the height of an individual waypoint, tap the desired waypoint. Drag the slider on the right
of the screen to modify the altitude. In the example above, ANAFI USA climbs from 3 meters at the
initial waypoint to 30 meters for the following waypoints.
To create a Point of Interest, press and hold on the screen. A menu opens with 2 options: Point of
interest / Close.
1. Start Flight Plan button
4. Final waypoint linked to a POI (indicated
by a white arrow with blue border)
2. Waypoint linked to POI
3. Currently selected Point of interest
(POI)
Tap Point of interest to add the POI. The POI appears as a blue square diamond. The white figure in
the center represents the POI altitude. Drag the slider on the right of the screen to modify the altitude.
Note: If you want a more precise method to define the drone speed between waypoints, waypoint
altitude, or POI altitude instead of using the slider, press and hold on the relevant figure. A menu bar
appears. To modify the drone speed, tap Speed. To modify the waypoint or POI height, tap Altitude. A
window opens where you can enter the desired value.
When you select a POI, all waypoints turn white to indicate that you can now link the waypoints to the
POI.
Tap a waypoint to link it to the POI.