This document is the property of PPedm Corp. and contains proprietary and/or patented information and may not be reproduced in
part or in whole without the express written permission of the company. Perfect Point logo, Perfect Point
TM
and E-Drill
®
are
trademarks of PPedm, Corp. US and worldwide patents pending.
CAUTION
Failure to replace worn electrode guides will have an adverse effect on the ability of the
E-Drill to accurately locate the center of the fastener being cut. Failure to replace worn
Electrode guides may cause damage to surrounding airframe if not properly maintained.
2.4
Removal of Button-Head Fasteners:
The first step before carrying out any operation with E-Drill is to select the correct
fastener in either the Part Number or Visual Selector libraries (as described in the
previous sections). Once the correct fastener has been selected on the Touch-Screen
Display, the Home Screen will indicate the electrode size to use. Configure the E-Drill
hand tool with the correct electrode, button-head adapter (see section 5.4), and
electrode guide (see previous section). Select the correct Button Head Locator which
fits tightly around the fastener head to be removed. For tight-access fastener
situations the Button-head adapter and locator may be one piece (Slimline style). After
the heads of the fasteners are de-painted (if necessary), the operator may proceed
with the cutting process. Refer to Appendix 2 for further explanation on adapter
selection.
A)
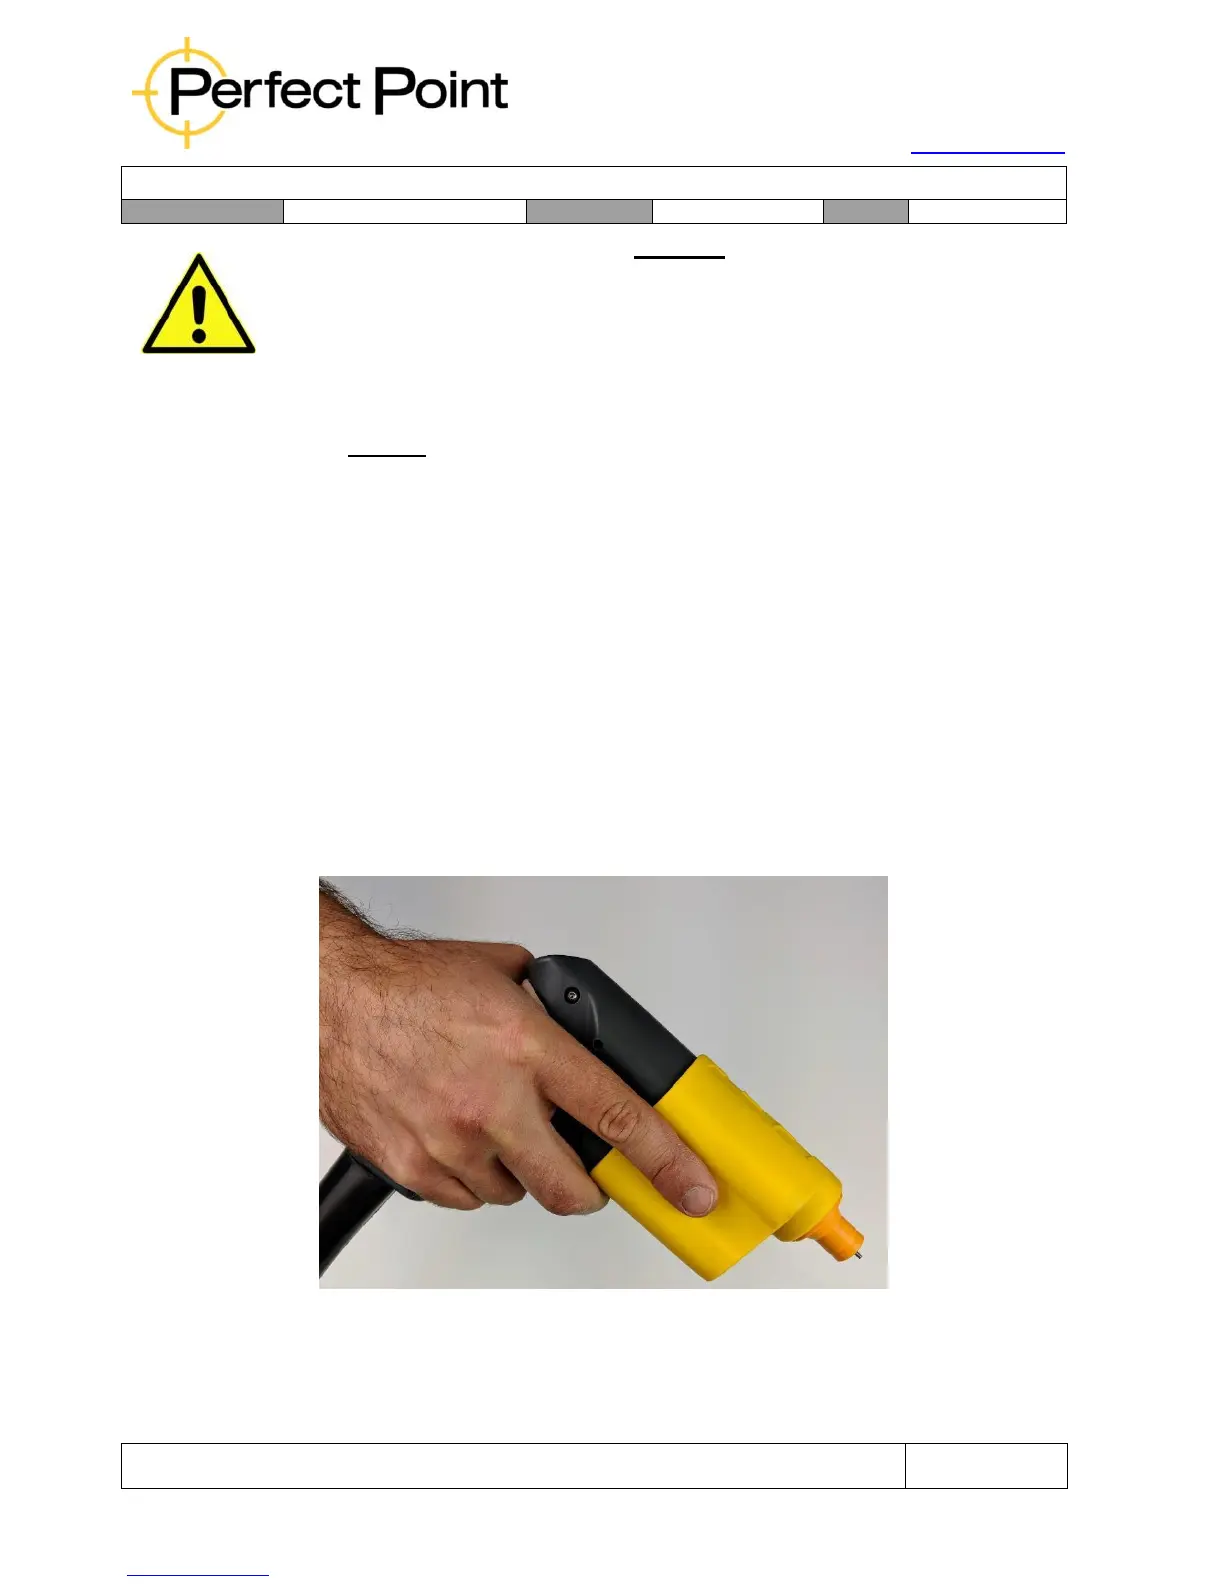
If using an EG hand tool, ensure the EG ground clamp is attached to the
airframe and the hand tool. Grip the E-Drill lightly, nestling the tool between
thumb and forefinger as shown below. Position your second finger to depress
the trigger when ready.
Correct Grip of E-Drill
B)
Place the selected Button-head Locator over the fastener and press down to
ensure it is secure, flat to the surface and forms a good water seal. The