EasyManuals Logo

Pitco SSH Series User Manual

Pitco SSH Series
94 pages
To Next Page IconTo Next Page
To Previous Page IconTo Previous Page
Page #35 background imageLoading...
Page #35 background image
PitcoSolsticeandSolsticeSupremeHighEfficiencyGasFryers
SG/SSHSeriesServiceManual 35
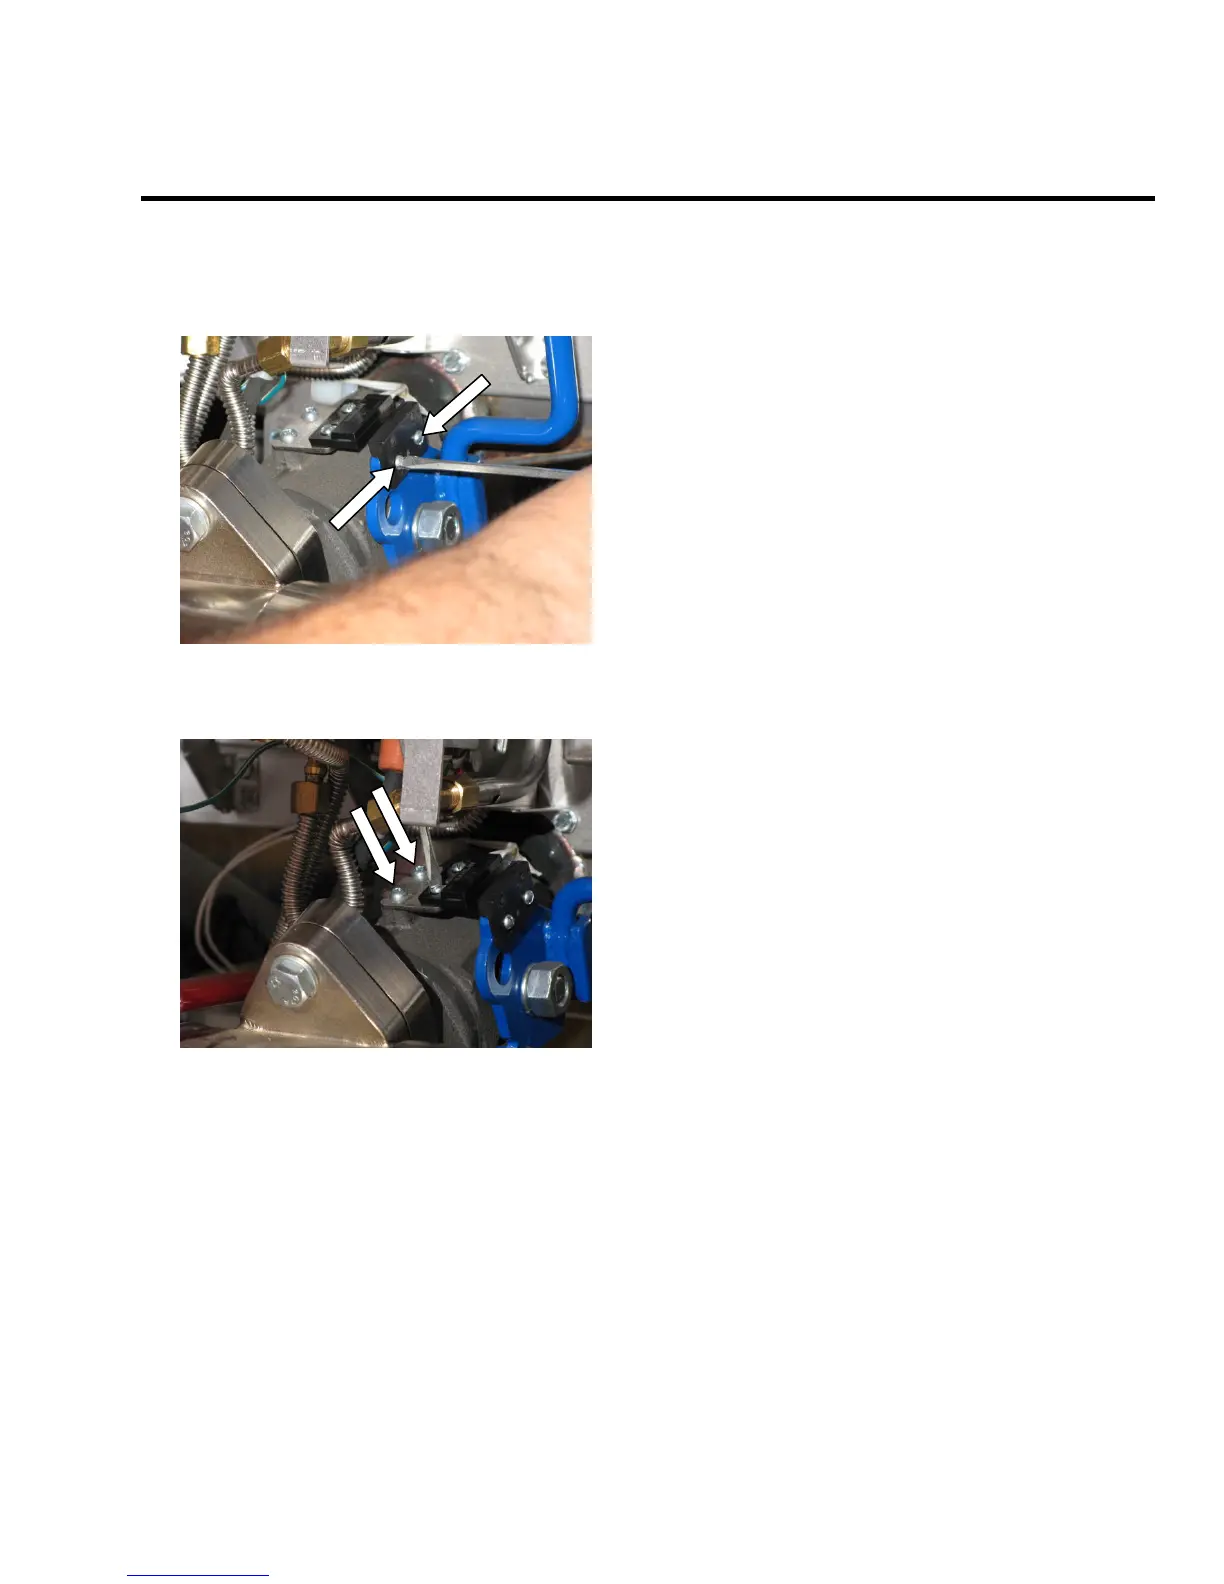
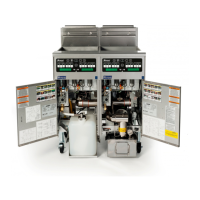
ReplacingtheDVISwitch
1. Remove the two (2) screws, which hold the
proximity sensor on the drain handle, using a
flathead screwdriver.
2. Remove the two (2) screws, which hold the
actuator, using a flathead screwdriver.
3. Replace the DVI switch ensuring a 1/4 inch gap
between the actuator and the magnet.
4. Follow steps 1 through 3 in reverse to reinstall a
new DVI.

Table of Contents

Questions and Answers:

Question and Answer IconNeed help?

Do you have a question about the Pitco SSH Series and is the answer not in the manual?

Pitco SSH Series Specifications

General IconGeneral
BrandPitco
ModelSSH Series
CategoryFryer
LanguageEnglish

Related product manuals